
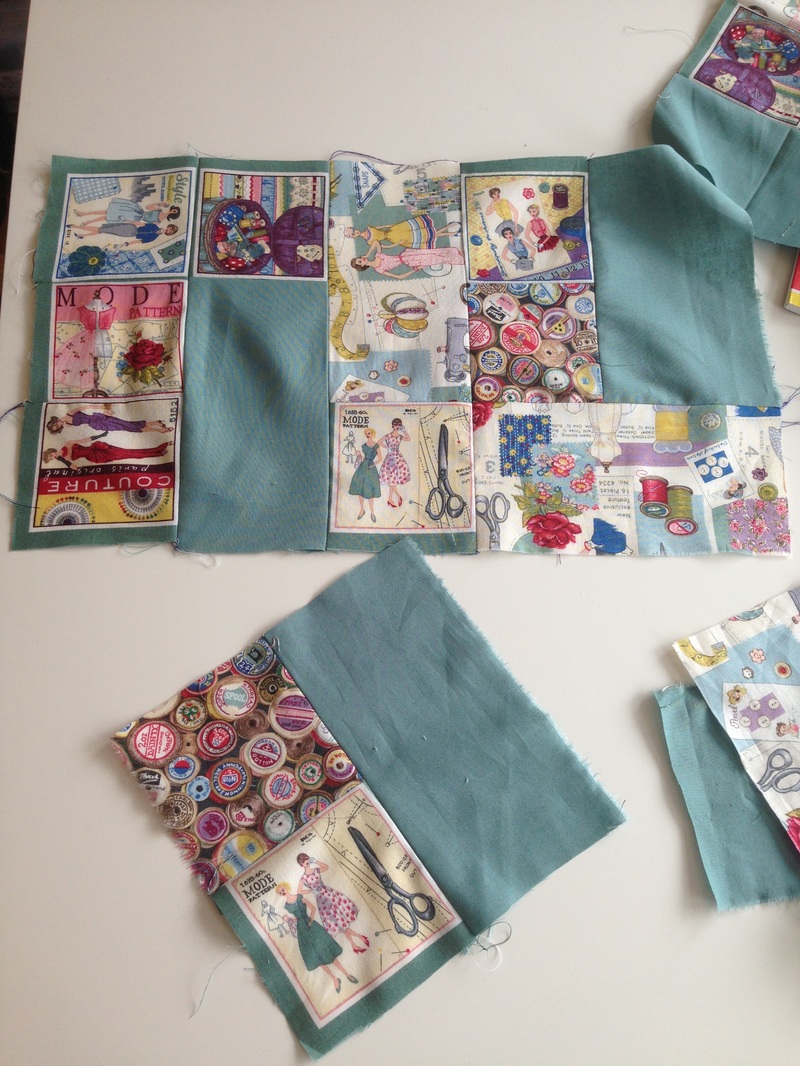
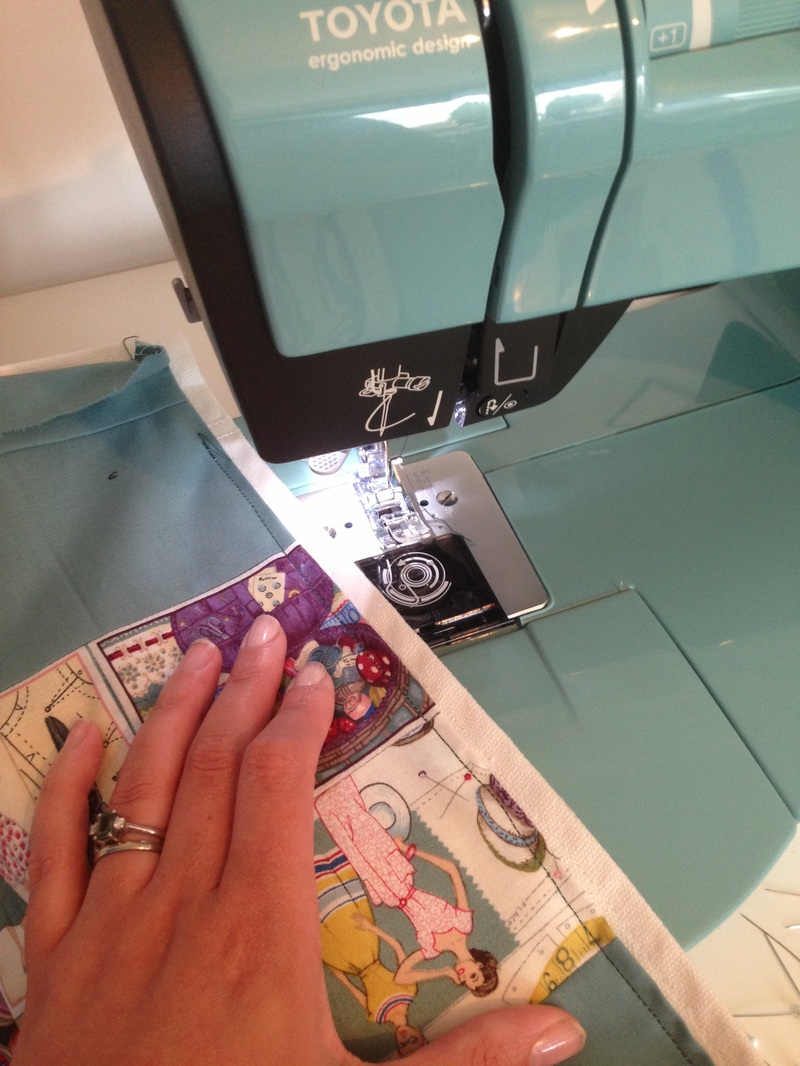
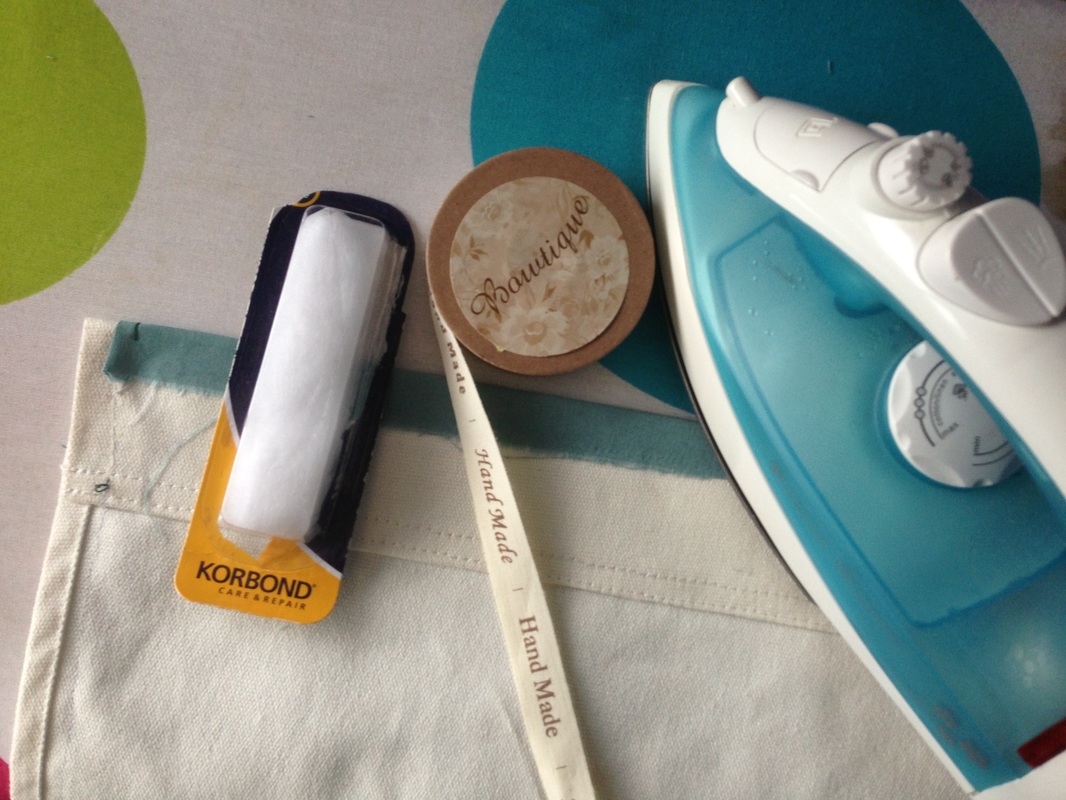
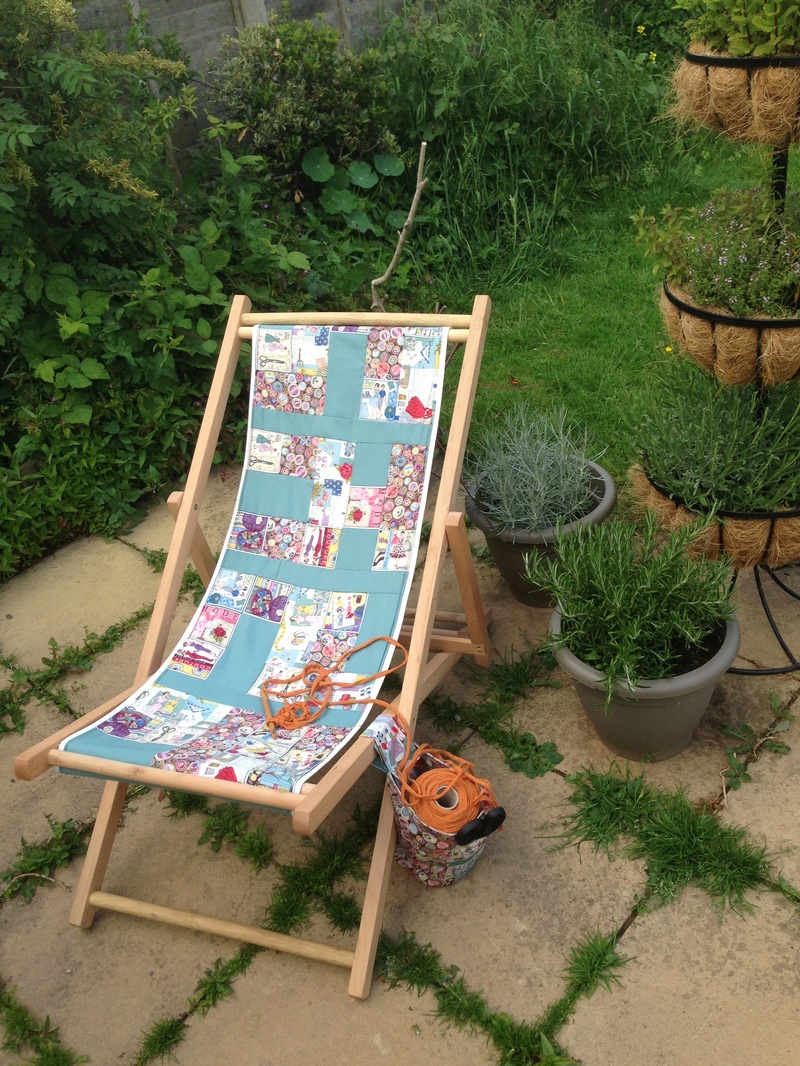
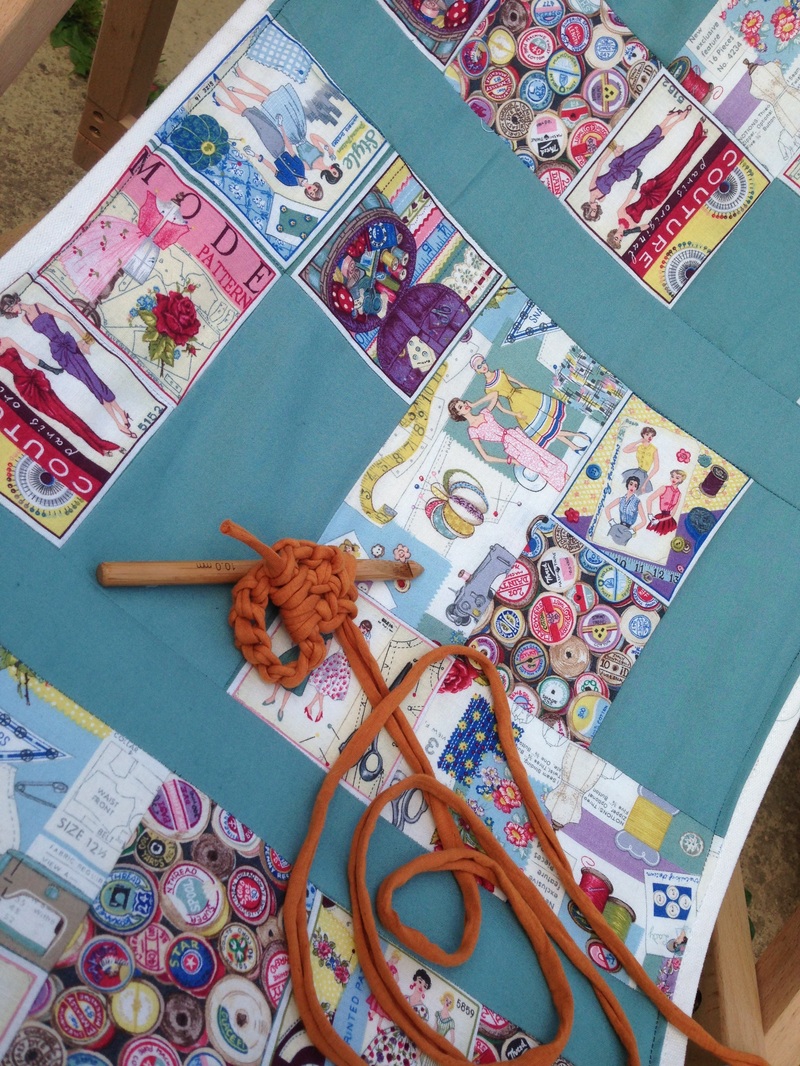
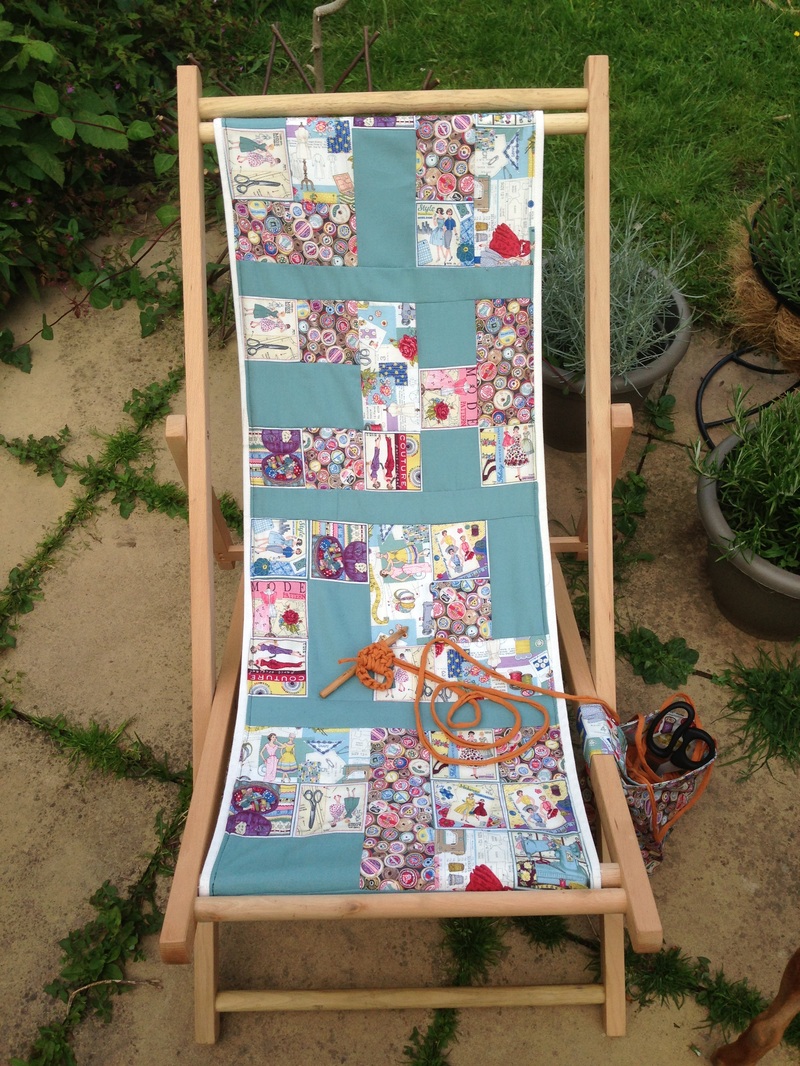
#Sewingrevolution upcycling Summer Challenge.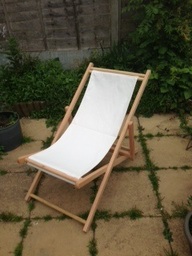 Deck chair waiting for it's #sewingrevolution make over. Deck chair waiting for it's #sewingrevolution make over. Never one to shy away from a sewing challenge, I was approached with an unusual propsal. Oceanfinance.co.uk have tracked down twenty creative bloggers and challenged them all to upcycle a plain deckchair. Armed with a Hobbycraft voucher and deckchair, I accepted this exclusive challenge and headed to Wolverhampton Hobbycraft for some inspiration. I knew that I wanted to theme my project around my love of sewing and craft. I wanted it to be a practical as well as a really funky chair and with the weather starting to brighten up, I wanted to be able to craft outside while grabbing a tan of course! With these aims in mind and the help of the lovely staff, we got to work. I think I spent about 2 hours in there looking at everything craft related. In the end I decided to go with four 1/4 meters of some awesome sewing related fabric which I was going to patch work for my seat. The fabric had a great retro feel to it with old sewing labels, patterns and images. There was also a cracking cotton reel fabric which I coupled with a lovely plain minty teal fabric.  The lovely staff at Hobbycraft! The lovely staff at Hobbycraft! While on my expedition I came across these large bundles of yarn, which was actually strands of t-shift fabric rather than wool. This was perfect! An opportunity to learn a new craft while sitting on my 'to be upcycled' deck chair. So I decided to apportion a little of my strict budget on two yarns of Boodles in orange and yellow along with a 10mm Bamboodle crochet hook. I'm already thinking of the clothes I can cut up to make yarn for future upcycling projects, but I better learn how to crochet first. One challenge at a time Jenni! After a quick picture with the lovely staff, Rachael, Jac, Melanie and Andy ( who was taking the picture) and feeling dead proud that I had stayed within budget, I was ready to get started. 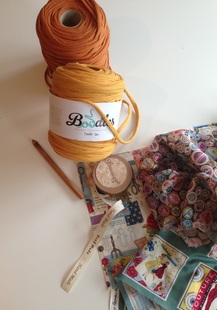 Back at #sewingrevolution HQ, I decided that I wanted to make a little bucket pouch that could be connected to the side of the chair. This would be the practical element that I wanted to include. Something to keep my scissors, wool, threads, material, bottle of wine and snacks that sort of thing while I craft away in the sun. With my next challenge waiting, I wanted to make sure my pouch would be big enough to hold one of the Boodles yarn, which is about 14 inches in circumference. So before started to cut up my fabric to make strips for the patch work. I cut out two large rectangles of the vintage sewing and reel fabric along with some of the vintage sewing label fabric for a front pocket. For my bucket pouch I need enough fabric to wrap around my yarn to create a tube, a circular base and strap - twice; as I wanted to also line my pouch. This was about 25 by 10 inches for the lining and again for the main fabric. You can obviously make yours as small or as large as you like. It's a really simple construction as it is the same pouch, made twice and then inserted inside each other, wrong sides together. Then finished with a top stitch on the edge. So I could attach my bucket pouch to my deck chair, I've added a strap and Prym Snap fasteners to secure it around the leg of the chair. I added the strap before sewing the two pouches together. I also wanted a little detail on the front so I added a pocket. A little something to keep your scissors or knitting needles out the way. 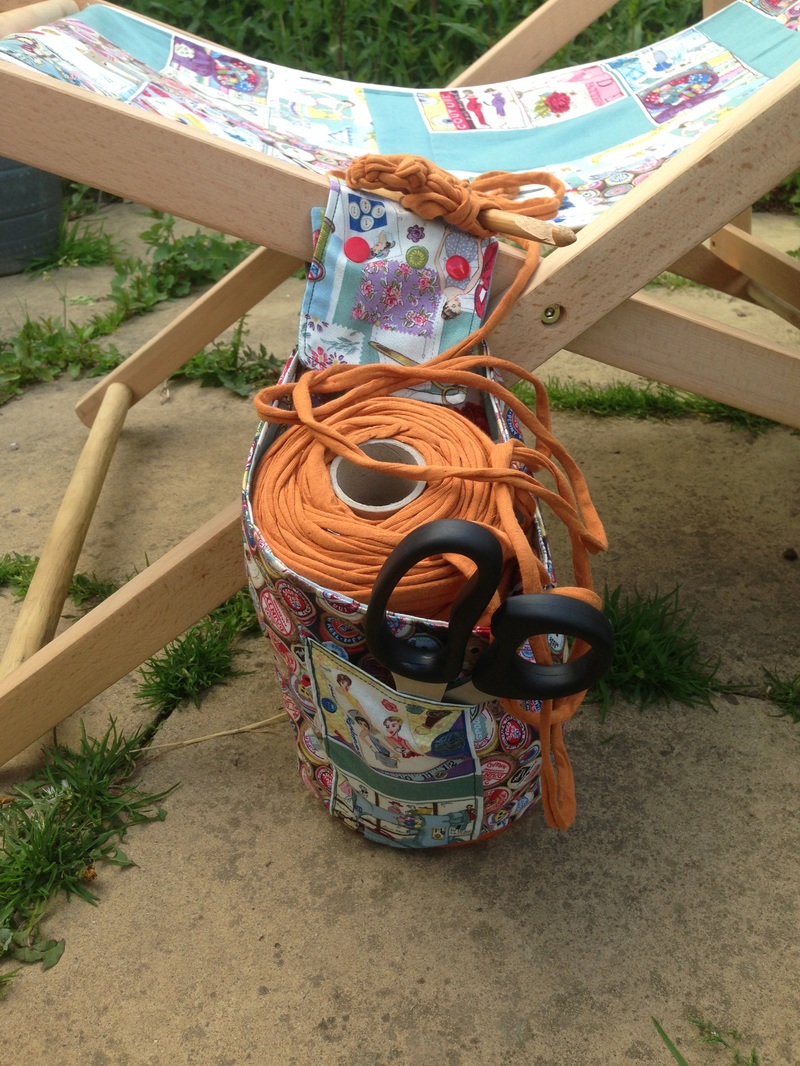 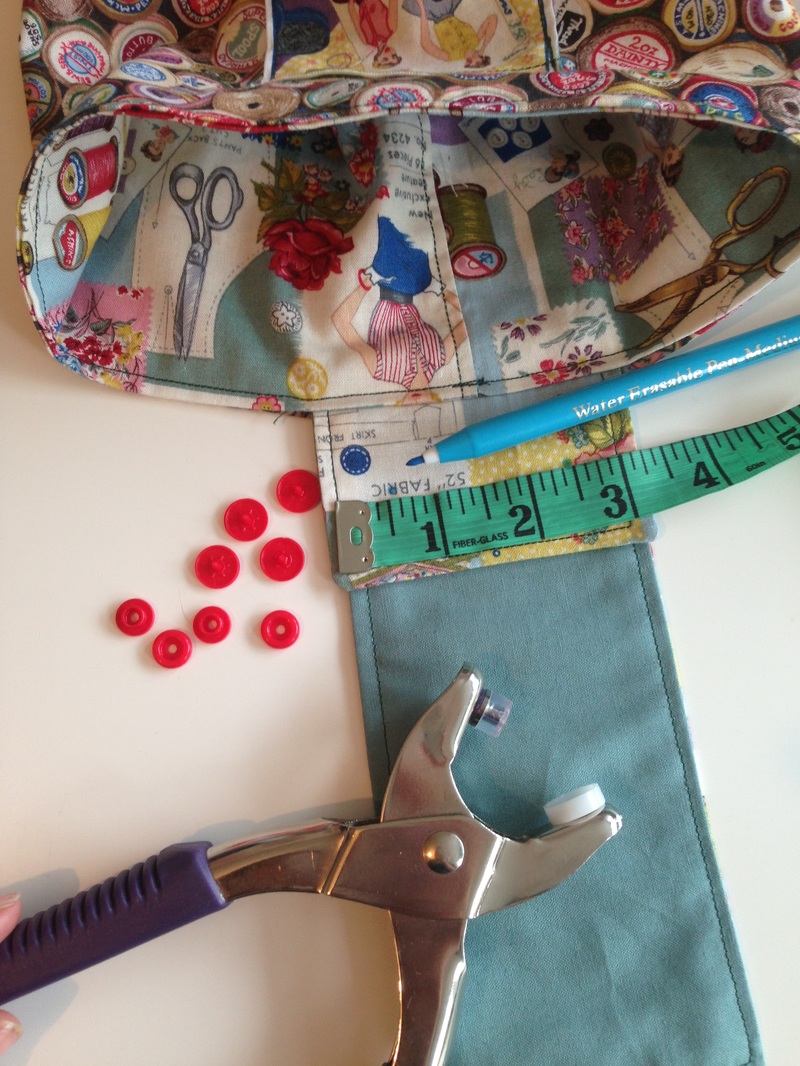 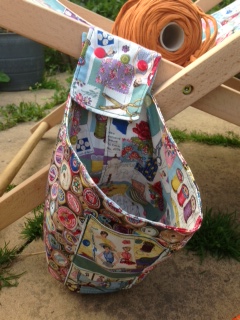 With my bucket pouch complete, I then took the remaining material and cut into long strips. Making sure that the width of the strips were all the same size so it makes it a lot easier to patch with. I wanted to go for a shabby chic look so I decided to use a combination of squares and rectangles to create my new deckchair seat. As I only had four difference styles of fabric, I tried to make sure that the same style was not stitched together, but I wasn't to bothered if it did; it all adds to the shabby chic look. Using the original seat cover to measure how big I needed my patch to be, I continued to piece together until it was big enough to cover it. Rather than completely replace the seat, I used the old white seat cover as a backing to my patch. Not only did this add strength to my seat but also covered up all my seams on the back of the patch work. After giving the patch work a good press and creating a small single hem on all the sides, the patch was ready to be pinned to the original seat cover. I secured it with a visible top stitch and used a white thread for the bobbin, so you couldn't see the stitches on the other side. I had to finish the top and bottom ends with a little hemming tape and hand sewing as I didn't want to sew the channels shut as that is where the wooden poles go into to secure the seat in place. I wanted to make a feature of this, so I added a printed cotton ribbon which said 'handmade'. Too Cute! 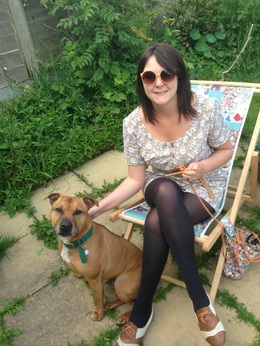 Waiting for the sun! Waiting for the sun! With my new seat cover and bucket pouch in place; my #sewingrevolution deck chair upcycle challenge is complete and I'm ready to start my next new challenge!
Crochet! Just waiting for the sun to make an appearance first. Thank you to Oceanfinance.co.uk for this awesome upcycling challenge. I hope you like it everyone! Why not have a go yourself and use your left over fabric scraps to freshen up those old deckchairs in the shed! Even make a bucket pouch too! If you need help - check out #sewingrevolution Events for a sewing clinic workshop near you! Remember 'Creativity is Contagious - Pass it on!' so don't forget to share pictures of your makes on my facebook or twitter pages using the #sewingrevolution hashtag!
5 Comments
|
#sewingrevolution newsWhatever I'm doing Categories
All
|
 RSS Feed
Sewing Revolution |
Tailor Taylor |
|