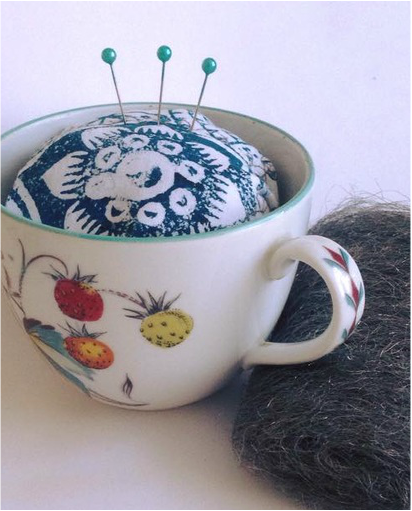
 Are you ready for the final instalment of strawberry fair #sewingrevolution #tricksandtips combo? Well here it is! Instead of filling your homemade pin cushions with toy stuffing, fill with wire wool instead! This ensures your pins and needles stay extra sharp! And it's too cute! Tune in next week for more #tricksandtips
1 Comment
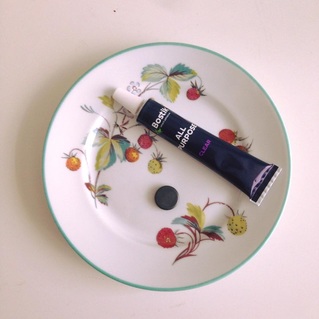 Well it's time for #sewingrevolution #tricksandtips ! This week here is a super quick idea to keep your sewing table tidy while at your sewing machine. Glue a few magnets to the bottom of a plate or in my case a saucer, so that when you are throwing your pins down as you go, the magnets on the plate make sure they stay on the plate rather than all over the floor! #boom ! Tune in next week for what I'm going to do with the matching cup. 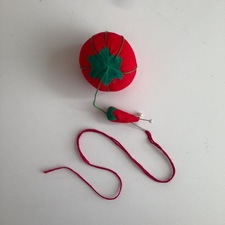 This weeks #sewingrevolution #tricksandtips Did you know that the little chilli attached to your Korbond tomato pin cushion is actually an emery pincushion? Which helps to keep your pins and needles sharp! I just thought it was something cute! #learnsomethingneweveryday Sew Fabulous!As you may have noticed I'm back on Telly co-presenting my own show on Create & Craft TV called #sewingrevolution.
Where I hope to inspire you to make #upcycled garments and accessories LIVE on Air! If you have not been able to tune in, head over the Create & Craft TV's Sew Fabulous page where Chinelo and I demonstrate tips and project ideas to get you started! learn how to: MAKE A WALLET MAKE A TABLET COVER MAKE A RUFFLE SHIRT Catch my next live #sewingrevolution show on the 6th Feb 2015, where I will be transforming a shirt! Sky 674 / Freeview 36 / Virgin 748 / Freesat 813  Need a little help to get you started, before you attempt your own D.I.Y projects? Come and join me and my #sewingrevolution workshops! Currently held throughout the West Midlands area, Check out Tailor Taylor events for dates near you! My mission, to get you sewing and to not be afraid to show it off! My workshops are mainly designed to give you more confidence in your craft through the art of #upcycling. From Beginners to Hard Core Sewer, I hope to inspire you by using old clothes, bed sheets, table clothes. To be honest nothing is safe! ANYTHING you were thinking of throwing out - DON'T we can make something from it! If you are interested in attending a workshop or would like me to come to you and hold a workshop at your venue? Please contact me through the website or email: [email protected] #sewingrevolution's Jenniffer Taylor.The wonderful Confessions of a Fabric Magpie who never fails to inspire me with the most beautiful fabrics, decided to contact me to find out what inspired me to pick up that needle and thread, start the #sewingrevolution and encourage others to start sewing.
Check out our interview and don't forget to follow her amazing page! 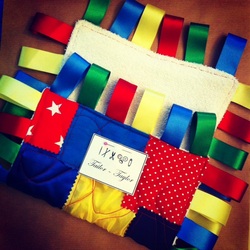 A fantastic baby shower gift! Can be made as big or as small as you like! remember babies love colour and texture - GO WILD! A Great upcycle/recycle project If you have lots of scrap material from other projects! You will need: scraps of fabric, ribbon, wadding (polyester more suited to regular washing and will not shrink, but cotton will also be fine), flannel/facecloth, coloured thread. Equipment: scissors, needle, pins, sewing machine will be quicker but hand sewing will also be great. 1, Taking your scraps of fabric, arrange them as you desire, ensuring that the scraps overlap each other and pin in place. If using a facecloth for the back, you may want to use this to gauge the size of your tag blanket. if using something bigger then just make it to the size you like, as we can trim the flannel and wadding to size later. 2, If using a sewing machine, stitch the pieces together slowly ensuring all overlapping fabric and caught. If hand sewing, I would suggest a small back stitch- please see the link for help. http://m.wikihow.com/Backstitch its a strong and durable stitch which will be required as it is a baby item! 3. Now you have decided your right side (the side you will see), you will need to thread the lose ends to the wrong side (the side you wont see) using the needle. If hand stitching you may have already done this. If using a sewing machine, I like to knot the lose ends together to make it more secure. 4. Place you patchwork on top of the wadding and cut to size. You may need to trim your flannel as well. Place your wadding on the wrong side for your patch work and pin in place. 5. Now for the fun part. If using your sewing machine, you can use any stitch like straight or Zig Zag to create a quilted design on your tag blanket. I have gone for a wiggly straight stitch, firstly going from top to bottom then from left to right. creating a grid like pattern. this will secure your wadding to your patchwork, just make sure you have covered the whole of your patchwork. If hand sewing use the same principle described above, again back stitch will be perfect, but feel free to experiment, as long as the stitch lengths are not far apart on the right side. You don't want to get any little fingers under the stitches! 6.Now for the ribbon, my ribbon lengths are about 4 inches long then folded in half. Pin you cut ribbon edges to the edge of your quilt, make sure you are placing your ribbons on the right side of your quilt. You could have ribbon on all four sides or just two opposite sides! 7. Before we stitch, check you are happy with the spacing of you ribbons, make adjustments where required. 8. Now slowly stitch your ribbons to your quilt. I'm using the machine foot as a guide to ensure I have a straight line. please be care full of your pins , I have put them in the wrong way round, so it did take me longer to do this step! if you have your pins , with the point facing the left not the right, it will be easier to remove when sewing with your machine. If hand stitching you will not have this issue, using the sturdy back stitch, complete the same step. 9. Place you quilt the right side down on to your flannel, making sure all your ribbons are flat and not poking out. Pin in place, and then stitch three of the sides. we need one side open to turn it the right side out. Like a pillow case. 10.turn your quilt the right side out. You will see it starting to take real shape. Nearly at the finish! Take your open side and make sure you ribbons are poking out so you can see them. Fold your flannel inside to create a hem. Pin in place. 11.As you can see from the picture, I have put the pins in a more manageable way this time! Take your time to stitch this opening, closed. Continue to go round the other three sides. This will give you a more secure and crisp edge. This is known as top Stitching. I went over the opening side again, using the first stitch line as a guide, to ensure that the ribbons and opening are secure. You guessed it, Back stitch you way around this step if you are not using a machine. 12. Taking your needle, make sure any threads are back threaded into the quilt and lose threads trimmed. This make your item very tidy and professional! and your DONE!!! I would suggest looking through the photo's first as this may help you to visualise the above steps. Hope you have enjoyed this D.I.Y project! I would love to see your finished items!! so please comment with pics! Interviewed By The Sewing Directory and The Challenge! Fabulous Fiona from the Sewing Directory contacted me to do an interview but also put my upcycling skills to the test by challenging me to a How to project using Argos products.
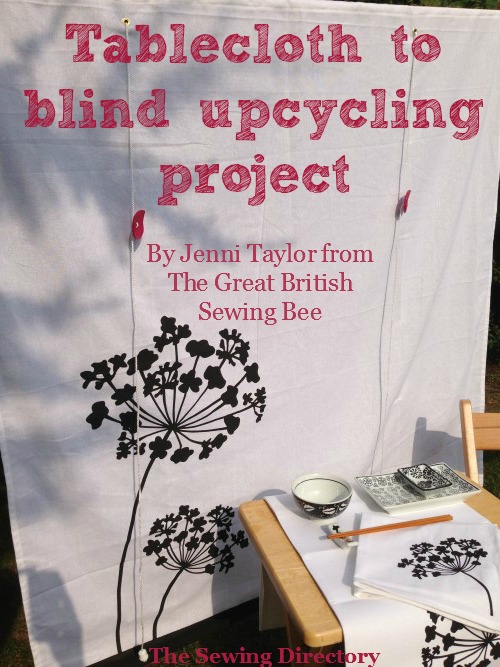
After visiting my local Argos store, I came across this Table Cloth set. As the set come with a table cloth and a table runner I thought i would use the Table Cloth material to make a matching blind. If you would like to know how I did this head over to The Sewing Directory where you will find the Blind Project and My Interview and a lot more! |
Projects & Tutorials.A little something to get you started. Categories
All
|
Sewing Revolution |
Tailor Taylor |
|

 RSS Feed