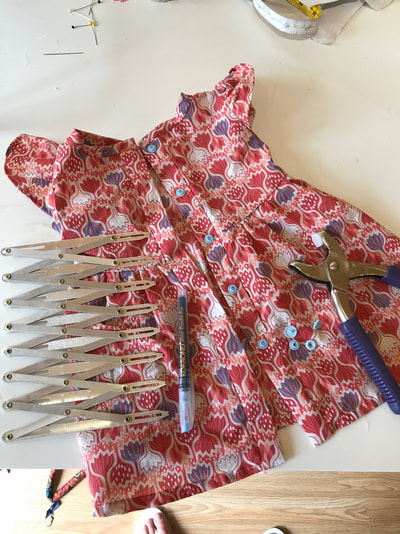
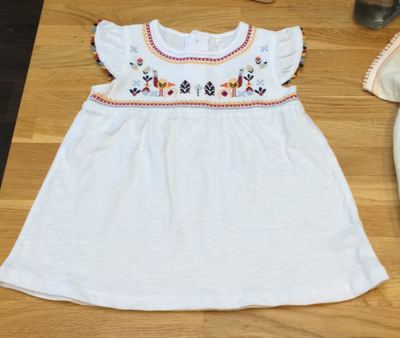
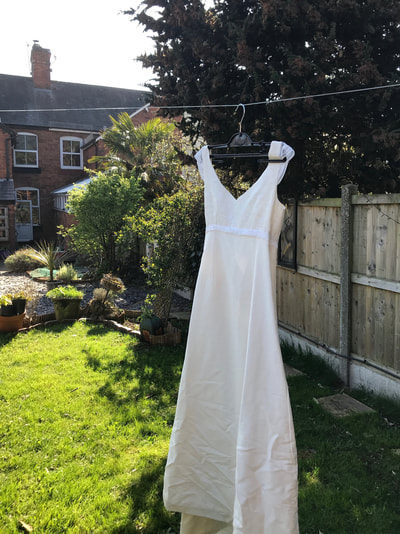
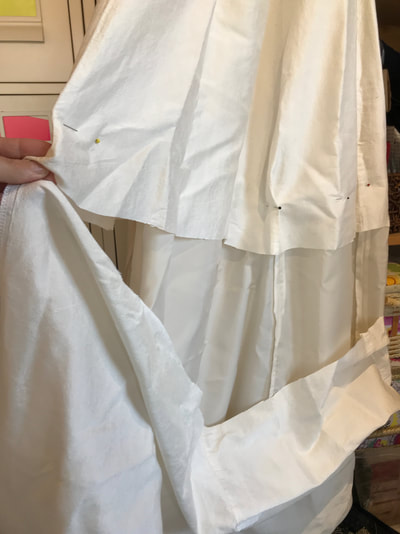
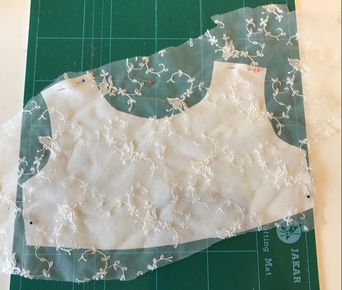
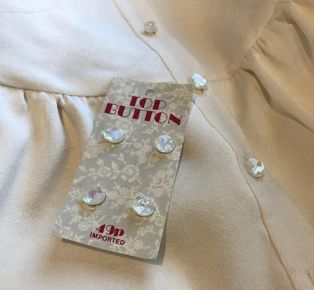
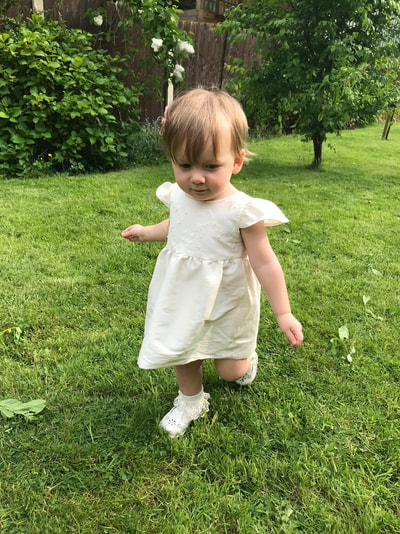
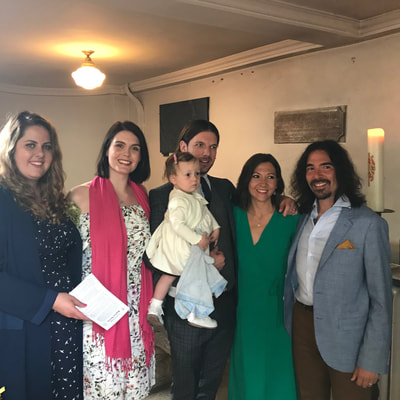
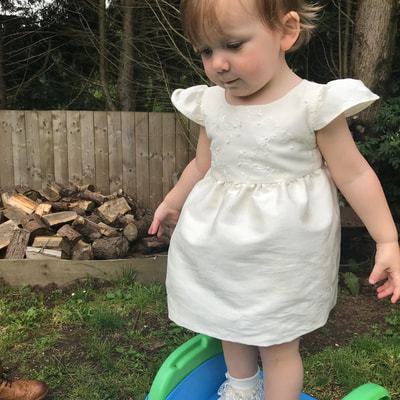
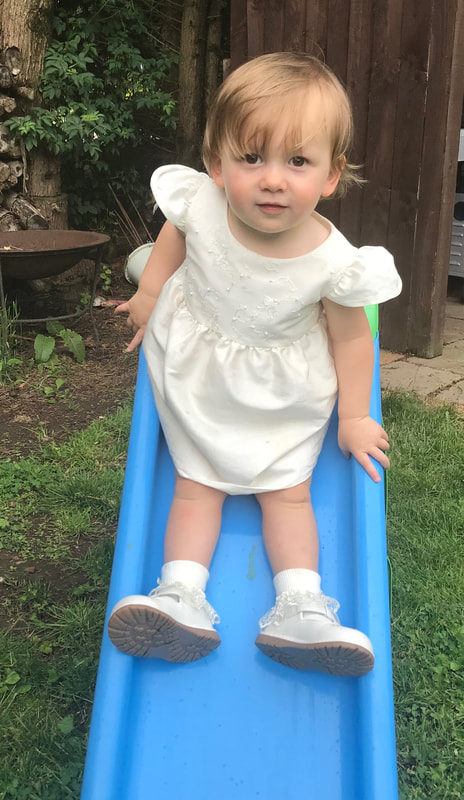
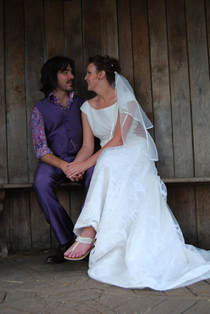
Emmy-Lou's Christening dress - Stitching Memories. 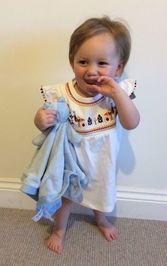 As I mentioned in Part 1 of Wedding dress refashion blog post, the past couple of months have been quiet an emotional sew! Starting with the 'Gathering Memories' project to raise money for the Alzheimer's Society which you can read more about here. But this post is about the challenge set by my sister in law, Gemma Beryln - to make my niece, Emmy-lou, her christening dress. Which at first I was totally fine with; however the challenge was to make it out of her wedding dress. Now this wedding dress is very special as this was a Hand-Made wedding dress which her mother in law, Ineke Berlyn had made for her. If you have had chance to read part one, you will know that Ineke was the person who set me on my sewing journey by showing me how to make my own wedding dress. She is a huge inspiration to myself as well as Gemma who has also been inspired by Ineke's printing and textile art. What made this project hard is that sadly, Ineke is no longer with us. She lost her fight to cancer in 2017 and has left quite a hole in our family. Try as we do to make sure she is still with us in what ways we can. So for me, to essentially cut up what Ineke had beautifully made for Gemma, was the most terrify thing. More terrifying than appearing on the Great British Sewing Bee Studio on the first day! Before cutting into the precious dress, making a toile was essential! I didn't use a pattern as Gemma wanted the gown to be a copy of a dress she already had that fitted her perfectly. I was so pleased with the toile! It's so cute and I didn't realise until after that the fabric has flowers resembling tulips on it, Ineke's favourite flower! I felt like it was a sign that she was approving. Which really helped as the next step was to cut up the wedding dress! luckily I was able to keep the upper part of the dress in tacked, so that Gemma still had a 'dress' left to cherish. I placed my pattern pieces onto the off cut, trying to avoid areas that had become marked from the evenings dancing and luckily there was just enough left over lace to cover the front bodice. PHEW! I also used the lining from the wedding dress to create clean finishing around the neckline and arm holes, where as on the toile, I bound them with bias binding. I also bagged out the skirt, so that it created a little volume in the dress. It didn't take long to sew up as it was such a small garment. I'm so used to adult sizes it seemed to sew up in no time at all, but it was a little tricky at times because of the arm holes being so small! They wouldn't fit around the arm of the machine. Again, I'm so glad I made a toile first as I was able to practise before hand. I took my time over the hand finishing details. I stitched sea beads left over from my wedding dress onto the lace and also hand finished the button plackets on the back of the dress. I didn't want to spoil the finish by top stitching them closed with the sewing machine. To finish off the dress, I added some vintage mother of pearl buttons that I'd been keeping in my stash. When I sent the finished dress pictures to Gemma, we both became emotional and was crying as we texted each other back and forth. I just hoped that Emmy-lou didn't have a massive growth spurt between now and the big day and that I had done Ineke proud. I felt that with Ineke no longer with us, I was somehow responsible for passing on this tradition of making special clothes for our children/ family members. Ineke had made both Gemma's and Liske's (Ineke's daughter) wedding dresses, and I know if she was here then she would have made Emmy-lou's christening dress. So I'm very honoured to do this for my beautiful niece, Gemma and Ineke. I like to think that Ineke and I made the dress together somehow; through two stitched garment, our hands have become one and we made it together just in time for the special day. Everything was perfect on the day! Gorgeous sunshine and fabulous home cooked curry at Little heath Barn Studio - Piet's family home as well as Ineke and Liske's studio where they hold printing workshop surrounded by her beautiful textile art. There was tears, laughter, wine, music and great company.
One thing though -trying to photograph a toddler is impossible, especially when all they want to do is play on the slide!! lol Have you made a special garment for yourself or a family member? Have you refashioned your wedding dress to make a christening gown? I'd love to see your creations so please send me pictures via my Facebook page Tailor - Taylor or don't forget to use the hashtag #sewingrevolution ! Also Emmy-lou's Christening dress has been featured in my editorial for June's addition of Craft Business . Where I was posed a question - The royals - A class of their own or fashion trendsetters? With Royal weddings and new royal baby arrivals in the press, are we being influenced by the royal's wardrobe - I wonder what your thought are?
36 Comments
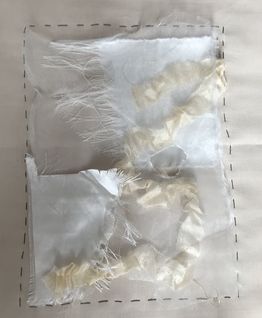
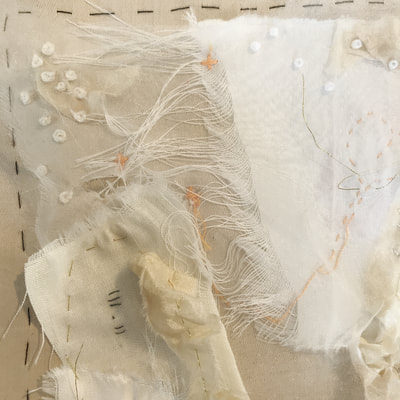
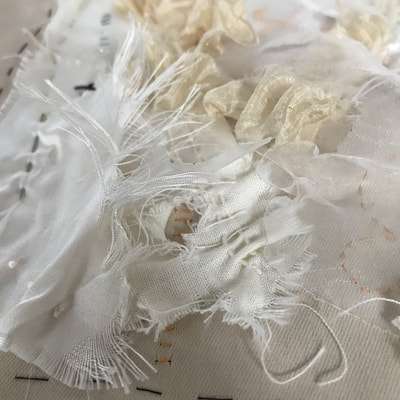
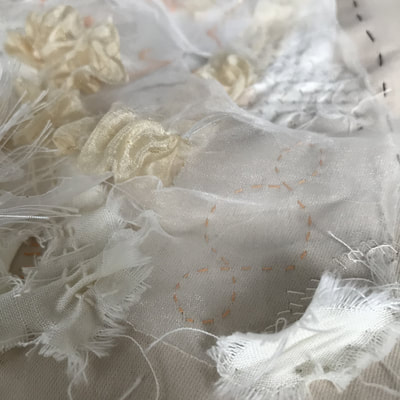
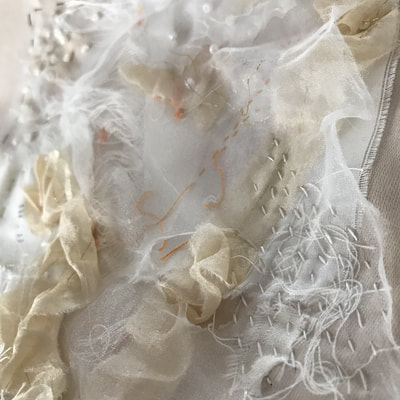
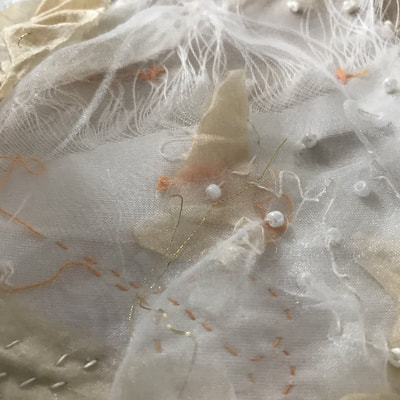
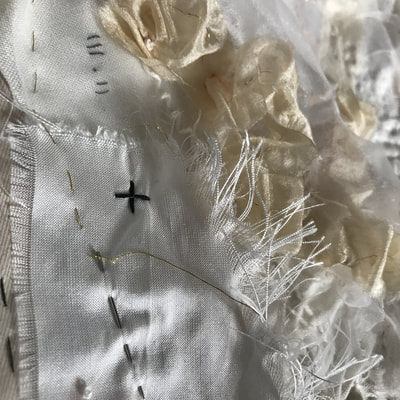
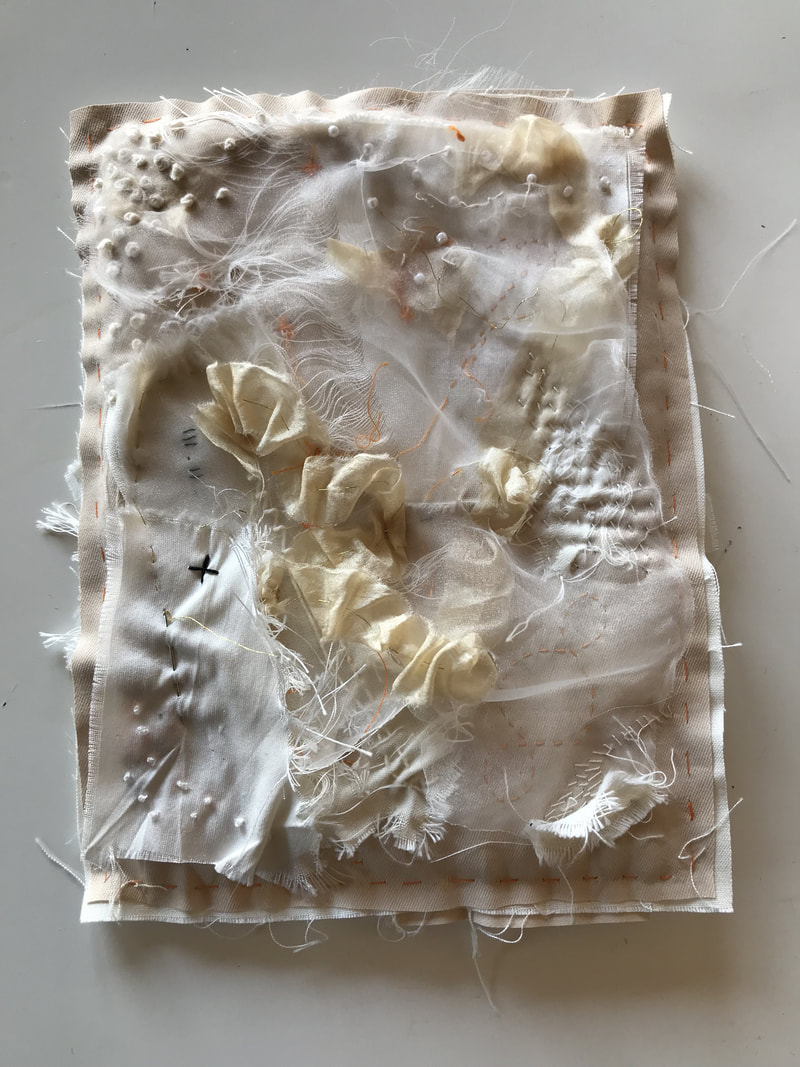
Gathering Memories project in aid of Alzheimer's Society - 'SEWN TOGETHER'The past couple of months have been quiet an emotional sew! The reason for this is that I've had two projects that have been very personal and have evoked wonderful and emotional memories, both that have included refashioning or upcycling of wedding dresses. The first project was for a charity project called 'Gathering Memories', which is a community project which aims to raise funds for the Alzheimer’s Society. I purchases the kit from Elizabeth, who was exhibiting part of the project in the booth next to me at sewing event. This is such a wonderful cause (my great uncle had not long passed away, who had also sadly suffered with this decease) and the challenge to create a A5 piece of art incorporating the kit materials was intriguing. The kit included: 'Silk strand with gold thread' taken from the original Gathered Memories installation, backing cloth, beads, thread and vlieseline bondaweb and iron on interfacing. You can add any other materials you like to the piece, but the only rule was that all or part of the 'silk strand' must be included! 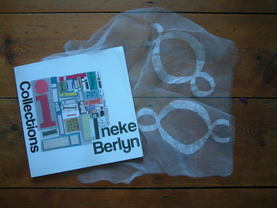 I decided to stitch about my sewing journey. Going right back to where is all started - my wedding dress. And with that in mind, I was stitching about a person in particular , Ineke Berlyn. She is a stunning textile artist and a fabulous lady who happens to be my sister in law's (Gemma Berlyn) , mother in law. She was the lady, who helped set me on my sewing journey, which has now turned into my profession and passion. Sadly, Ineke is no longer with us as she lost her fight with cancer in 2017. I wanted to relive and honour the memories of my time with Ineke through stitch, and to do this I used thread in Ineke's favourite colour, orange. Applied a stitching technique called Sashiko, that Ineke also introduced me to, which as you may know, as I'm totally addicted to, as I use this technique a lot in my Sewing Quarter live shows and upcycle Projects. I also included materials left over from the making of my wedding dress and Veil. This was the first project, I had ever sewn back in 2011 and Ineke was my guiding hands. Within the layers of material, I stitch in symbols and coded messages as well as objects like pins that had come from the sewing kit which was left a vintage singer sewing machine. (it features on the front cover of my book 'Girl With A Sewing Machine') I saved the sewing machine from a house clearance and was in a skip. I did ask before taking it by the way. lol. Through Stitch, Ineke and I made the garment I am most proud of, and she will continue to be a huge influence on my stitching life. Always asking her for advise and guidance, which she always gave so willingly. I miss her terribly , and through this project and other projects that use what she has taught me, I like to think that I'm keeping her work and spirit alive. So if you would like to get involved in the project by viewing the other entries and potentially bidding for a piece of artwork? Silent auctions will be taking place on the below dates. The Willis Museum, Basingstoke, from 30th June – 4th August 2018 and Southampton Art Gallery (Foyer), from 12th August – 30th September 2018 The Silent Auction will take place throughout the duration of these two exhibitions via written bids and/or via the website. Bidding will close on 30th September 2018 and the winning bidders will be notified by the end of October 2018. My piece is called 'SEWN TOGETHER' and is number 155 on the online the gallery. There are so many lovely pieces, it is totally worth having a look, if you have a moment to spare! Do you have projects that you have sewn and they remind you of someone special or have sewn something to specifically remind you of someone? I would love to see them, so please share your pictures with me over on my facebook page Tailor - Taylor or by using the hashtag #sewingrevolution. I would also like to note that Liske, Ineke's daughter is continuing to keep Little heath barn Studio alive by continuing Workshops at Ineke's studio. Liske and Claire regularly run print and dyeing workshops and I have also run Sashiko workshop here to, so check out their website for more information and events details.
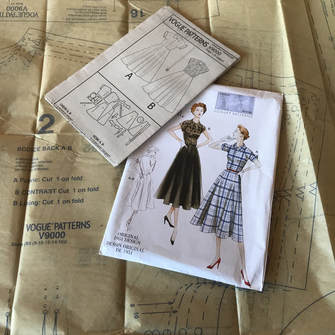
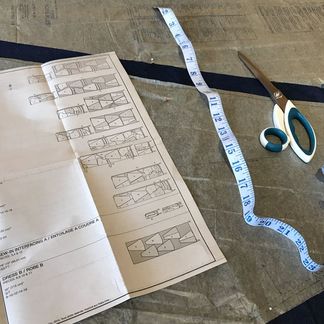
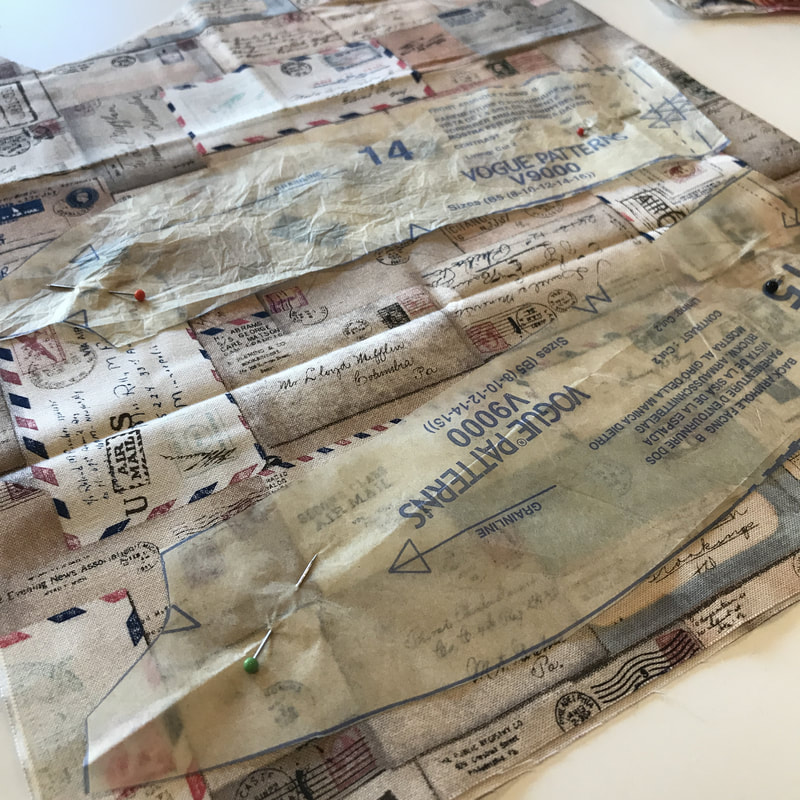
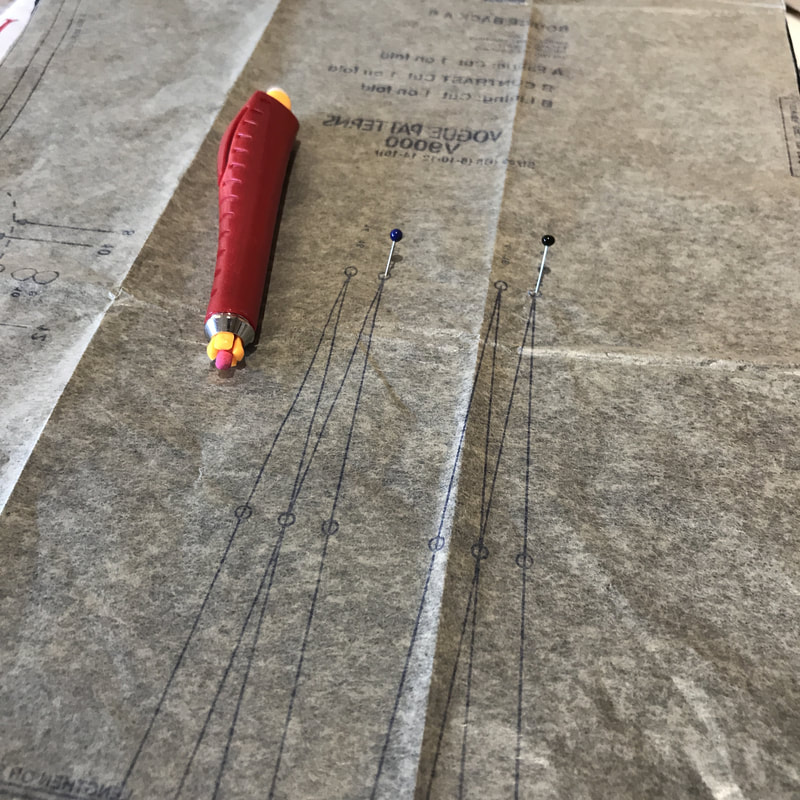
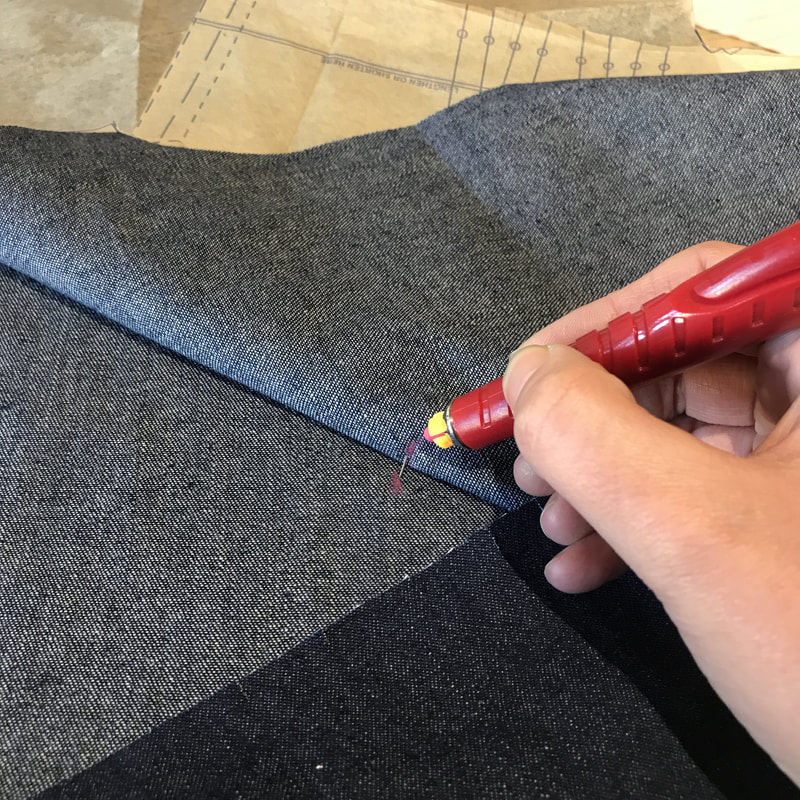
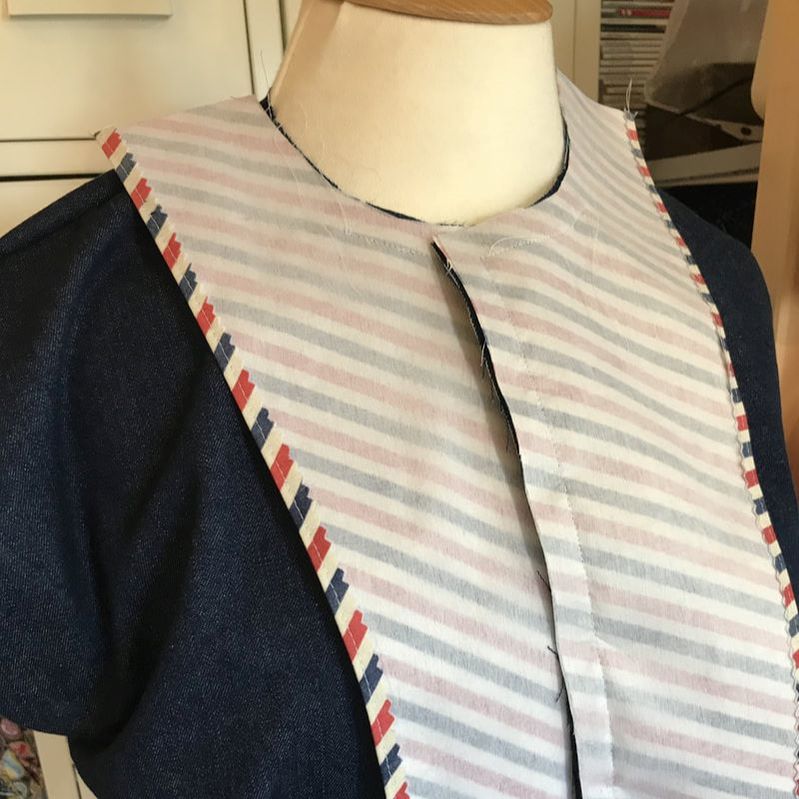
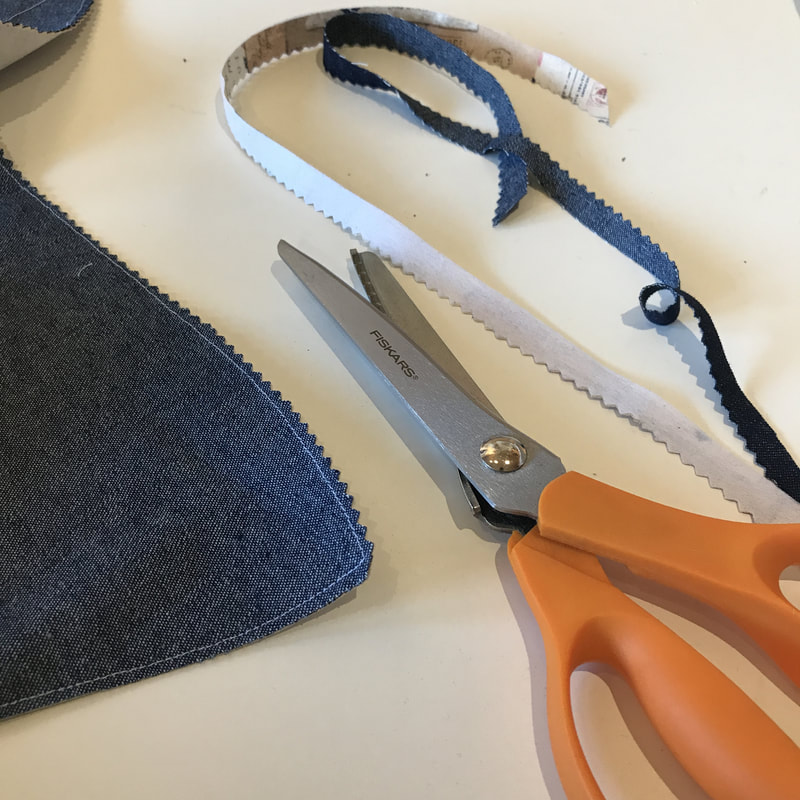
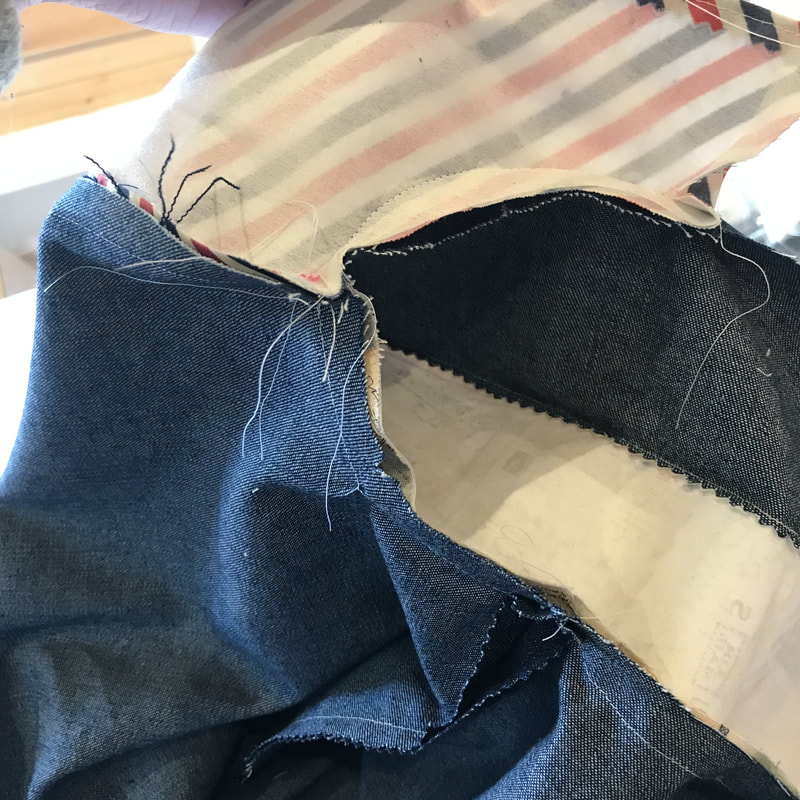
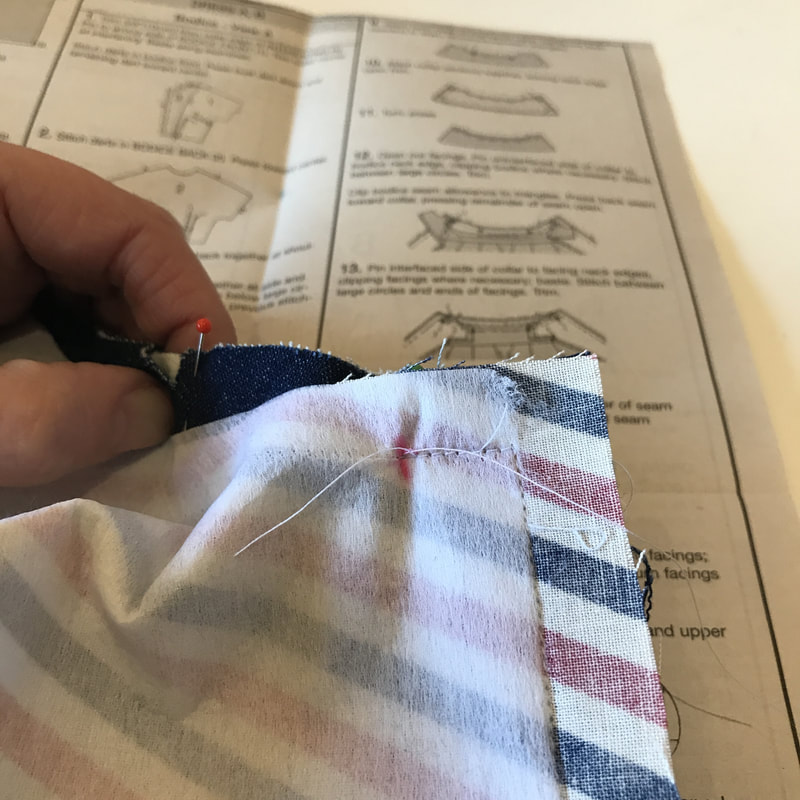
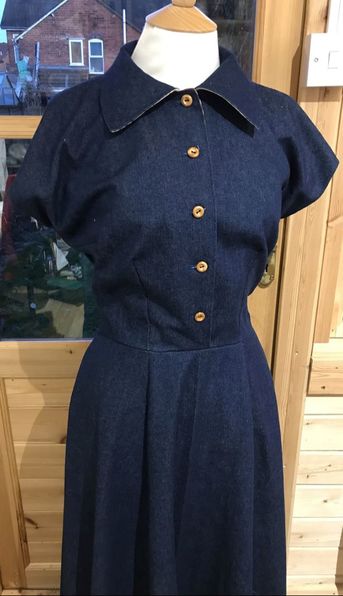
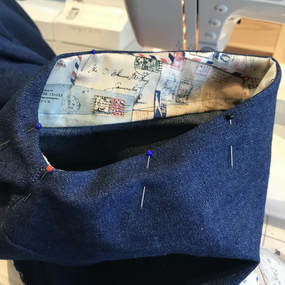
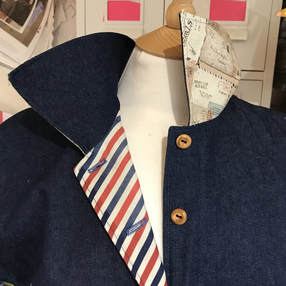
Remember..... Creativity is contagious - PASS IT ON! Pattern review Vogue V9000 Sewing for a living means that I don't get much time to sew for myself. Not that I'm ungrateful as I get to do what I love and are passionate about everyday, but it can be a little frustrating. So I've decided to turn that frustration into a positive and bring you, On My Cutting Table. With working on the Sewing Quarter, I get to make so many fabulous garments, to be shown and demonstrated on live on air. Unfortunately, I have to make them into the size that fits the dress form in the studio. And I can tell you now, that I'm considerably a lot larger than 'Mandy the mannequin' as I like to call her. So I don't get to wear my makes and so don't get chance to appreciate what I've just spent several hours making; I'm straight onto the next project for the next show. So, to savour the dressmaking flavour, I thought I'd give you all an insight into my sheshed studio and specifically my cutting table. Giving you a back stage look into the construction and details of the patterns that I'm using. As well as hints and tips that I might not get chance to cover in the live shows as time goes so fast and often runs away with us. So even though I might not get to wear my Sewing Quarter makes, I want you to have everything you need to enjoy your makes at home. So first up is Vogue's V9000, which is a 1951 pattern design. It's essentially a pull over dress with a side zip. A super flattering dress with princess seam bodice and a panelled flared skirt. It comes with two design options of a lined bodice or capped sleeve but of course you can always mix and match it up. The WOW factor with this pattern has to be the skirt! If you are looking for swishy skirts then this is the one for you. It a six panel skirt, so you need a fair bit of material but its totally worth it! Also they are cut on the Grainline rather than the Bias but you still get a great swish! So this saves on the yardage but you are going to need a nice clear and large space to get cutting out. You know I cant stick to the rules, so I decided to team up the dark denim with a little bit of detail. As this is a vintage 1950's pattern, I thought I'd add a little post war detail in by adding some Tim Holtz Correspondence fabrics. As I only had 2 Fat Quarter pieces left, I used them to add detail onto the facing and underside of the collar; Kinda like a peak a boo of detail, and this collection screams war time love letters from the front line. Another detail I love about this dress is the double darts in the back. So that's four darts in the back piece. This give it a gorgeous shape around the waist line and really accentuates your waist as you sashay away with your flowing skirt. A quick way to transfer those darts is to use a pin and a chalk pen. I love this one called chalk cartridge set or Kreideminen-set and it was a gift from a dear friend that I use all the time! A perfect gift! Anyway pop the in into the notch, peal back the fabric and mark the position of the pin onto both layers. It's a lot quicker than a tailors tack! One thing I didn't like about the pattern is that it didn't tell you how to finish the facing edge. I decided to quickly use my pinking shears and secure with a single hem, giving it a clean finish. This is a great pattern for a beginner, so keeping the beginner sewist in mind, I think they should have covered off this quick step. I know there is a section at the beginning but as a beginner your not going to know when to check that section without being told. It's a simple thing that makes the garment last longer as you have finished the raw edge, and if you learn these little tips from the start then your onto a winner. Another quick tip is to use your pinking shears to trim your collars seam allowances. This saves time as it is clipping and reducing the seam allowance as it goes. Just be careful that you don't cut your threads. For me the collar would be the tricky bit, especially if you are a beginner, which is why I really wanted to cover this in my live demonstration. The trick is the notches! They really are there to help you, so make sure you have transferred all of these to your fabric pieces. The instructions are great on this step, so don't worry if you are worries about doing collars. If you want to sew along with me, you can watch my show back via the link below. The vintage dress was my first hour so scroll to the 1 hour mark for the start of that show. Overall, I loved making this dress. Full of opportunities to add personal details without losing that vintage look, by adding fabric prints into the collar, cuffs, facing and why not add it to the hem as well?
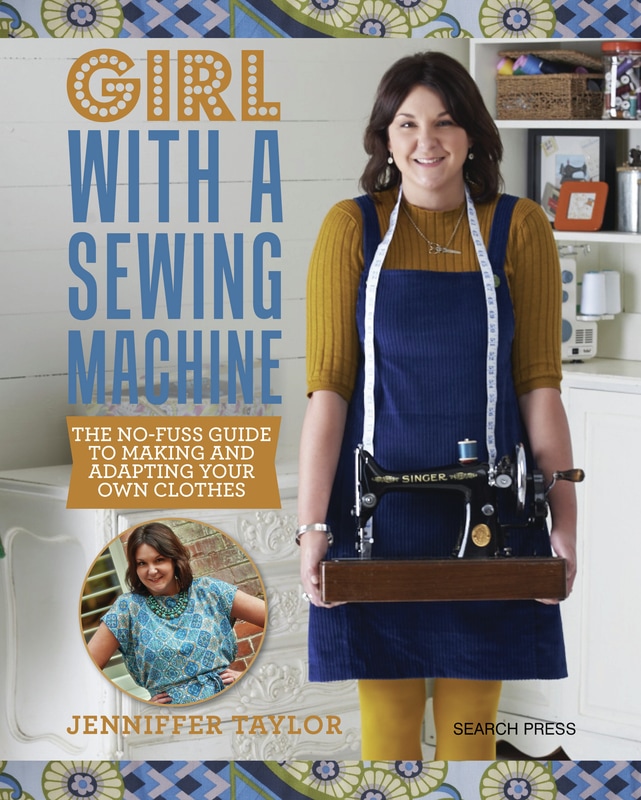
Super flattering and feminine; This is a dress that could easily be made up for a special occasion! Hope you enjoy making this dress as much as I did! Until next time, Happy #sewingrevolution! I have some exciting news for you!After all your wonderful suggestions and support, you have all given me the confidence to finally pull my socks up and have set up a YouTube channel. EEKK! so here goes! I'm looking to fill it with how to's and projects, hints and tips and also link my Sewing Quarter live shows demonstrations, so you can easily access them when you want to watch them back. I have also made a start on my Stitch Library series. As you know, it's all about the sharing the #sewingrevolution love, so I wanted to cover some of the sewing basics as well as the more complicated seam and hem finishes. As I know we all have that moment where we go ' How do I do that stitch again?' This is the first time I have filmed, edited and uploaded video's to YouTube! So this has been a huge learning curve for me and your feedback would be greatly appreciated! Also feel free to get in touch with any suggestions for future videos. I want this to be a channel that becomes part of your sewing room! Here for when you need a little help with that stitch, when your a little lost for project ideas or you just want some sewing banter on in the background. I really hope you like the channel and please don't forget to share and subscribe. WELCOME TO THE YOUTUBE #SEWINGREVOLUTION EVERYONE! Book Launch Excitement!I cannot believe the book is here! It still doesn't feel real - Can somebody pinch me! If you had said to me four years ago that you will attending your own book signing - I would have said your were crazy, but more fool me as I have, it's here and that's exactly what I'm organising! A BOOK SIGNING! AAHHHH! 'Girl with a sewing machine' is my no fuss guide to making and adapting your our clothes. Being a self taught seamstress, I learned to sew by cutting up and upcycling clothes and curtains to make new outfits for next to nothing! After making my wedding dress and the wedding, I was skint but I was desperate to explore my new found skill, and that is exactly how i did it before finding myself on the Great British Sewing Bee a year later. 'Girl with a sewing machine' is an insight into my personal sewing journey, with projects that I have made along the way and that also include special stories too. With each project, I learned or improved on a new skill and I hope that you will to. I wont say too much more as I don't want to spoil it for you, but I will say that I really hope you enjoy sewing along with me. I would love to see your finished makes so don't forget to include the #sewingrevolution in your Facebook, Instagram or Twitter posts.
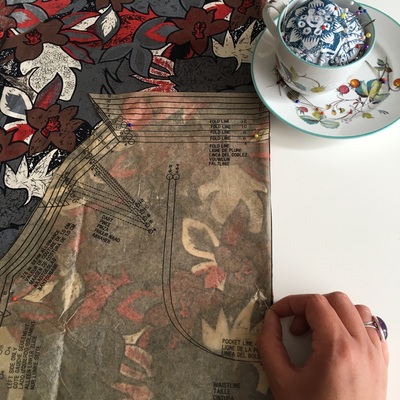
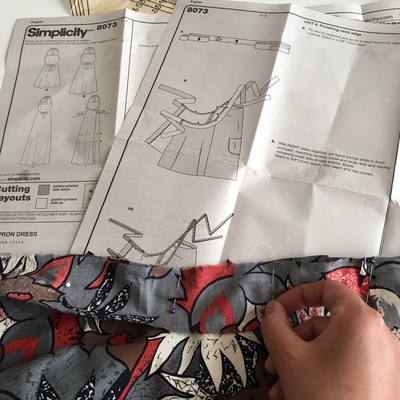
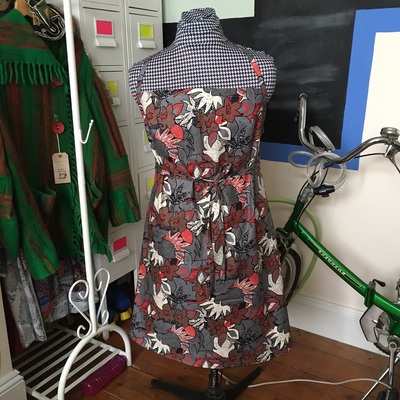
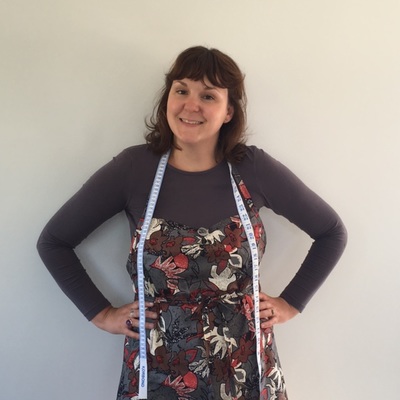
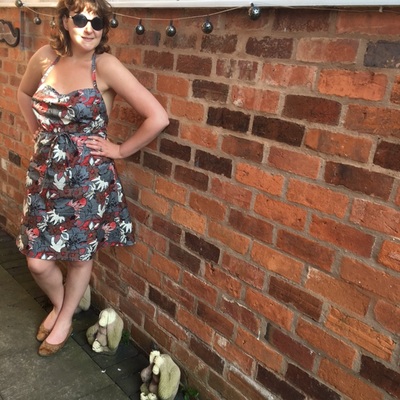
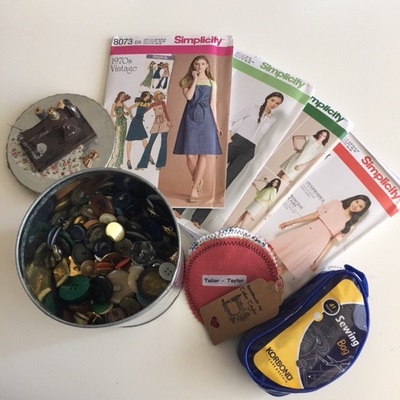
I will be holding a series of BOOK LAUNCH EVENTS around the country, so you may be able to grab a signed copy and have a chat with me very soon! If not you can grab a copy from Amazon , any good book stores or buy it directly from me and get an exclusive #sewingrevolution Badge! VIVA LA #SEWINGREVOLUTION ! Simplicity & Korbond Birthday Giveaway!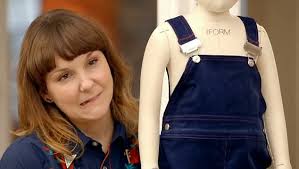 It's been a while since I last did a blog post but as its my birthday I thought i'd treat myself to a handmade garment and as we are in the midst of #memademay which I sadly have not had time to take part in this year so it just seemed the right thing to do even though it is only one garment. You will know from watching me on the Great British Sewing Bee that I love dungaree's! I always feel like a little scamp who is likely to get into trouble when wearing them. Along with dungaree's I love a pinafore or Apron dress. Still feeling mischievous in them but look a little more feminine than Dunga's! With this in mind I decided to make 1970's inspired Vintage Simplicity Pattern 8073. It's a cute and super simple Apron dress. Perfect for spring or summer and is great coupled with a long or short sleeved t shirt. I wanted to make it up in this awesome crazy floral print fabric that was kindly gifted to me by SewJo after an epic fabric clear out. I don't have many garments with flowers on so I thought i'd go for a change. 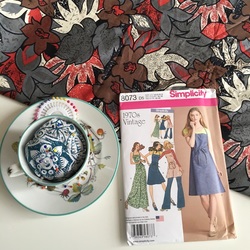 Ive made a few different types of Apron dresses before. Sew Me Something' s Beatrice which I made reversible and also the Walkaway Dress by Butterick which also featured as a task on the Sewing Bee Series three. So I was looking forward to trialing this one too. It's a super simple in design as it is literally an oversized Apron. You have a 'normal' apron front but the 'wings' are larger so they wrap around the back turning the apron into an awesome dress. With the #sewingrevolution in mind I think this is a perfect pattern for a beginner wanting to make a garment for the first time. I like that there are not too many pattern piece's to cut out and the instructions on how to make it are super clear. So there is nothing daunting about this pattern if you are a beginner. I loved it as I was able to make something for myself in super quick time ready for my birthday meal with the bonus of being able to loosen off the waist ties when you have eaten far too much! I think this dress is also perfect for holidays as you can just pop it on when you want to go to the bar after sunbathing by the pool and want to be a little more covered up. What do you think? So to celebrate my birthday and the return of the Great British Sewing Bee with series four starting this evening at 9pm I'm doing a little competition giveaway!
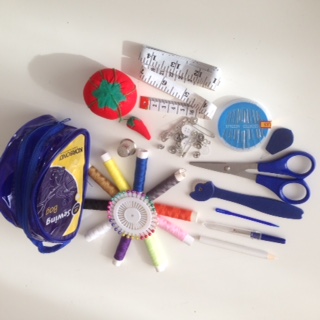
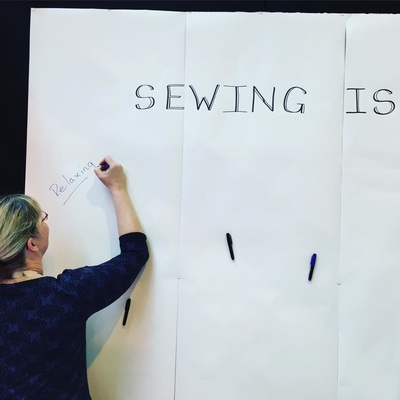
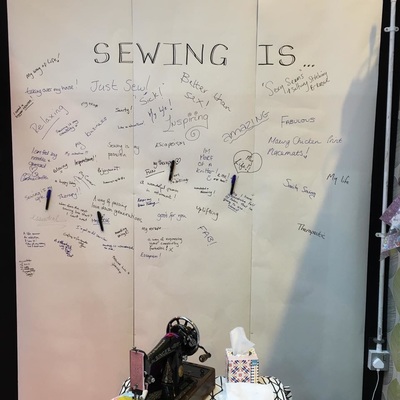
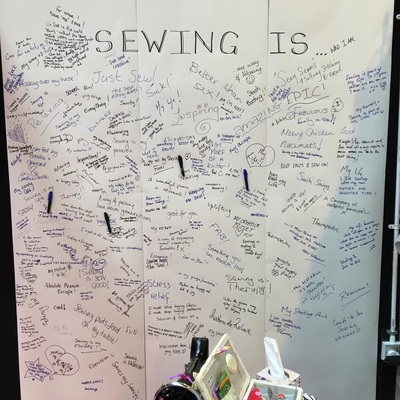
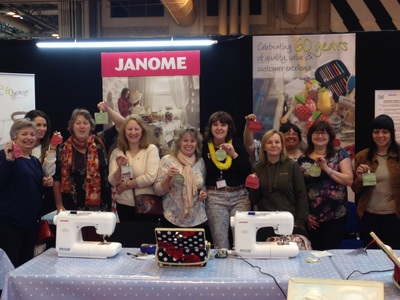
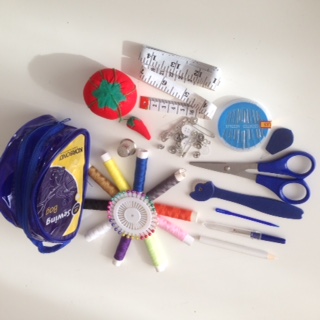
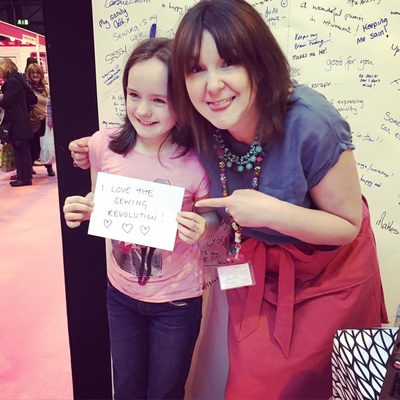
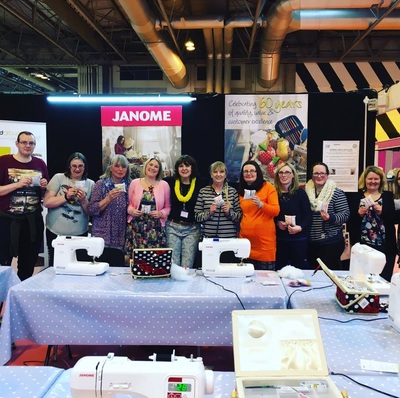
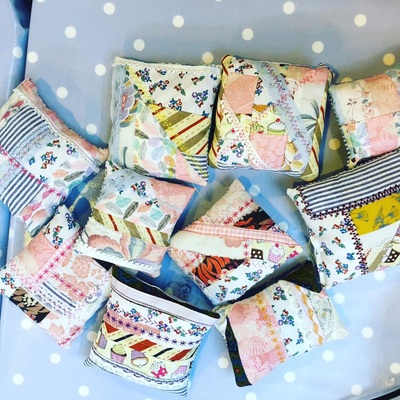
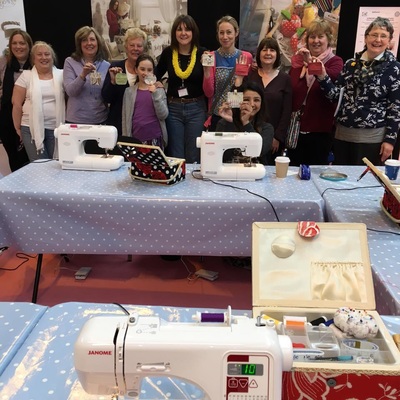
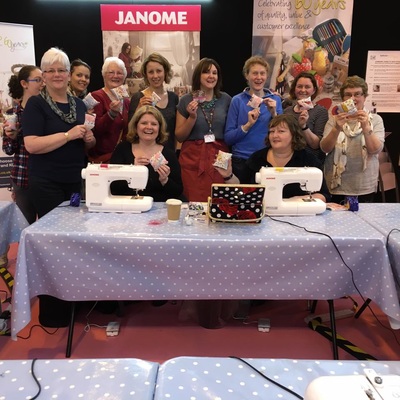
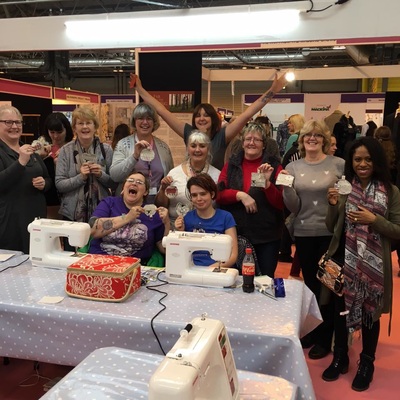
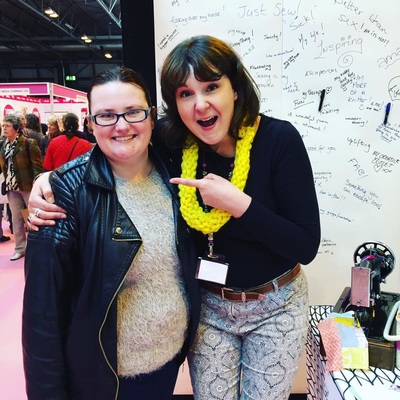
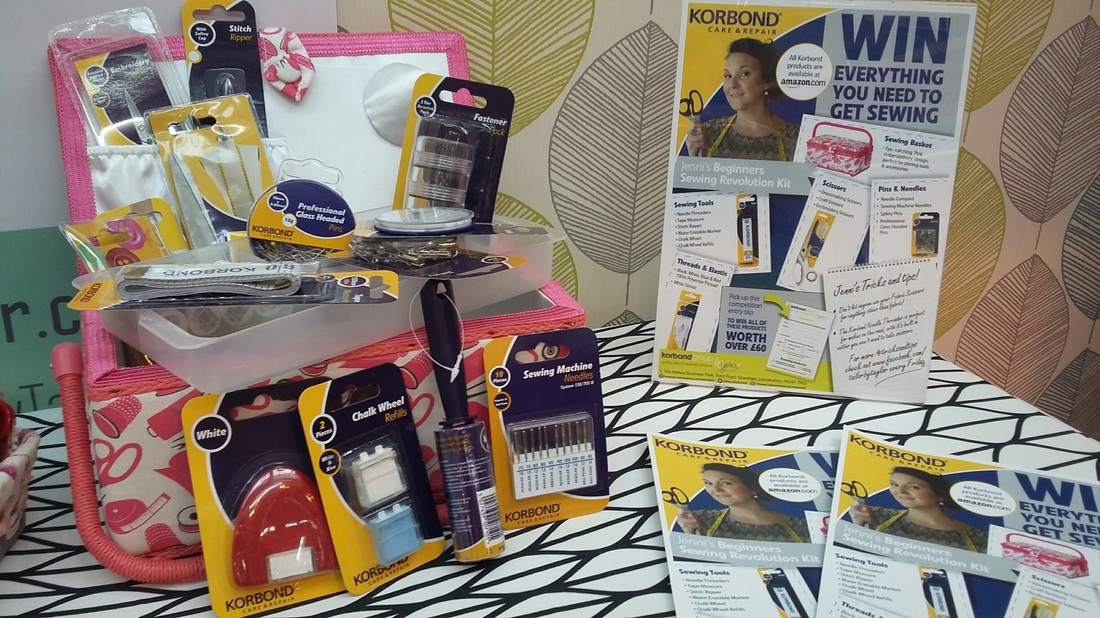
If you can guess how many Vintage Buttons are in my Sewing Pot you will be the winner of a selection of wonderful Simplicity patterns, a Korbond Sewing kit and a Needle Wallet made by yours truly. All you have to do is leave a comment with your guess along with an email address at the bottom of this blog post and ill be picking the winner on the 31st May 2016. Once the winner has announced I will contact you directly to organise the delivery of your goodies!!! So a few rules. only one guess per person, only comments on this page will count (facebook and twitter will not count) and the closest guess wins. If I have a few people with the same closest guess, then they will go into a draw! Competition closes at 12pm 31/5/2016 so comments will not be counted after this time. Good luck, feel free to share and viva la #sewingrevolution! Sewing for Pleasure 2016 - Korbond Sewing Kit Competition Wow it's been a few crazy months! ICHF's sewing show in Manchester and Stitches, NEC in February. Knitting and Stitch in Olympia at the beginning of March and now Sewing for Pleasure! My body is in some serious need of a fast food detox I can tell you but i've loved every minute of it! 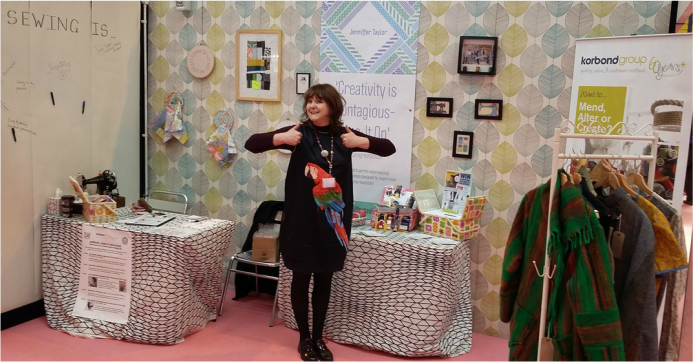 Sewing for Pleasure was a very special event for me this year as this was the first time that I have ever had my own stand at such a large event! Normally at these events I have been a guest demonstrator or speaker but this time I was on my own. Designing and setting up my own stand. Planning, sourcing and preparing my workshop kits and of course sharing the #sewingrevolution love; it's been a huge learning curve and milestone for me! It feels like all the hard work is really starting to pay off and i'm so looking forward to the next chapter! When I was thinking about how I wanted my stand to look. I knew I wanted to bring my sewing room to the NEC; so i did! I brought my 'old gal' singer sewing machine, pictures from my sewing room wall and my 'when i get chance to' project which I started in February while in Manchester. You can just about see my cabin block patch work hanging on my pin boards. I also brought a selection of clothes that are examples for my workshops which i'm running throughout the year. I thought it would be nice for people to have a look at them and may be get some ideas or inspiration. 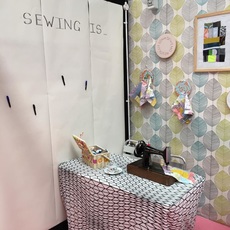 The one thing that I definitely wanted to incorporate was an inspiration wall. This became my 'Sewing is..' Wall. Remember the 'Love is..' comic strip from the 1960's? well it's kind of like that. I wanted to encourage visitors to add what sewing means to them in a few words. It started out as a little fun on Thursday with only a few brave people making their mark but by the end of the first day the wall began to take on a different shape. On Friday the wall felt like a diary, Secret messages and thoughts became public and by Sunday the text was not only fun but just beautiful, inspiring and completely heart breaking all at the same time. The 'Sewing is..' Wall became such a treasure that I now plan to immortalise it by creating a very plain quilt and transferring the text onto it using free motion embroidery. Everyone made such a wonderful effort in sharing their thoughts It seemed only right that something special becomes of it, so watch this space... but don't hold your breath, it will take me a while! Another big part of the show for me was the #sewingrevolution workshops! This is what I love to do and I hope that those of you who were lucky enough to secure a place enjoyed it as much as me! I ran two different workshops. One was an upcycled key ring pouch and the other was a scrap busting pin cushion or hand warmer. All of the project kits used clothes or left over materials. I think someone thought I was joking when I said that the green corduroy was my husband's trousers. It was only when Kirk popped his head round and said that they were did she believe me! lol! I hope you all enjoyed the workshop and put your little korbond sewing kits to great use! To top it all off and to celebrate my milestone, I decided to run a little competition which was exclusive to the Sewing for Pleasure show. I wanted the prize to be something that would help to the next person to start their own #sewingrevolution. So my awesome workshop sponsor, Korbond and I put together the ultimate kit filled with everything you need to get started and more! It was free to enter and we had an amazing 232 entries but there can only be one winner... Congratulations Emma Pattinson for winning the Korbond Sewing Kit!The sewing kit will be with you in a few days Emma! I would love to see what wonderful creations you make with it so keep us posted! Before I sign off, I just wanted to say a HUGE thank you to Korbond for their amazing support and for supplying the wonderful sewing kits for my workshops and the competition! To Jane Bolsover and ICHF for letting me run havoc at the show and the chance to share the #sewingrevolution love, cannot wait for the next one!
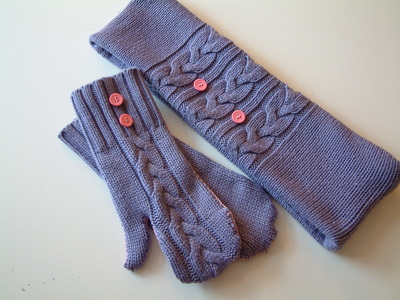
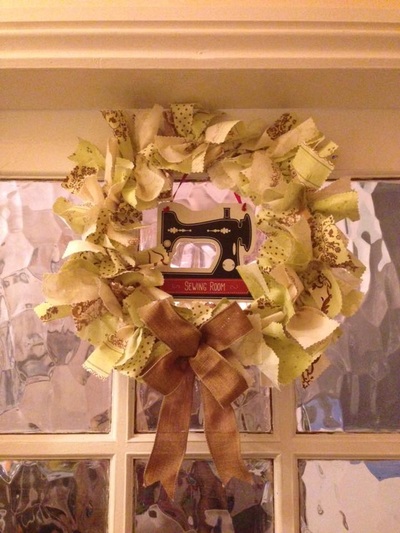
But the biggest thanks of all has to go to my amazing husband for his love and continuous support! For not only stepping in and completely rocking my stand on Saturday and Sunday but for putting up with me when I have to just finish that last seam before dinner or to not go mad when you have stepped on yet another sewing pin. I'm so proud and blessed to have you by my side and without your faith in me there would be no #sewingrevolution. I truly am a luck girl!! xxx #craftblogclub Secret Santa!I love Christmas. I think it's the perfect time to share what you love with others and nothing says 'I care' more than a hand made gift- wouldn't you agree? So when #craftblogclub invited me to take part in their secret santa, I just couldn't resist! 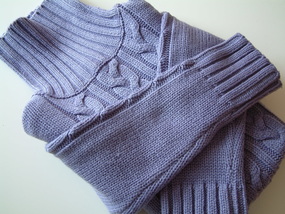 I knew that I wanted my secret santa gift to be something upcycled as it is something that im very passionate about for many reasons. one that it means we are not wasting anything but mainly because I think it is a fantastic way for beginners to get into sewing. So in order to share the love, i'm sharing my #sewingrevolution ethos. I had recently held a christmas knits workshop and was completely inspired further by my students makes. I thought I would make my secret santa a pair of gloves and a matching scarf too, using a lovely purple jumper and Korbond embroidery threads. 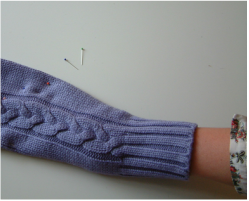 I firstly got to work on the gloves as I knew that they would take the longest to make, but to be honest the whole project is a nice quick make and is perfect for Christmas when wanting to make a few hand made gifts for friends and family. I used the arms of the jumpers for my gloves as the cuff's of the sleeve just work perfectly and reduces the amount of hand sewing that you have to do. I also loved the detail in the knit and wanted this to be the main feature of the gloves. Roughly pinning my hand in place, I cut out a mitten shape and used this as a template for the other glove by placing this over the top of the other sleeve. 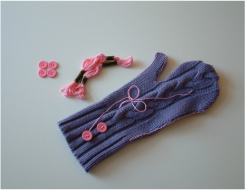 After hand sewing the glove with normal sewing thread inside out. I then pulling the glove the right way out and stitched it again, but this time using Korbond embroidery thread and using a chain stitch to add a little extra detail. I also wanted to add a few cute pink buttons as I thought it complimented the threads I was using as well as the purple of the wool. I then got to work on the matching scarf. 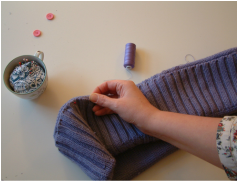 Using the body of the jumper I simply cut across from armpit to armpit, giving me a large tube to work with. Folding this tube in half, I then single hemmed the cut side and joined it to what was once the original hem of the jumper. Pinning these edges together I then ladder stitched the seams together, giving you a nice chunky scarf. To bring the designs together, I added two pink buttons to the detailed side of the scarf. My Upcycled Winter Warmer gift was now ready for the post just in time for Christmas! It was so lovely to see Kay gets Crafty post a picture on her blog and twitter! It looked just perfect for her, so I was so glad that she liked it! Not forgetting that it wouldn't be Christmas without a gift in return. I received an awesome fabric wreath made from fabric left overs! AWESOME UPCYCLE Katie! You can check out how she made it over on her blog 'Katie gets crafty'. I had to put it up straight away on my sewing room door. I need to ask though, is it bad luck to keep up Christmas decorations as I don't want to take it down!? Thank you #craftblogclub for organising an awesome Secret Santa. Check out #craftblogclub which runs every Tuesday from 7-8.30pm on twitter for Craft Bloggers and lovers everywhere! Happy new year everyone and Viva La #Sewingrevolution!
My Most Luxurious Upcycle Yet.
I'm going to be honest, I'm not a great fan of this time of year. Dark mornings, Dark afternoons and the cold, it just makes me want to go into hibernation. The only thing that helps to keep me wake is the thought of open fires, mulled wine and spending time with the family at Christmas. Another bonus are the lovely long walks we can do with the dog, now that we have moved to Bromsgrove. There is something really lovely about getting all wrapped up and taking a stroll in the cold but not when its raining! It's this thought that making me think of one of my favorite garments, the cape! Super stylish and always reminds me of the 60's era and is what has inspired me to make one of my most luxurious upcycled projects yet! 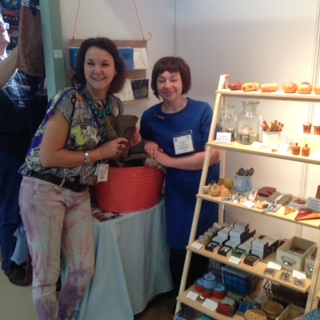
While is was working with Create and Craft TV at the WI Centenary fair in September, I came across a stand by Beyond Measure.
I got talking toGrace who was in the process of hand sewing a beautiful pin cushion made from the most beautiful mustard coloured leather and tweed i'd ever seen. Next to her stood this bucket, full of multi coloured strips of the most gorgeous tweed. Both wool and silk blends and varying from about 1 to 3 meters in length. Grace mentioned that they were Lancashire tweeds. The mill that they came from started producing textiles in the mid 19th century and has been run by the same family for five generations. Grace is totally passionate about high quality goods that are produced locally and works with fantastic craftspeople to create and sell these beautiful products. 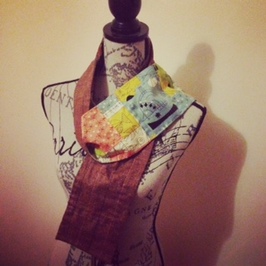
I completely raided the tweed bucket over the three days I was there. I wanted the get as many combinations and colours in 3 meter strips so that I could stitch them back together to make a piece of fabric I could work with later.
While I was there I couldn't wait to tuck into the fabric so I made a little silk tweed scarf with a deconstructed disappearing nine quilting patch for the lining. The lining fabric is Tiki Tok by Moda. Two lovely ladies, Sue and Stephanie from Cupcake Cottons gave me a little bundle to play with as they wanted to see it finished as much as I did! 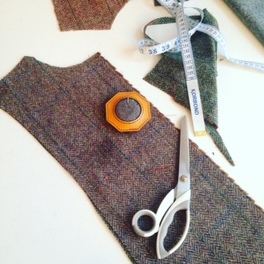
Unfortunately, when I got home, like most of us, it's finding time to start a new project. It was only after I had finished preparing for my Create and Craft TV Cape show on the 19th November that I found time to tuck into the beautiful tweed. I'd all ready found the pattern I wanted to work with which was New Look 6073 by Simplicity.
It's an awesome pattern. Very simple and classic in design but it was exactly what I was looking for ! It was a little tricky to get the strips of different tweed into a single piece of fabric that I could then cut out the pattern on. I wanted to try and pattern match the check detail that ran though some of the herringbone tweed pieces so it flowed nicely across and down the body.
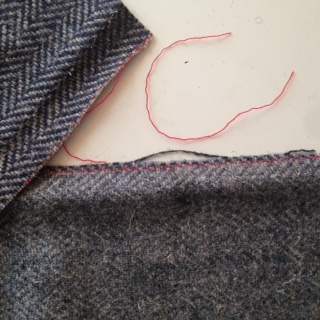
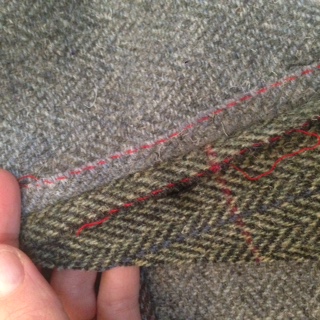
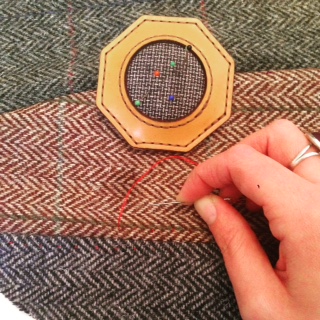
Another detail that I wanted to include, to give a sort of nod to what it was before I made it into a cape, was the red stitching that was found on each strip of tweed. It was the marker to divide each of the samples, as one design would come on one length of fabric but in several different colours. The red thread chops up the colour variations in the same design. So I wanted to incorporate this red thread into my seams by prick stitching the seam allowances to the garment.
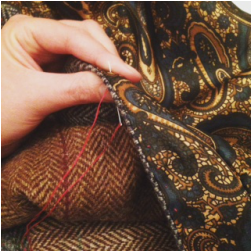
This not only made the seams less bulky but really gave the cape a unique and special hand stitched detail. I was super pleased with it but it was a labour of love as there are 15 seams and that doesn't include the collar and hems.
I then got to work on the lining of my Cape. Brenda Killigrew from Inkberrow design centre gifted me a roll of the beautiful Savile Row paisley lining. I wasn't kidding when I said this is my most luxurious upcycle yet. 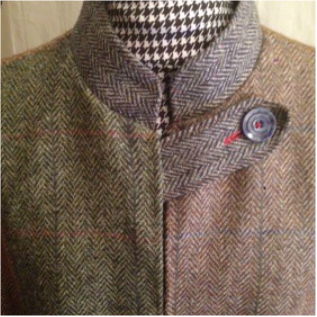
Before sewing the lining in, I wanted to add a little Jenni special, as you know I cannot just go with the pattern, I always end up adding a little twist. This time I added a little tabbed button hole rather than the looped option and again used the red thread to add further detail.
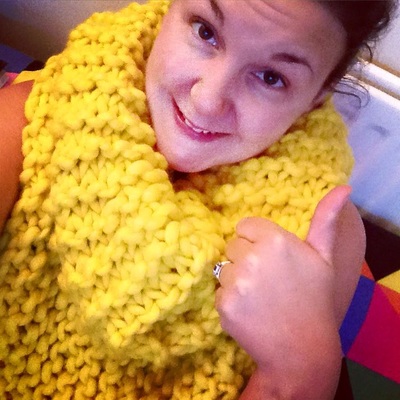
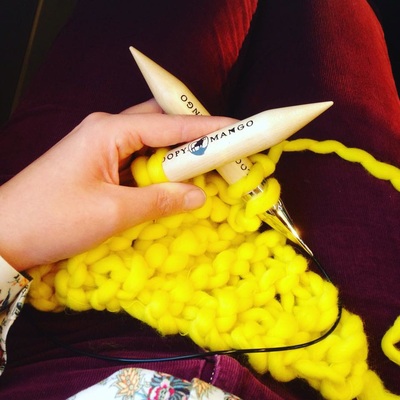
I like how I've positioned the tab as it follow the neck line rather than the check in the tweed. I think it adds a little drama - what do you think? After finishing what I started with the red thread, I pricked stitched all the outer seams together to give a crisp hemmed edge. I'm super pleased with it and love wearing it! Before signing off I just want to thank everyone who has either gifted or inspired me with gorgeous fabric. This really is a special #sewingrevolution garment! x Events , Inspirational people and learning new skills.As you may have seen on my social media feeds October has been quite an eventful month. Kirk and I have been settling into our new home, getting all excited about the open fires and uncovering the original Victorian tiled floors and choosing wall colours. We have also had the arrival of my second nephew Marley and also my dear friend Joanne's baby called Henry. Both babies are nothing short of miracles but that is another story. For me, you may be pleased to hear that I have taken the jump and given up my day job! Which is super scary but I haven't had much time to think about it as I've been on the road quite a bit. I've attended the Great Create Extravaganza in Harrogate, Visited Korbond HQ in Grantham where I completed an order on the shop floor. It was just like supermarket sweep! Celebrated Bellacrafts birthday by holding a #sewingrevolution workshop and talk in Hampshire. Became an ambassador for the fabulous #sewsaturday event which was organised by Sew Magazine, where I held a made to measure workshop at the Inkberrow Design Centre, Redditch. As well as starting a 4 day sew along at the Stanball Centre in Walsall. To celebrate #sewsaturday in October, I also gave all workshop attendees a free Korbond Sewing kit, which was actually the first sewing kit I had purchased as a beginner. So I hope they go on to start their own sewing journey's in true #sewingrevolution style!  The highlight this month had to be the Walkaway Dress Tea Party at the Alexandra Palace, London. Firstly, I have never been there and as a building it is just stunning and secondly I got to bump into so many creative and inspirational people. I was invited to the event by Sue and Marilyn from Butterick and the only catch was that I had to make a Walkaway Dress. For those who may not have heard about the walkaway dress, it was feature on the Great British Sewing Bee, series 3 as a task. Off the back of the demand for the sales of the pattern, a percentage of sales went to the charity 'Eve Appeal' which helps to fund world-class research into gynaecological cancers. Cancer has been quite an up-setter in my life, I have thankfully never been diagnosed with it but I have had so many close friends and family suffer by it and thankfully are still here to tell the tale. From a dear friend and another family member who are now in their mid fifties to a family member who was only in her early twenties when she was diagnosed and had to have a double mastectomy and may now have to consider having her womb removed to reduce risk in the future. Cancer does not care about age, sex or what plans you may have for the future, so these types of charities are so important to help people get back their lives and hopefully help prevent cancer from taking them and others away from us in the future. 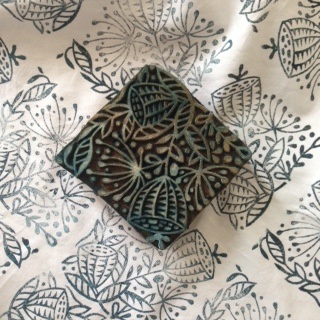 Not one to shy away from a challenge, I thought I would make a Walkaway with a difference. I was going to Upcycle it! So taking a man's shirt and a bed sheet I got to work. Using some awesome India printing blocks from BlockCraft that got from the WI centenary event last month, I decided to print my own fabric using a large seed head pattern block, and to complement the colour shirt I printed using a dark colour blue. It was so super quick and beautifully transformed the boring white bed sheet in an afternoon. After cutting out the skirt pattern pieces from the walkaway pattern I used the remaining fabric to make Bias binding for the arm holes and tying the dress design together. 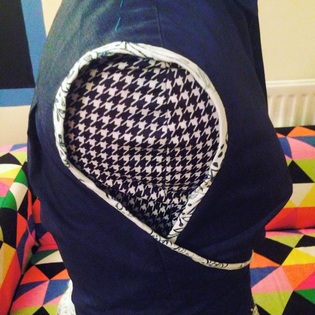 I then got to work on the top part of the dress. This was very tricky as I needed to get a shirt that looked and fitted well around the collar but was big enough to wrap around me. The biggest size I could go without the collar looking too big was a 15 1/2 inch collar. The down side was after unpicking the shirt side seams the shirt did not fit the walkaway front or back pieces so I had to improvise. I decided to make a feature out of this rather than try and hide it so I used the shirt cuffs for the front wrap. Keeping the original cuff and placket in place to add further detail to my dress design. After a few trials and errors, I finally got it to fit the original paper pattern and so began constructing the walkaway dress as the instructions directed. So it was a tricky detour but I think I pulled it off in the end. 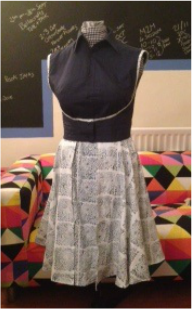 I was now ready for the Walkaway Tea Party. It was a wonderful day and it was fantastic to see so many people wearing the dress. It was quite funny as I was walking around the event as everyone made a slight head nod/gesture to each other as if we were in a special club because we had made and was wearing 'the dress'. I had lots of lovely complements about my version of the walkaway and that no one had ever seen it look like that before, which I was super pleased about. While I was tucking into my afternoon tea with a glass of bubbles, I was amazed at the number of different dresses, It's truly amazing how a different type of fabric or fabric design can completely change the style of the dress, even though we are all wearing the same dress pattern. I also got to bump into the gorgeous Lauren and Stuart from series 1 and have a good catch up. While at the tea party I got to speak to Sue the lady who invited me and put together the event and while presenting the cheque to the Eve appeal announced that she had also been affected by cancer. I had no idea and such a powerful thing to share in a room full on unfamiliar faces. Sue's speech really highlighted how important these organisations and charities are and how we need to support them. Thank you for sharing this with us Sue!! To top it all off, I've also had two personal achievements this month! Firstly, while at the Walkaway Tea Party I purchased some beautiful merino wool and loop needles from loopy mango. I'm not sure why as I didn't go in with the intention of buying any wool as I cannot knit, well I can only do knit and purl stitches, but it was so beautiful; a gorgeous bright yellow, I fell in love. So while on the train home I thought i'd give it a go and with their helpful on line tutorials I was away and made this 'Her Shawl' in 5 hours! #boom My second achievement was that I exhibited my first photographic piece. An image that I had used as part of my degree course but never had the opportunity to show anyone. A friend and sew me something's husband Charlie, posted on facebook the opportunity to exhibit a photograph as part of the' suffragette' film premier. Based on inspirational women I decided to enter a photograph along with my Kirk. 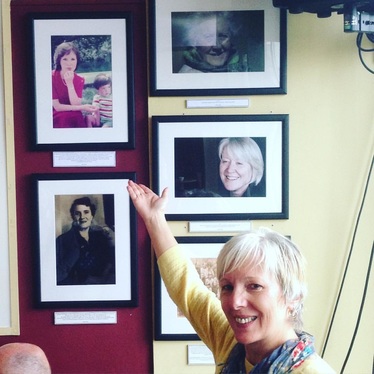 Kirk used a photograph of his mother- Brenda, along with a beautiful write up. We decided to take Brenda to the exhibition without telling her what she was going to see and she cried. She was so taken back by the gesture and that we saw her as inspirational. Inspiration is always where you least expect it - or should I say, where you take it for granted. Growing up I saw my mom as, well, just a mom; picking up my clothes, making my dinner, cleaning the house. How wrong I was - my mom was left with three children to bring up on her own, keep a roof over our heads, and stop us from going hungry - all whilst holding down a full time job and completing a degree. My mom is an inspiration and showed me that anything can be achieved, never stop dreaming, everybody has feelings, love, laugh and be true. My inspiration is Brenda Taylor. 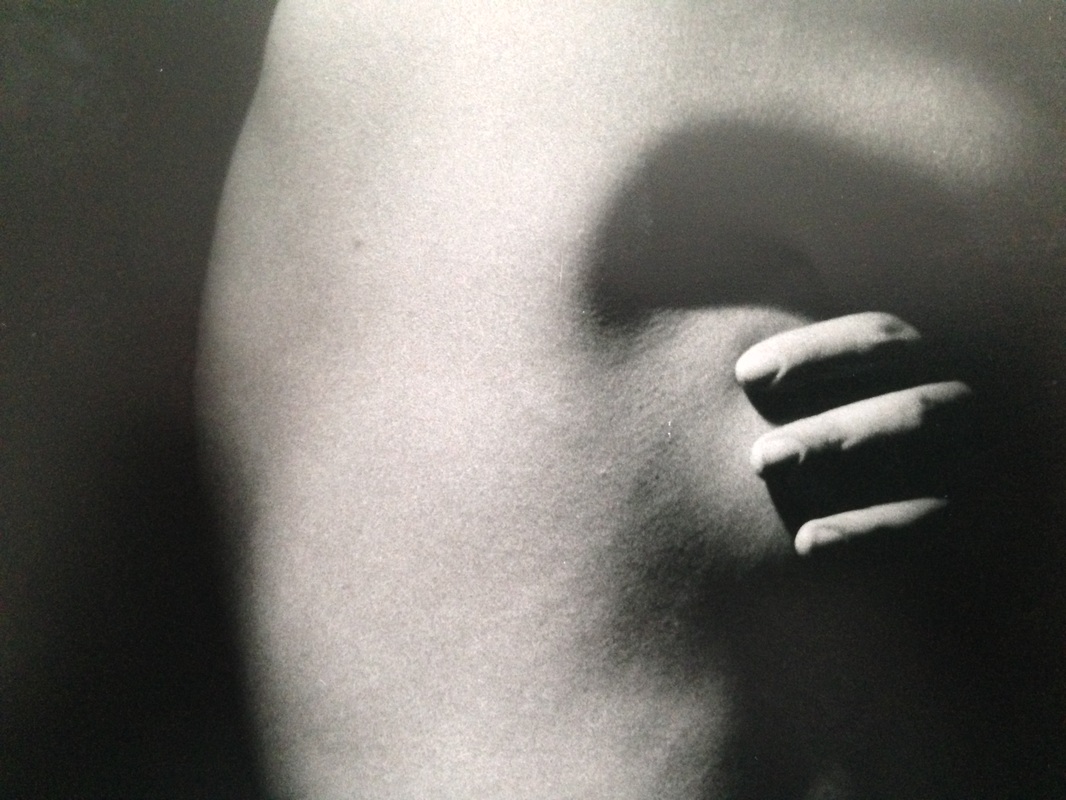 I decided to enter this self portrait along with this paragraph. 'The inspiration from within' When thinking about inspiration, you tend to think or draw on other people. Rarely do we look to ourselves. We all have within us the power to be inspirational, but you have to be prepared to look into yourself, to bare all and be vulnerable. That being said to be self inspired is empowering and you never know who will look to YOU for inspiration. I hope this blog post has left you all feeling inspired? Until next time... Viva La #sewingrevolution. |
#sewingrevolution newsWhatever I'm doing Categories
All
|
Sewing Revolution |
Tailor Taylor |
|


 RSS Feed