
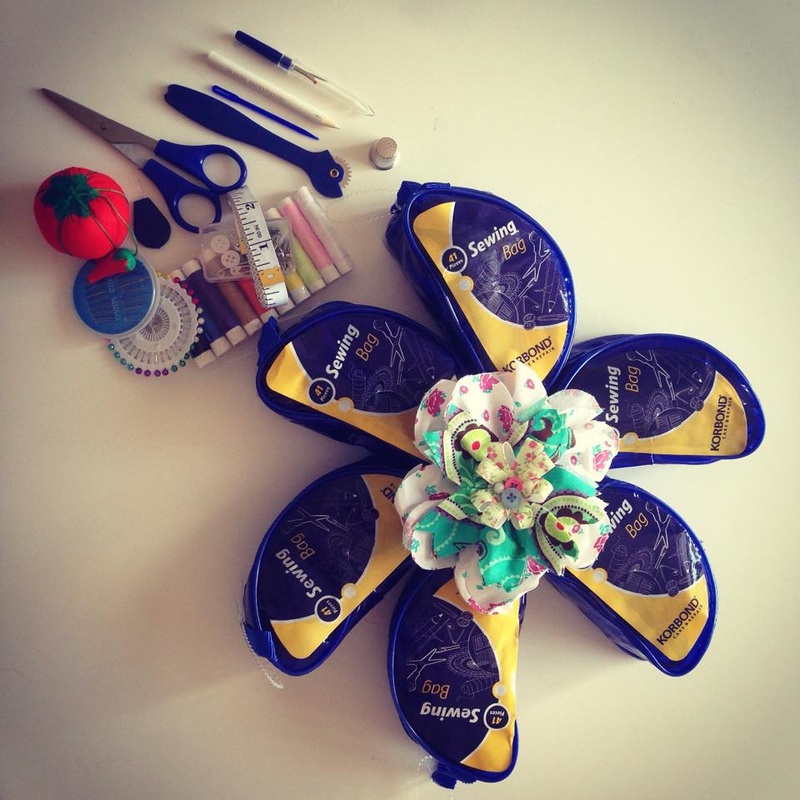
My first sewing kit.I often get asked ‘what sewing equipment do I need?’ to attend my #sewingrevolution workshops. I generally say a pair of fabric scissors, tape measure, pins and an unpicker as I would have everything else on hand at the workshop, but the question got me thinking about my very first sewing kit that started my sewing journey. When I made the decision to make my own wedding dress, I must admit that my first action was not to head to my local haberdashery. Shamefully I didn’t know where my local one was and I did not have anyone to ask for advice on where to go.  Impatiently the first thing I did was look at wedding dress designs on the internet. Images of women in gorgeous dresses in fields, beaches and other aesthetically pleasing places. I then found my perfect dress it was unusual with what I called Spirograph lace, but do you think I could find the designer or where I could buy it - NO. I then headed to bridal shops and outlets to see if I could find something similar with no joy. So then I gave up looking to buy a dress and decided to make my own. Instead of looking to buy I began visiting bridal shops to look at how these dress were constructed and took notes and sketches of designs. I also tried several dresses on, ( well, I was a bride to be after all and I couldn’t resist dressing up) to see what shape and style suited me the most. With my design in mind, I brought my first sewing kit and Sew Magazine (also my first sewing magazine) from a place that everyone visits at least once a week. My local super market. 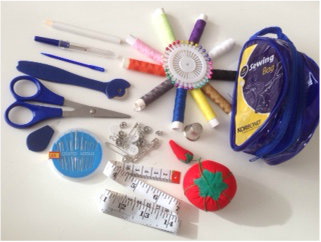 My first sewing kit. My first sewing Kit was a Blue Oval Korbond sewing kit. It was almost the size of my palm. Not knowing everything that was listed in the bag I purchased it with excitement; My first sewing kit and confirmation that I was going to start sewing my dream dress and my first ever sewing project! The little kit had so much in it. A small pair of scissors, needles in various sizes as well as a wool needle, a measuring tape, pin cushion and pins, threads, thimble, needle threader, hooks and eyes and snap fasteners, buttons and safety pins. Then there were items that I had never seen before let alone knew what to do with; but I now cannot live without - A Stitch ripper, Tailor’s chalk and a tracing wheel. Looking back now surrounded by my many variation of fabric or paper paper scissors, tailor chalks and unpickers that, that sewing kit really was the best thing to start my sewing journey and many of the items are still part of my sewing kit today. I stitched my crochet waistcoat with the blue wool needle last week. Used the tailor’s chalk pencil to draw out my design for Charlotte’s ‘salt of the earth’ birthday present. The threads are long gone along with my ever evaporating pins and needles but I still have my tomato Pin cushion! So whenever anyone asks me ‘what sewing equipment do I need to get started?’ I would recommend my first sewing kit. The main reason , because it wasn’t scary. It is just a little blue bag packed full of items to help you on my way but the main reason was that it was so accessible. It is likely that you have passed the stand in the supermarket a hundred times before, it's familiar and I didn’t need to go searching for it. As you may have guessed I’m passionate about getting people sewing. Many of my workshop attendees have never picked up a needle and thread before, let alone used a sewing machine. So I want to make getting started as easy as possible for them. Upcycling is an element that I truly believe helps people get into sewing. You are taking items that you already own or can pick up very cheaply at charity shops and transform them into something unique and new. Being able to pick up good quality sewing equipment easily and at an affordable price is also important, as this can be a huge stumbling block. I want sewing to be accessible to all- regardless of what you can afford or be able to access. I want to prove you don’t need to go very far to get started. Just grab a sewing kit while you’re food shopping and take that old garment from your wardrobe and start a #sewingrevolution! 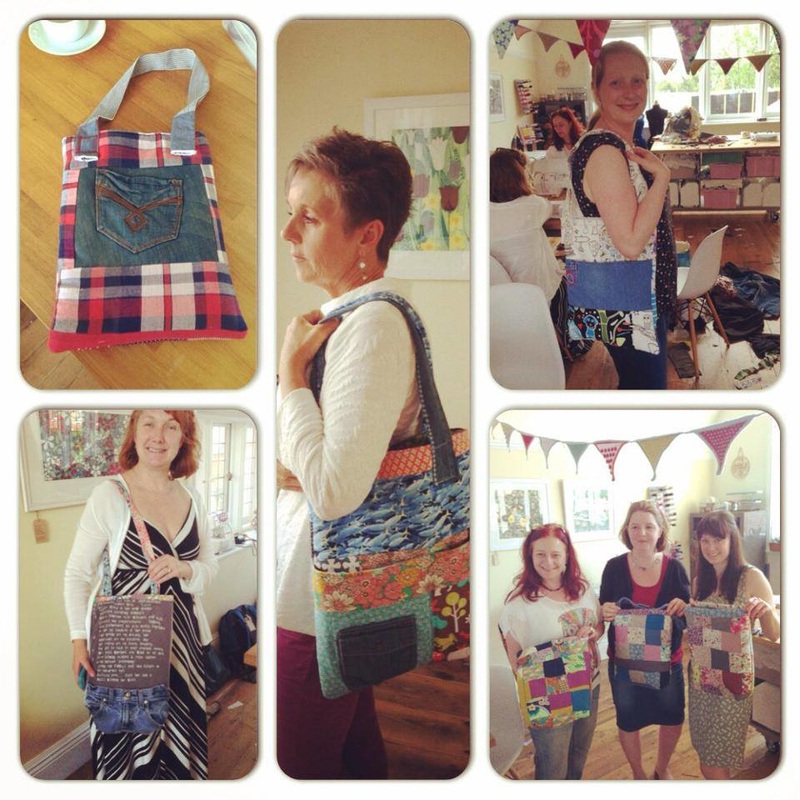 Upcycle Workshop at Guthrie & Ghani - Moseley. Upcycle Workshop at Guthrie & Ghani - Moseley. By taking these small steps and building your sewing confidence you are more likely to continue and improve your sewing skills. I want sewing to be a long term investment not something that turns into guilt for ruining that beautiful and possibly expensive material by the mistakes you made. For me mistakes are an important part of learning and you will make them, So the last thing I want is for you to give up because you don’t want to ‘waste your money’ on it.
I hope that my #sewingrevolution helps to give people confidence in their sewing abilities; to head to the haberdashery and buy that metre of awesome fabric, confident with your wonderful new found skill and completely guilt free. Being able to make something for yourself or others is one of the most rewarding things. Making clothes that fit you perfectly and to your style and taste is a great self-confidence booster, especially if you struggle to get clothes to fit you, for whatever reason that may be. So please, head to the supermarket, pick up a sewing kit and get sewing. There are plenty of online tutorials and workshops available or you can even watch me on create and craft TV so there is no excuses! My next workshop dates are the Great Create Extravaganza 2nd & 3rd October where you will be getting 'my first sewing kit' free when you attend my workshop - book here! For all other workshop details are listed under #sewingrevolution events. Last but not least, If you know how to sew, buy one for a friend and be part of the #sewingrevolution by sharing your skills, it’s important that we keep this awesome craft alive. Viva La #sewingrevolution!
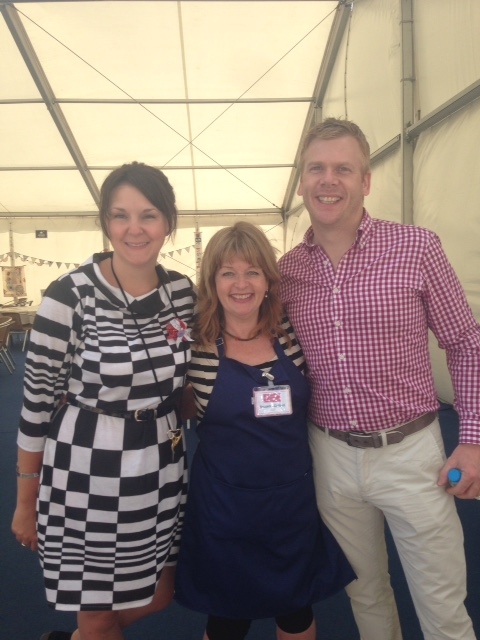
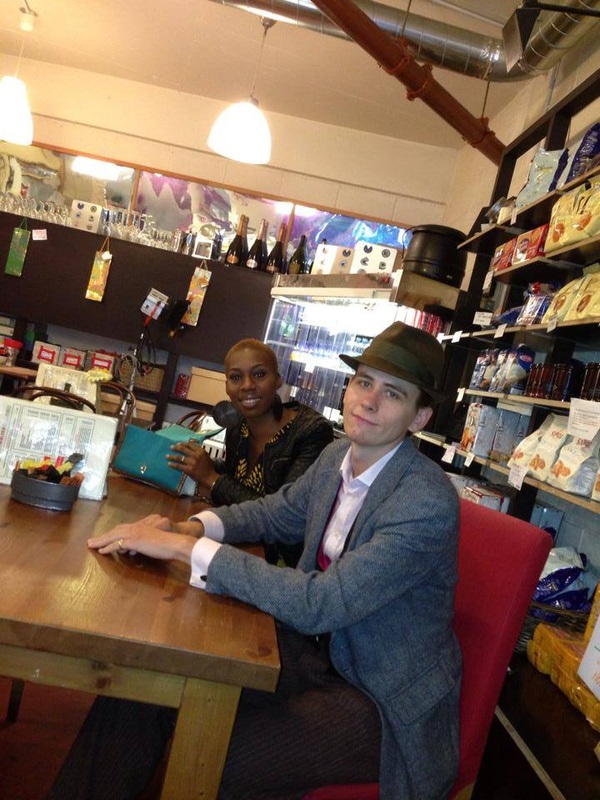
12 Comments
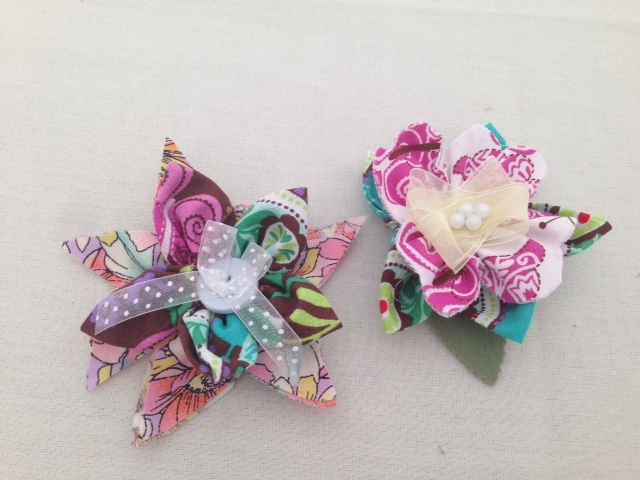
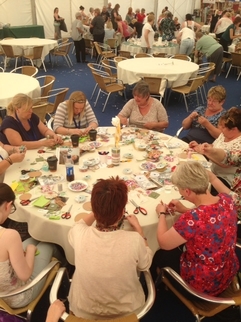
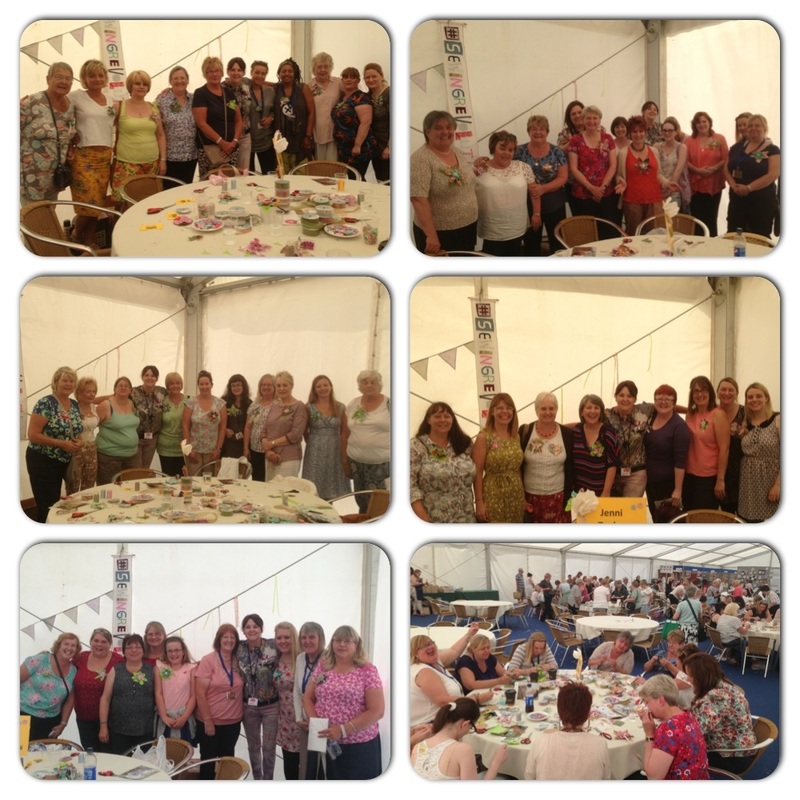
 I was super excited to hear that I would not only be visiting Summer crafting for the first time ever but that I would also have the opportunity spread the Sewingrevolution love! Boom!! For the two days , I was asked to hold a series of Make and Take sessions bringing a sprinkle of upcycle sewing to the event! Summer Crafting took place at Doncaster Racecourse on July 11-12, and this was its sixth year! The event hosted 80 exhibitors covering a wide range of craft products, from ribbons and stamps to dies, decoupage and gift wrapping. There were 2,000 individual places for the make and take sessions so people had lots of opportunities to get crafting with Debbi Moore, Nancy Watt, Tilly Rose, Julie Hickey, Sarah Trebilcock to name a few and me of course. There was also the opportunity to be part of the audience for Create and Craft TV as they were broadcasting live from the event, an exciting first for them! The icing on the cake was finally getting to meet Matt Chapple the winner of GBSB 2015, we have been chatting on twitter and email for ages, so it was lovely to finally catch up for real rather than digitally over a pint and a Tom Jones tribute act…don’t ask! Summer Crafting 2015 was all about entertaining and educating, so it was the perfect event for my #sewingrevolution to get involved. It was a complete pleasure to be part of the summer crafting and Stephanie Weightman’s team. Working on make and take ideas and sourcing materials was lots of fun. In the end we decided on fabric ‘Forever Flowers’ as this is a great project that can be created time and time again which can easily be made at home and are perfect as gifts. I had played around with the ‘Forever Flower’ idea on a previous Create and Craft TV #sewfabulous show and we thought it would be nice opportunity for me to teach the attendee’s what I did live on the Channel. It’s the perfect scrap and notion buster project. The gorgeous selection of fabric was supplied by The Craft Cotton Company so we were very spoilt for choice. Over the two days and 10 workshops later we had a wonderful collection of finished fabric flowers. Each ‘Forever Flower’ had its own individual style as attendee’s added personal extra’s by adding buttons, ribbon and beads. Within the make and takes, I wanted to vary the type of flowers that were being made; so I came up with three flower designs that could be mixed and matched to create different flower designs every time. It was lovely to see everyone wearing different types of finished ‘Forever Flowers’ from each session with a huge smiles on their faces. Many of the attendee’s have never sewn before. The majority of them were paper or stamp crafters so I was over the moon that I was the one giving them there first sewing lesson! In true #sewingrevolution fashion I took a group picture after every sessions to show and share all the wonderful makes with you. So I hope these pictures help inspire you to get those scraps of fabric and odd buttons out and get sewing! Or even head to the Great Create Extravaganza - Harrogate where Ill be holding a series of Forever Flower Workshops and not forgetting your free 'get sewing' sewing kit thanks to Korbond!
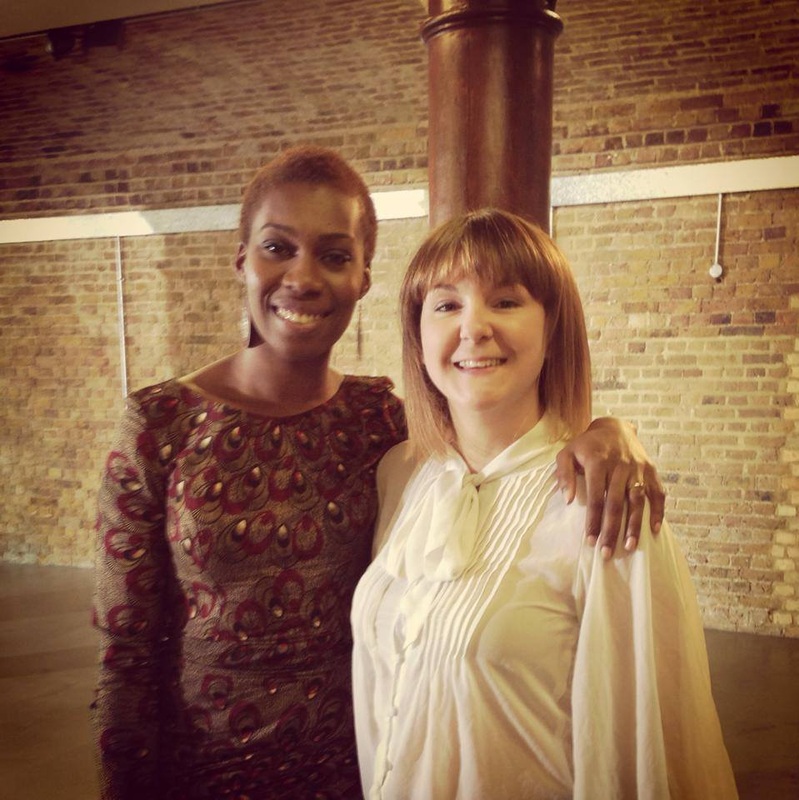
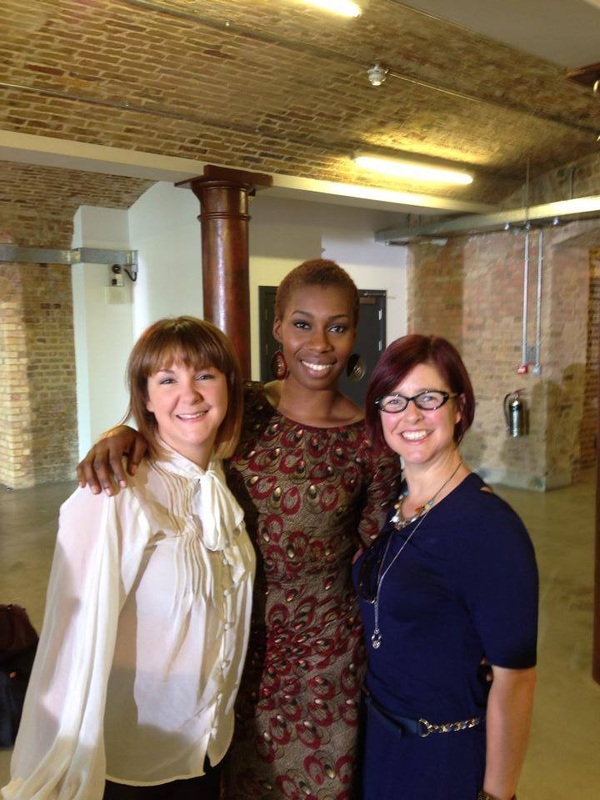
Using #sewingrevolution upcycling techniques to cheat your way to a vintage blouse.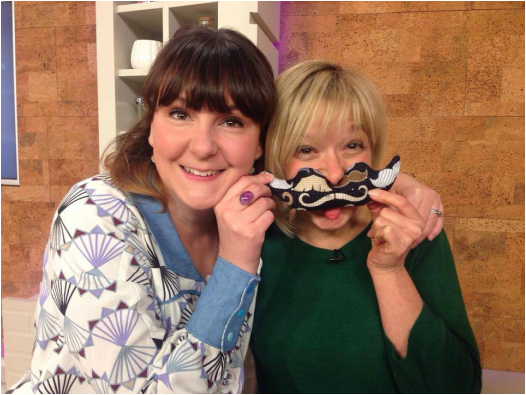 Leonie and I having fun on Create and Craft TV Leonie and I having fun on Create and Craft TV
If you follow my Instagram and facebook posts as well as my live demonstrations on Create and Craft TV you will know that I love an upcycle project!
Transforming old items into something completely new is a buzz, a little challenge if you like. My favourite #sewingrevolution workshops are my sewing clinic’s where I never know what the attendees are going to bring or want to make until on the day. I have to think on my feet and come up with several project ideas using only the materials we have to hand. It’s exhausting but very rewarding work as the tutor. I love teaching people how to look at old items differently while they are also learning new sewing skills. Showing that you can make wonderful and unique items with things that you were going to throw out or taking those precious items that you cannot bare to get rid of but just don’t know what to do with it. 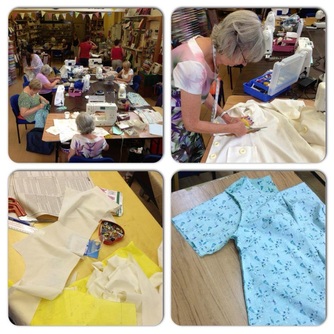 #sewingrevolution Sewing Clinic Workshop #sewingrevolution Sewing Clinic Workshop
It’s always a special moment when a person bring something very personal, like old baby clothes or their mothers old coat.
At first it is very reluctant to start cutting into the item and it will always means a trip down memory lane. So I feel very privileged when people tell me and the group their family stories. It seems to give them a little more courage to get hacking knowing that these memories will no longer be in the wardrobe hidden away, but transformed into an item that will be used and loved again. Upcycling doesn’t have to be tricky though, I love to combine new fabrics and commercial patterns with elements of old items especially when wanting to get a vintage look. 
My Mom had a blouse that she used to call it her ‘cheese cloth top’ and she lived in it. So much so that it completely disintegrated. I would kill for that top now it was a lovely light cotton with hand embroidery around the neck coupled with a little lace detail, very Fleetwood Mac/ Stevie Nicks, very hippy chic. Simplicity have a pattern which 100% reminds me of my mom in this top when I was a kid. It’s the New look pattern 6027 which I thought would be the perfect addition to the simplicity bloggers circle as well as the foundation for my sewing project. As soon as I saw this pattern I knew I wanted to recreate my mom's top. Problem is I don’t have time to hand embroider the fabric, so I thought I’d do an upcycle cheat. 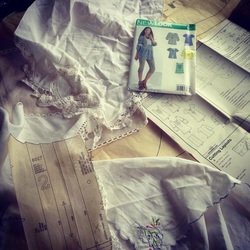 Sew vintage. Sew vintage.
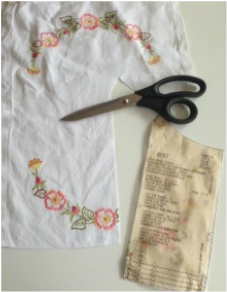
After scouring the local charity shops, I came across several different types of Table clothes, Doilies and Handkerchiefs with either printed, machine or hand embroidery detail. Just perfect and all around 50p to a £1 an item, I purchased several as I was sure they would come in for other projects.
In the end I used a medium sized Doily which was about 1/2 a metre squared to give me the hand embroidery detail on the front of the blouse. It had cute pink flowers and also a yellow and orange seed head, which arched. I wanted to take advantage of this shape for the front of the blouse. This was the first Vintage cheat. I then removed the cotton lace edging off a different table cloth by unpicking it carefully and then added this to the sleeve at the elbow - Vintage cheat number two.
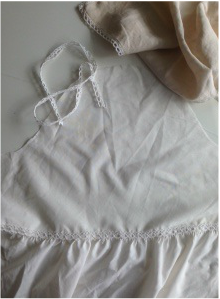
For a third Vintage cheat, I did take it a little further and used a large white cotton bed sheet for my main fabric because it was a wonderful quality, had obviously been washed several times as it was super soft and again only £2 from the charity shop; A complete bargain! There was so much fabric that I think I can make another top out of it, which is great news as the pattern has five variations.
So there you have it. Add a little vintage inspiration to your makes by upcycling those little elements at a fraction of the cost and also time! Start your own #sewingrevolution makes and don't forget to send me pictures! 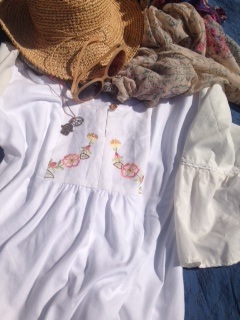
Fake Vintage Embroidered Blouse. #sewingrevolution.
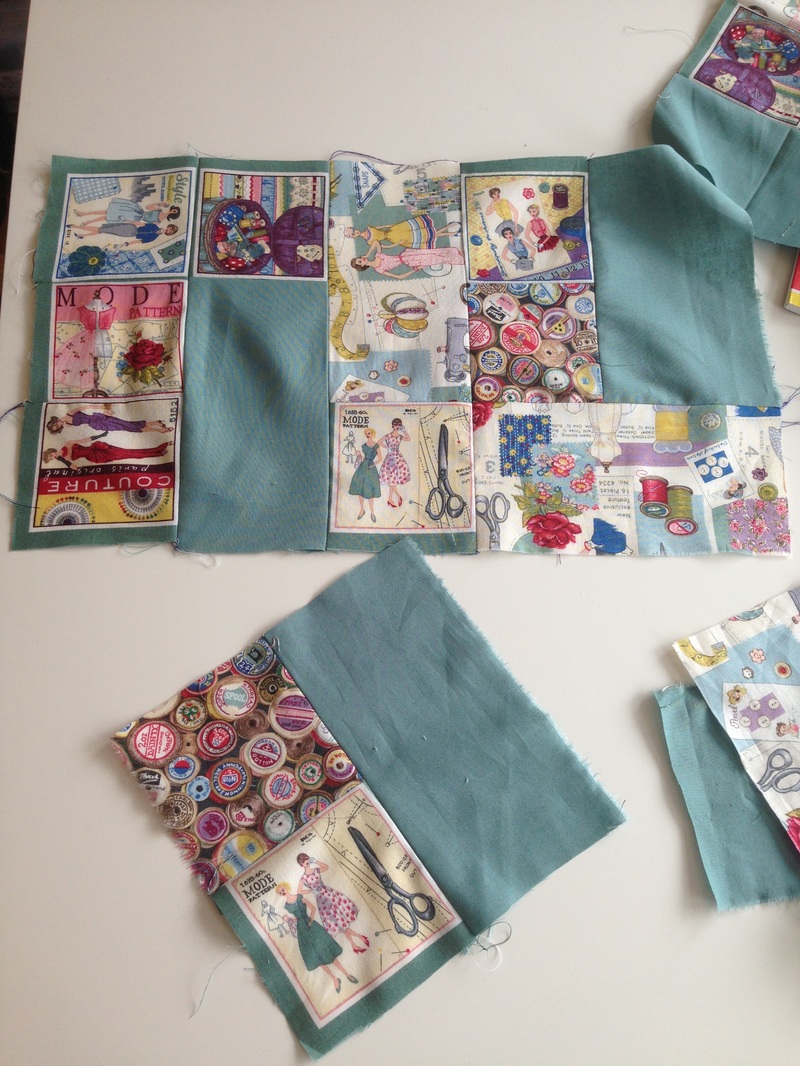
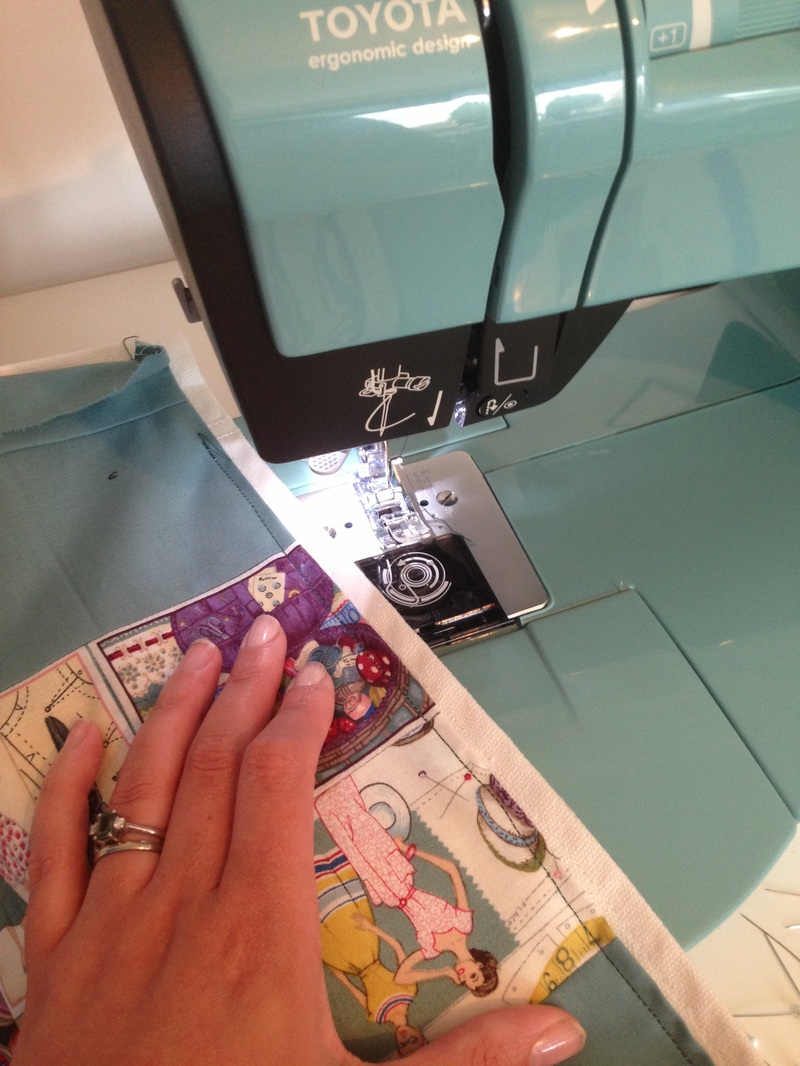
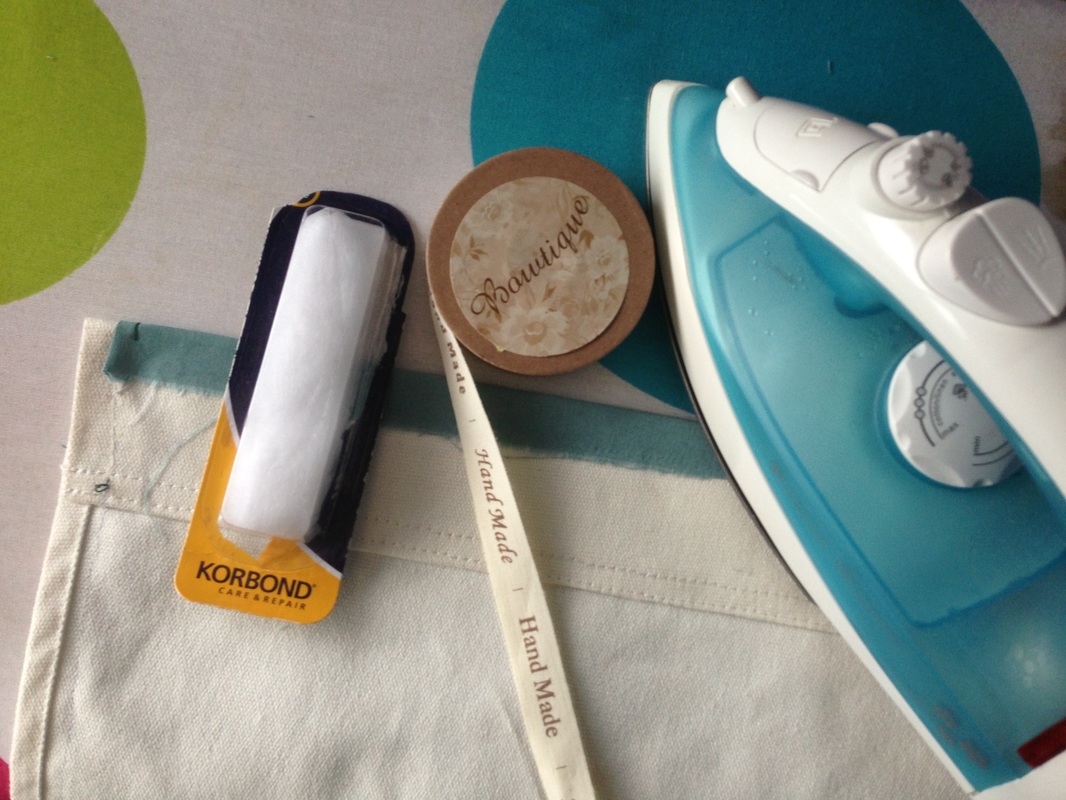
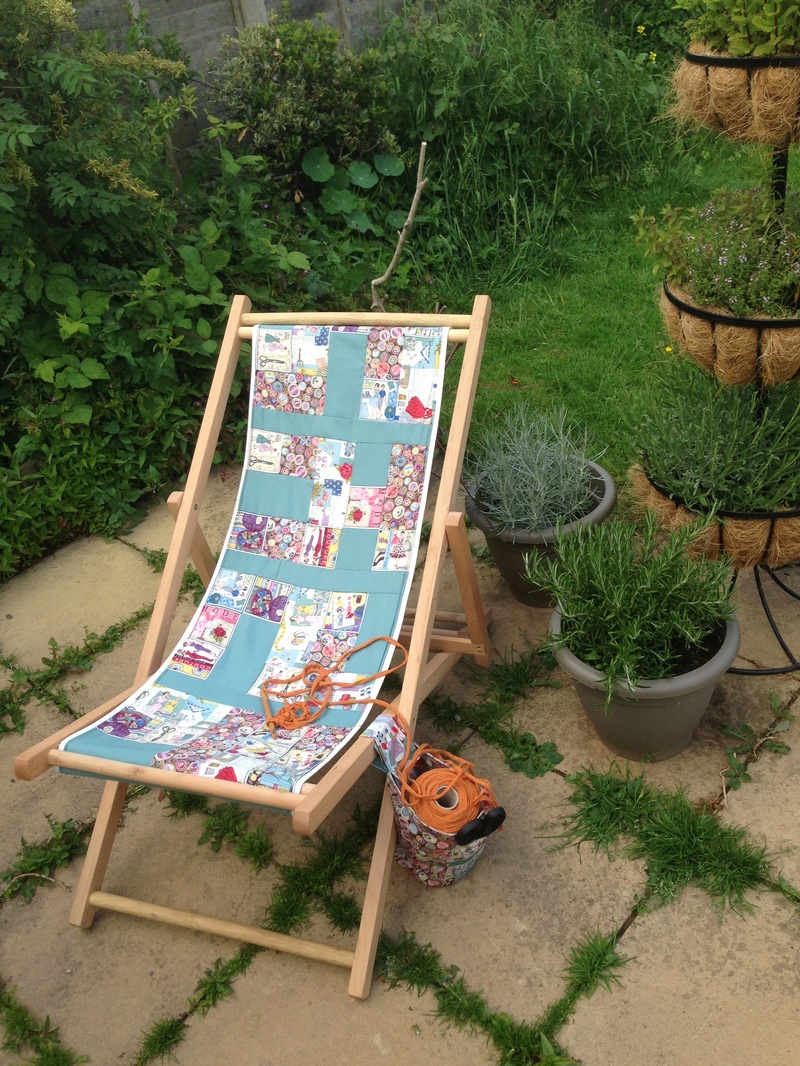
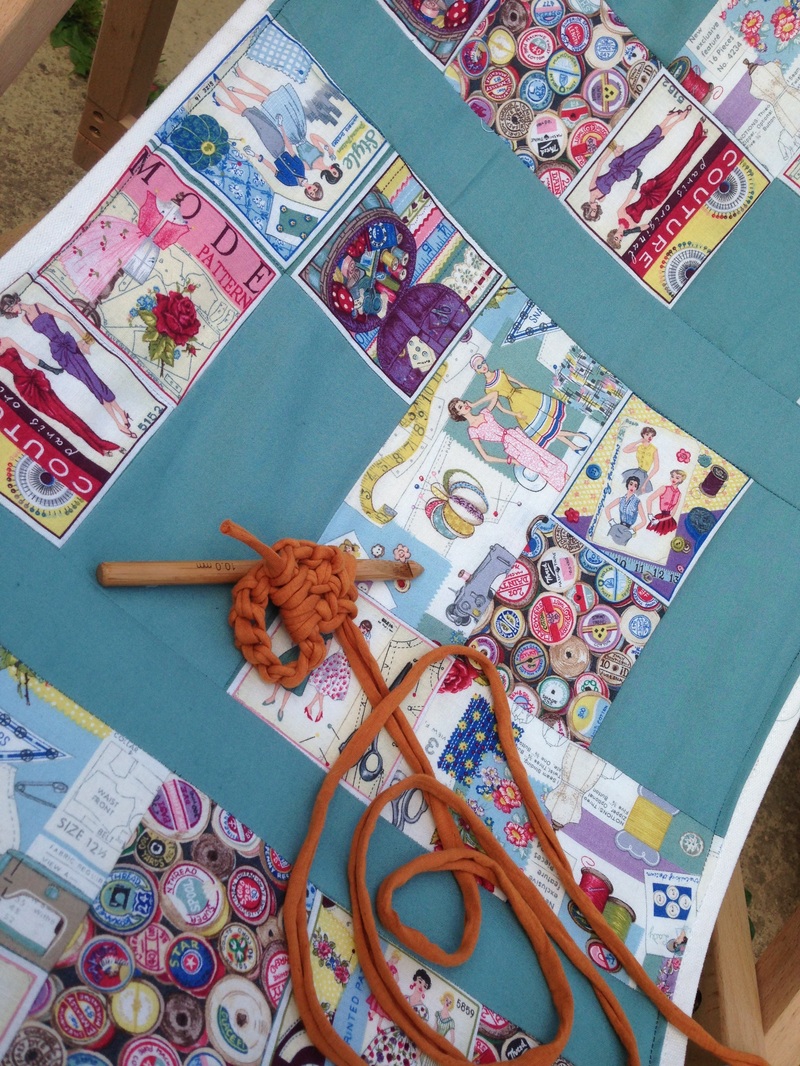
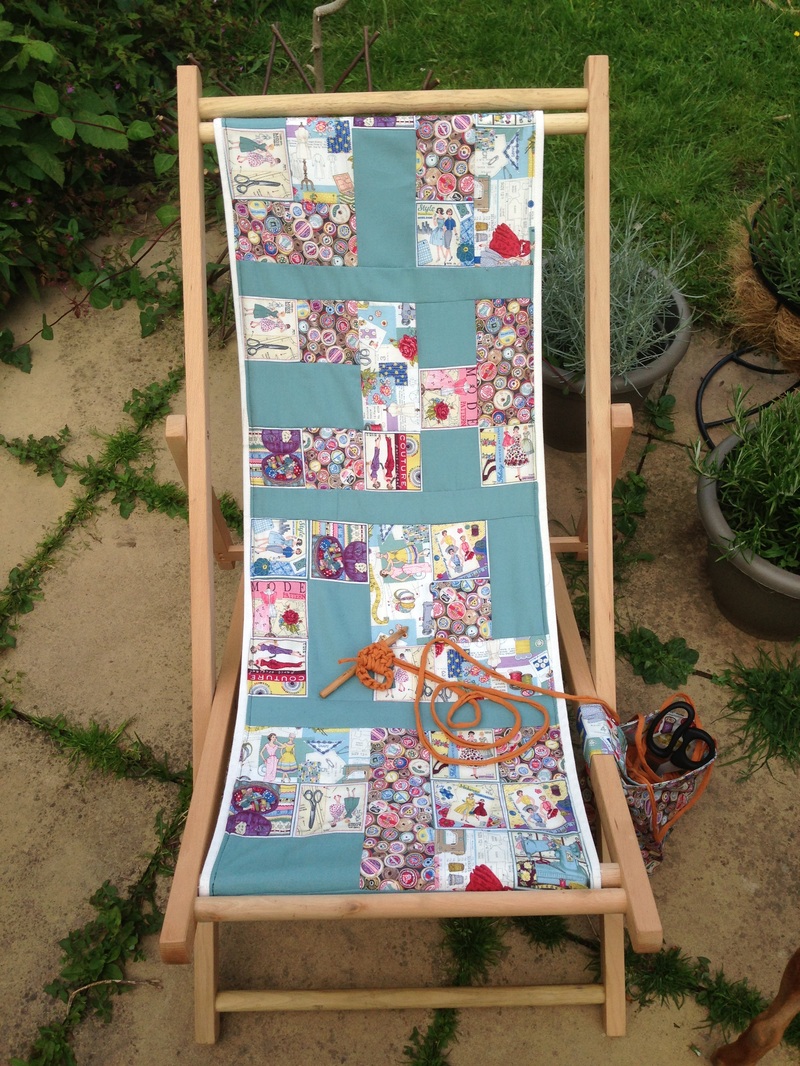
#Sewingrevolution upcycling Summer Challenge.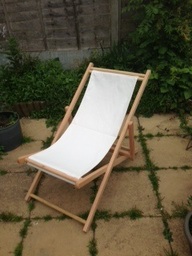 Deck chair waiting for it's #sewingrevolution make over. Deck chair waiting for it's #sewingrevolution make over. Never one to shy away from a sewing challenge, I was approached with an unusual propsal. Oceanfinance.co.uk have tracked down twenty creative bloggers and challenged them all to upcycle a plain deckchair. Armed with a Hobbycraft voucher and deckchair, I accepted this exclusive challenge and headed to Wolverhampton Hobbycraft for some inspiration. I knew that I wanted to theme my project around my love of sewing and craft. I wanted it to be a practical as well as a really funky chair and with the weather starting to brighten up, I wanted to be able to craft outside while grabbing a tan of course! With these aims in mind and the help of the lovely staff, we got to work. I think I spent about 2 hours in there looking at everything craft related. In the end I decided to go with four 1/4 meters of some awesome sewing related fabric which I was going to patch work for my seat. The fabric had a great retro feel to it with old sewing labels, patterns and images. There was also a cracking cotton reel fabric which I coupled with a lovely plain minty teal fabric. 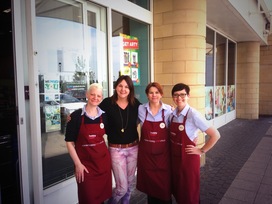 The lovely staff at Hobbycraft! The lovely staff at Hobbycraft! While on my expedition I came across these large bundles of yarn, which was actually strands of t-shift fabric rather than wool. This was perfect! An opportunity to learn a new craft while sitting on my 'to be upcycled' deck chair. So I decided to apportion a little of my strict budget on two yarns of Boodles in orange and yellow along with a 10mm Bamboodle crochet hook. I'm already thinking of the clothes I can cut up to make yarn for future upcycling projects, but I better learn how to crochet first. One challenge at a time Jenni! After a quick picture with the lovely staff, Rachael, Jac, Melanie and Andy ( who was taking the picture) and feeling dead proud that I had stayed within budget, I was ready to get started. 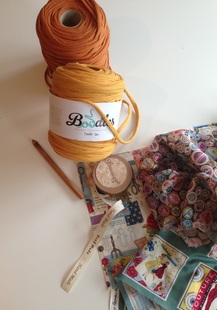 Back at #sewingrevolution HQ, I decided that I wanted to make a little bucket pouch that could be connected to the side of the chair. This would be the practical element that I wanted to include. Something to keep my scissors, wool, threads, material, bottle of wine and snacks that sort of thing while I craft away in the sun. With my next challenge waiting, I wanted to make sure my pouch would be big enough to hold one of the Boodles yarn, which is about 14 inches in circumference. So before started to cut up my fabric to make strips for the patch work. I cut out two large rectangles of the vintage sewing and reel fabric along with some of the vintage sewing label fabric for a front pocket. For my bucket pouch I need enough fabric to wrap around my yarn to create a tube, a circular base and strap - twice; as I wanted to also line my pouch. This was about 25 by 10 inches for the lining and again for the main fabric. You can obviously make yours as small or as large as you like. It's a really simple construction as it is the same pouch, made twice and then inserted inside each other, wrong sides together. Then finished with a top stitch on the edge. So I could attach my bucket pouch to my deck chair, I've added a strap and Prym Snap fasteners to secure it around the leg of the chair. I added the strap before sewing the two pouches together. I also wanted a little detail on the front so I added a pocket. A little something to keep your scissors or knitting needles out the way. 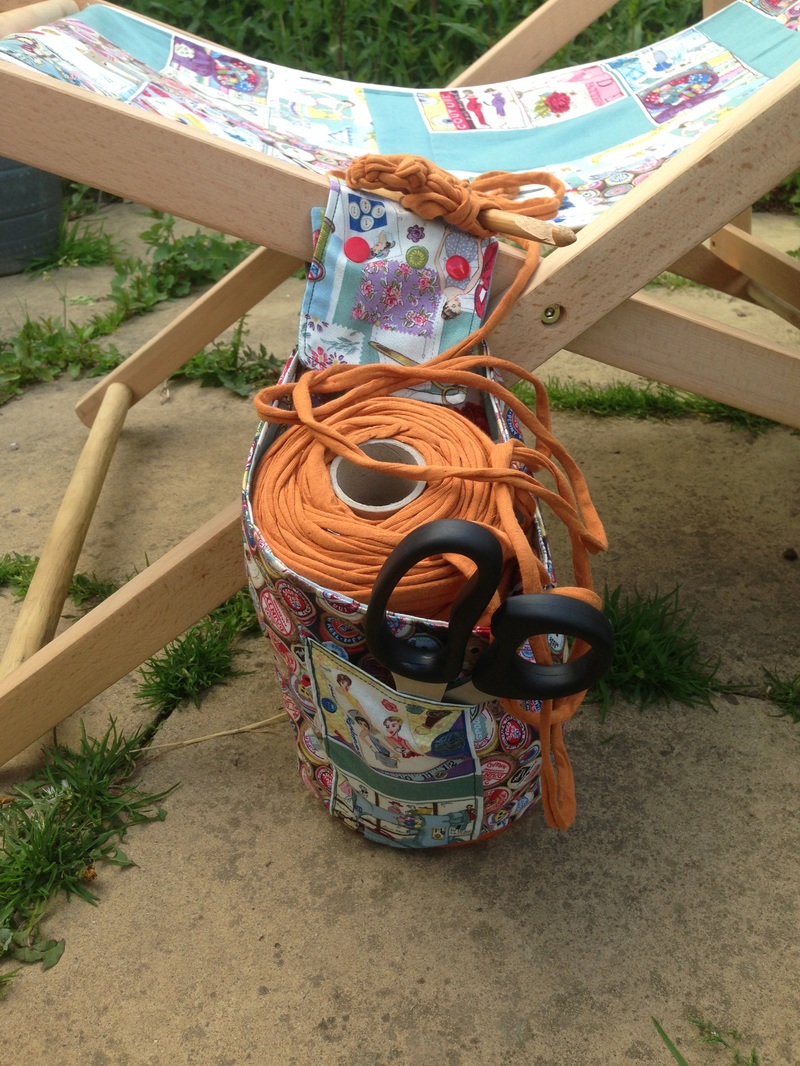 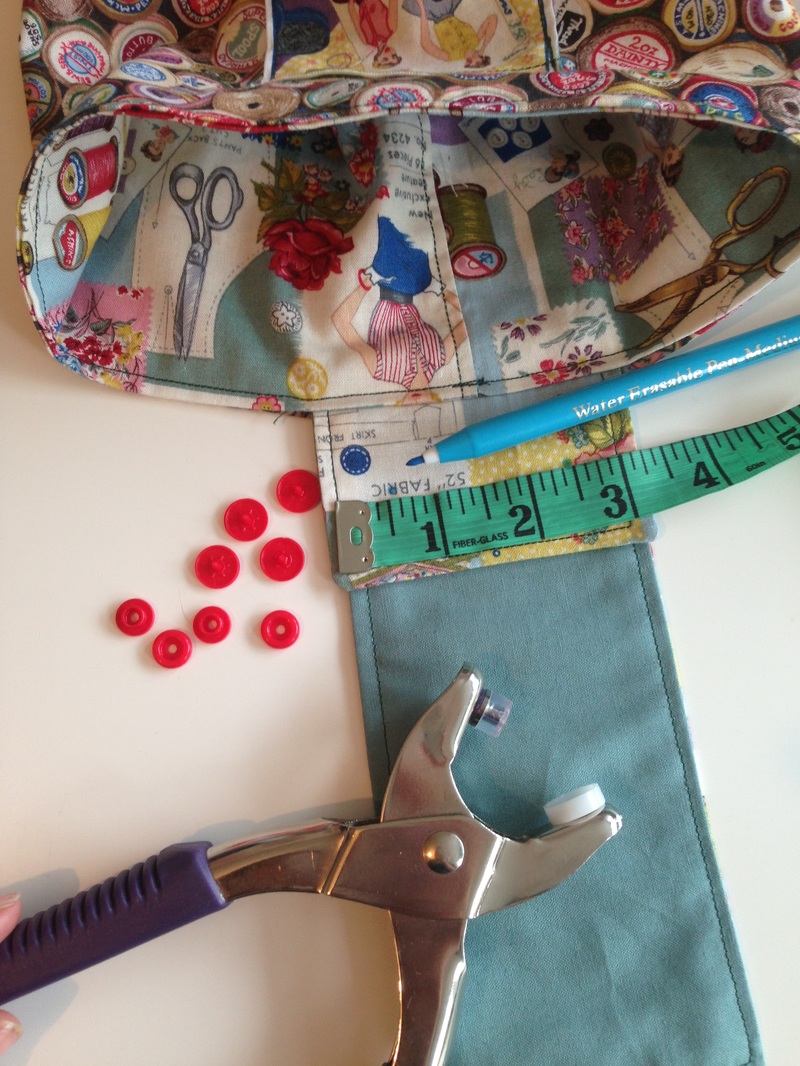 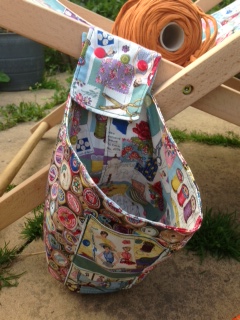 With my bucket pouch complete, I then took the remaining material and cut into long strips. Making sure that the width of the strips were all the same size so it makes it a lot easier to patch with. I wanted to go for a shabby chic look so I decided to use a combination of squares and rectangles to create my new deckchair seat. As I only had four difference styles of fabric, I tried to make sure that the same style was not stitched together, but I wasn't to bothered if it did; it all adds to the shabby chic look. Using the original seat cover to measure how big I needed my patch to be, I continued to piece together until it was big enough to cover it. Rather than completely replace the seat, I used the old white seat cover as a backing to my patch. Not only did this add strength to my seat but also covered up all my seams on the back of the patch work. After giving the patch work a good press and creating a small single hem on all the sides, the patch was ready to be pinned to the original seat cover. I secured it with a visible top stitch and used a white thread for the bobbin, so you couldn't see the stitches on the other side. I had to finish the top and bottom ends with a little hemming tape and hand sewing as I didn't want to sew the channels shut as that is where the wooden poles go into to secure the seat in place. I wanted to make a feature of this, so I added a printed cotton ribbon which said 'handmade'. Too Cute! 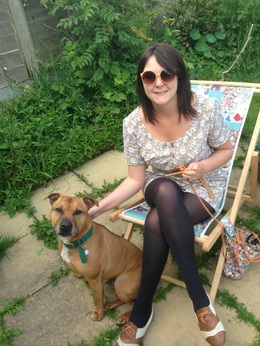 Waiting for the sun! Waiting for the sun! With my new seat cover and bucket pouch in place; my #sewingrevolution deck chair upcycle challenge is complete and I'm ready to start my next new challenge!
Crochet! Just waiting for the sun to make an appearance first. Thank you to Oceanfinance.co.uk for this awesome upcycling challenge. I hope you like it everyone! Why not have a go yourself and use your left over fabric scraps to freshen up those old deckchairs in the shed! Even make a bucket pouch too! If you need help - check out #sewingrevolution Events for a sewing clinic workshop near you! Remember 'Creativity is Contagious - Pass it on!' so don't forget to share pictures of your makes on my facebook or twitter pages using the #sewingrevolution hashtag! 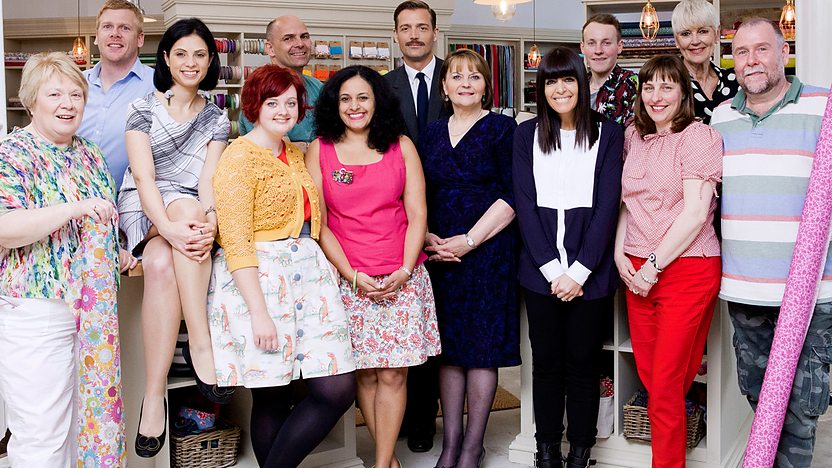 #GBSB Class Of 2015 Why Does It Have To End So Soon!With only one more sleep to go, I'm filled with sadness as it can only mean one thing. The Final of the Great British Sewing Bee 3 is nearly upon us. I normal love to wish the week away, ready for the weekend filled with fabric, threads and family time; but not this week!
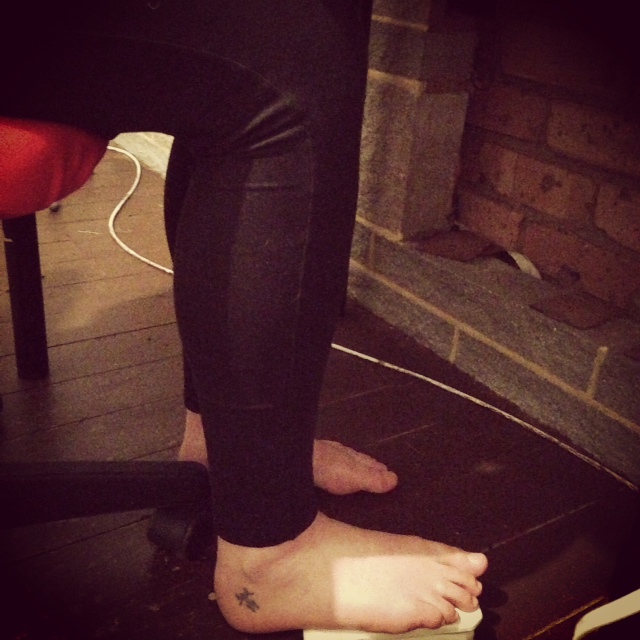
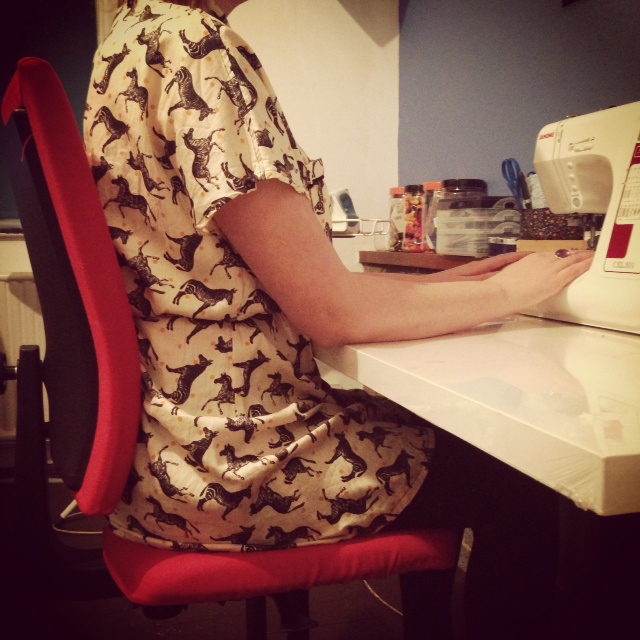
I have really enjoyed being the spy this season; working with Sew Magazine to publish a weekly blog about my thoughts on the Bee's and their sewing challenges. So not only do I not want the show to end because I LOVE WATCHING IT, but I'm very much enjoying my own little assignment of writing to a deadline and for someone else other than my personal blog. The tight next morning deadlines really have been a challenge, especially with having to get up for work at 6am the next day. That being said its been a wonderful experience and another mile stone towards my #sewingrevolution. If you want to catch up with my blog installments before tomorrow's last stitch! SOB SOB! Head over to http://www.sewmag.co.uk/great-british-sewing-bee Lastly, I just want to congratulate all the Bee's on their hard work to firstly get on the show ! Not forgetting to wish the Final Three - Good Luck tomorrow and Don't Drop A Stitch! Don't forget to tune in to BBC2 and read all about it on Friday over at sewmag.co.uk! Want to get the down low on the Great British Sewing Bee Series 3? Well, every week yours truly will be guest blogging for SEW - Home & Style. With only 24 hours to go before the next installment, I cannot wait to see what the judges have in store for our sewing eager contestants. With my pen and paper ready I will share my thoughts on the challenges, the makes and last but not least the contestants. With my behind the scenes knowledge and experience, I'll be letting you know who I'm tipping for the top each week! If you missed last weeks blog you can catch up over on SewMag.co.uk check it! My next #GBSB blog installment will be available on Friday 13th February. Good luck fellow Sewing Bee's and see you on our screens tomorrow.  Class of 2015 - All poised and ready to go! Reliving The Great British Sewing Bee - Class of 2014 Reunion. 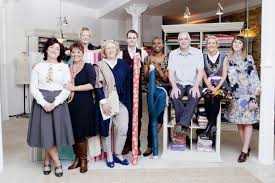 Great British Sewing Bee Class of 2014. With the BBC revisiting our time on the Sewing Bee with the Class of 2014; You know that this means term time for the Class of 2105 is just around the corner. Who is excited? I know that I am! Watching the reunion show brought back all those wonderful and sometimes very stressful memories. So much so that having been through that experience and coming out the other side, I felt I wanted to share a few little insider tips and advise for any future sewing bee's. So here goes...... Jenniffer Taylor's five Insider Tips For Future Sewing Bee's. Keep Your Head! Jenniffer Taylor's Five Insider Tips 1. Keep your head – Us crafty lot can become very devoted to our makes. I know that I feel like I have put a little bit of myself into each project, so to have feedback especially negative feedback, you cannot help but take it personally. I know I did while on the show. My advice to any sewer is to not take it to heart. You can only improve and learn with every ‘rubbish’ garment and mistake you make. Keep your head and listen to the feedback. There will always be little nuggets of great information that you can learn from. You cannot be amazing all the time, even if you do try and strive for perfection. 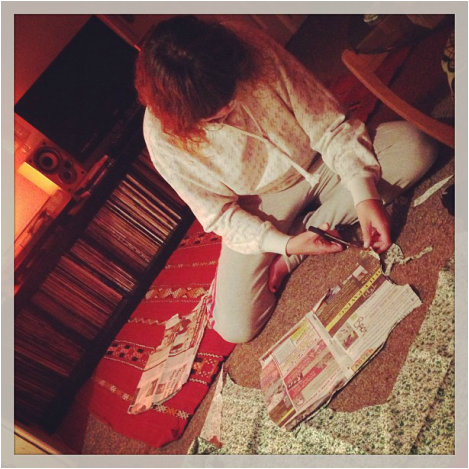 sew like no one is watching - Jenniffer Taylor's Five Insider Tips.  Wizard's Sleeves Patrick? Come on its RETRO Wizard's Sleeves Patrick? Come on its RETRO 2. ‘sew like no one is watching’- What I mean is sewing gives you the ability to make whatever YOU want. I like to think that on the show and to this day, I have stayed true to my style, even though it may not be to everyone’s taste. YOU, are what makes this craft so special and for all the feedback you may receive, if it’s not process related and it’s style related DON’T LISTEN! Telling someone their ‘gathers are not even’ is different to ‘not sure about that colour fabric’! Style and Construction are two different things in my book, so ‘sew like no one is watching’ because it does not matter what they prefer anyway! Be you!  Out Of Your Comfort Zone - Jenniffer Taylor's Five insider Tips 3. Out of your comfort zone – To anyone wanting to sew, I would say always sew out of your comfort zone. It is easy to stay with the same ‘A’ line skirt as you have mastered it. I think the reason why I got onto the sewing bee after only a year of sewing was because I was constantly pushing myself with different projects rather than sticking to what I felt safe with. Even while on the show I was trying new things like drafting my first pattern when making the night gown. Probably not the best time to be experimenting while in a competition but looking back I’m glad I did. I think this is what kept me in the competition for so long considering I was the one with the least experience. I was not afraid to try. Now not everyone is going to apply for the sewing bee, but I think it’s good to push yourselves a little sometimes, you never know where it may take you!  Women are always right - Jenniffer Taylor's Five Insider Tips 4. Women are always right! So men are on the left. It’s a little rhyme I made up to remember what side garments dress too. On women’s clothes the right hand side of the shirt goes over the left hand side. Therefore for men’s clothes the left hand side goes over the right! This helped me remember which way the fabric lay and I could figure out the button holes and trouser from that. 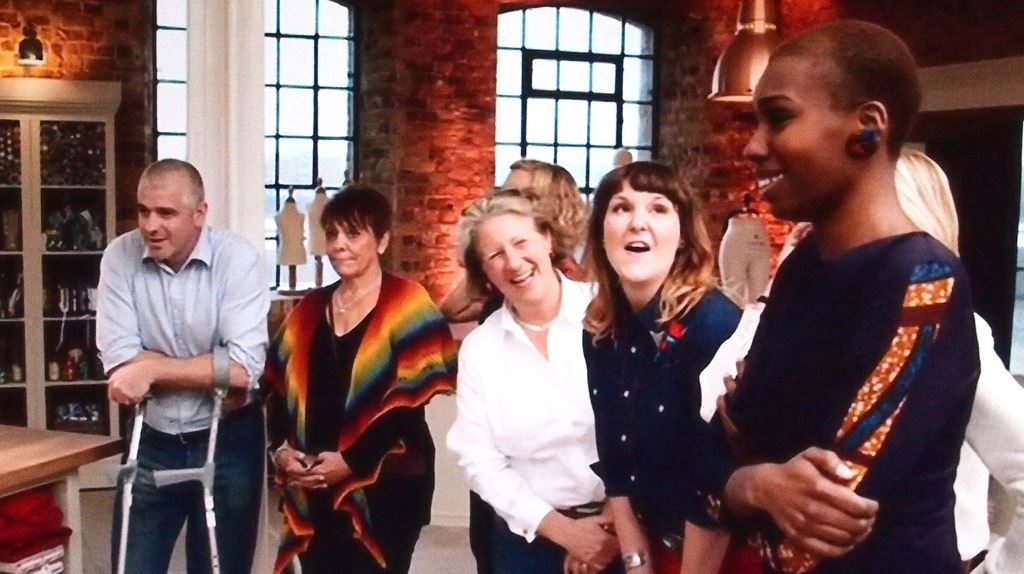 Have Fun - Jenniffer Taylor's Five Insider Tips. 5. Have Fun! Sewing is supposed to be fun so don’t take it too seriously! The minute you stop loving what you are doing then the magic of the craft has gone. You are less likely to come up with new ideas and be inspired. You are more likely to make mistakes through being frustrated or rushing, and no one wants to do something they don’t like. I found the moment I embraced the competition, I began to score higher in the judging. I was enjoying myself and getting better results for it. The moment I started to question what I was doing or getting stressed about it, was the time I didn’t sew as well. I think the same applies to my sewing room at home. The more pressure I put on myself, the less I get done. Sometimes it’s better to put the project down for a while and come back to it, rather than stick with it and end up ruining it. Play music, have a dance at the ironing board with a glass of wine whatever you have to do but have fun! If only I could have had a glass of wine while on the bee, it could have been a different story! I hope you find the tips helpful and they are really applicable to anyone wanting to take up sewing. You don't have to apply to be on the Sewing Bee to take a little #sewingrevolution advice. Good luck to my fellow Sewing Bee's of 2015! Its going to be a crazy ride! Tune in February 5th!!! 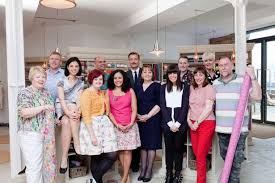 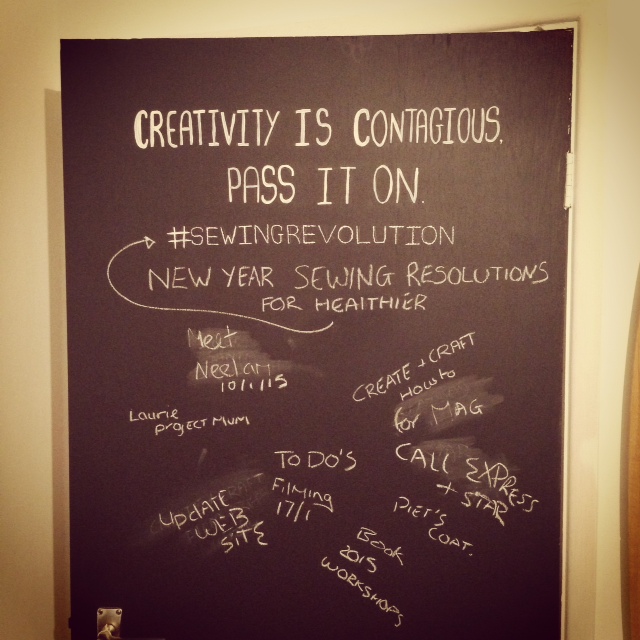 New Year Sewing Resolutions For Healthier #Sewingrevolutions With the start of the new year, I'm feeling inspired to be creative. With exciting live broadcasts with Create and Craft TV and a collaboration project with Neelam Meetcha, the #sewingrevolution is beginning to take off. Therefore I think 2015 is going to be a busy one. If you are anything like me you also try and grab as long as possible at your sewing machine. Alternatively, you have been a work all day and you still try and cram in a few hours at your sewing desk. Desperate to get a garment or project finished and you have not had a break, something to eat, let alone a cup of tea. Your poor body is aching from those hours at the needle and at work, as a result you cannot even stand up straight to wear the garment you have slaved over or appreciate the project you have successfully completed. Well here are my top sewing resolution tips to ensure the perfect posture to go with that perfect garment. With additional benefits to boot, making those #sewingrevoultion projects a healthier one! Size up that Sewing Station.I know you have all searched the internet for the must have pattern, been on endless shopping trips to find the just right fabric to ensure the ultimate garment. Well, it is time to give your sewing station the same level of love and attention. We are all guilty of trying to spend as much time as we can at the sewing table, therefore it is really important that we make your sewing station a comfortable and caring place for your body, in particular your back. 1. Get a good chair! As much as you love that antique dinning chair that you have shabby chic’ed to perfection, does it really support your back? The answer is, probably not. You ideally need a chair that can be easily adjusted in height, seat and at the back rest. A chair that has wheels will also be an advantage so you can move close enough to your work without hunching or leaning forward to see it. 2. No dangling feet or one foot stretched out to operate the foot pedal. This position will be rotating your back for long periods, a big no-no! So stop tap dancing for that foot pedal and bring it closer to you. 3. Ideally your upper arms, lower legs and back should be at right angles to the floor. So adjust your chair to achieve this position. You should not have your hands higher than your elbows. So having a table you can adjust as well may help if you are particularly tall or short. For the best seated position your forearms and wrist should ideally be level. 4. Head down to Ikea, they have a great range of chairs and tables that can be adjusted to suit you at very reasonable prices. They are pretty funky too.
DRINK!Now this is something that I’m guilty of not doing enough of (excluding wine of course), so not only will this tip help keep us all hydrated but it will force you to take those important breaks away from your sewing station. 1. Stand up while waiting for the kettle to boil and decide on what to eat for dinner. Alternatively you could even review the next steps of your pattern’s instructions while standing and drinking your drink. This way you are technically still sewing and taking a break from your seated position. Multitasking at its best. 2. Drinking anything would be an improvement for me, so I would suggest drinking anything you enjoy as long as it has water in it. Drinking more will generally help skin to look better, helps energise muscles, controls calories if you as sticking to low calorie drinks and helps remove toxins from your body. 3. Do not take your drink to the sewing station! With this tip you need to be firstly drinking all of your drink and in the time it takes you to do this, you are also taking a needed break away from your chair. Now no cheating! 4. Set a timer! Depending on how long you have been able to steal from your day to be able to do some sewing; factor in some drink/desk break times. Recommended ‘desk break times’ for someone who works in an office is short break around every 20 minutes. Now this time scale just is not going to happen, so I would suggest at least every hour. I know that would be a huge improvement for me even if it is just to sip a small teacup of earl grey. How about you? 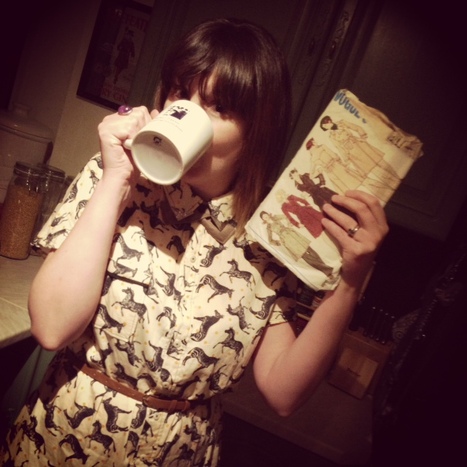 Time for a cuppa and a run through my pattern instructions. Get up now, Get on up! James Brown.In addition to your drink/desk breaks this small change will help achieve the recommended every 20 minute desk break and you won’t even notice you are doing it. MOVE YOUR IRONING BOARD. It seems so practical to lower your ironing board so it is level and closer to you and at the position where you don’t even need to get out of your new wheelie chair. While this will make things quicker and easier to finish that garment now, it definitely will not later when your back completely gives out. 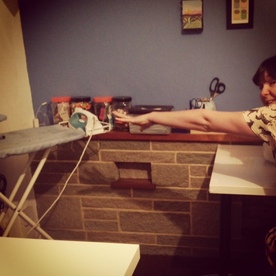 MOVE YOUR IRONING BOARD! MOVE YOUR IRONING BOARD! 1. Moving your Ironing board just a little so you have to get out of your chair and stand while you press, could be the small change that your back is waiting for. 2. Where possible cut out your fabric on the ironing board rather than leaning or bending over a shorter table. For projects that have smaller pieces to cut out, you have no excuses people! Your standing ironing board can be adjusted to the perfect hip height for this. 3. If you are lucky enough to have the space, invest in a cutting table that can be adjusted to your hip height. Not only will the standing help burn calories and is good for circulation, it will stop you from stooping over the dining room table. Happy backs all round. Let’s get physical! Olivia Newton-John.Don’t worry you do not need to run up a leotard for this… unless you want to of course. Mine would definitely have tassel’s. Anyway, doing a few stretches after you have completed your sewing task could really make a difference to your posture and will definitely keep your body happy. Here are a few little exercises to help relieve those aching muscles. 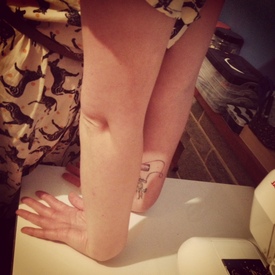 Tired wrists? Carpal Tunnel Reliever. Tired wrists? Carpal Tunnel Reliever. 1. Carpal tunnel reliever- This is good for tired wrists. Standing at your desk and keeping your arms straight. Place the back of your palms on the desk with your fingers pointing upwards. Slowly bend your knees to feel the stretch. You will not need to bend very low at all to feel it work and you ideally want to hold it for 10 seconds before releasing slowly.  Wooden Leg Exercise. Wooden Leg Exercise. 2. Wooden leg exercise- This is good for your lower body. While sitting with a straight back, extend one of your legs out straight and raise while flexing your foot. This will help to stretch out your leg muscles. Again hold for around 10 seconds and then lower slowly. Repeat on the other leg. 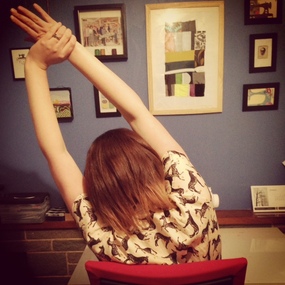 Give it a Pull! Give it a Pull! 3. Stretch – Great for upper back and sides. Stretching your arms towards the ceiling then hold your right wrist with the left hand. Sitting up straight pull with your left hand. Keeping your shoulders down. This will stretch your right hand side. Hold for 10 seconds and return slowly to the upright position. Now repeat on the other side. 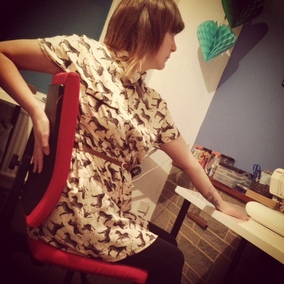 A good twist. A good twist. 4. Twist – Good for lower back. Sitting up straight in your chair, stretch your arms toward the ceiling first then put your left hand on the desk, grab the back of the chair with your right hand and twist to the right. Hold this for10 seconds and slowly release by raise your arms toward the ceiling again to face the front. Then repeat on the other side. 5. Make sure you are breathing while doing these exercises. You will be surprised how you forget to breath when doing exercise. So deep breath in through the nose and out through the mouth. Doing this breathing exercise on its own is also good for stress relief. 6. Repeat the exercises. You can do these as many times as you like but be aware these should be very gentle exercises. If you are cooking up a sweat you are definitely doing something wrong. Take each exercise slowly and gently remembering to breath as you go. Please consult a doctor if you have any health concerns before carrying out these exercises. 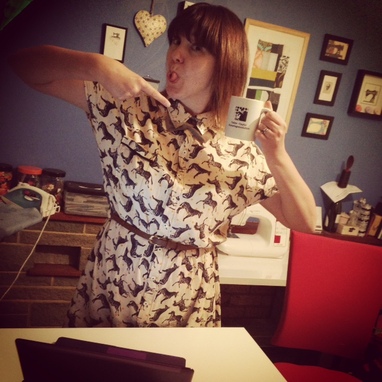 Practice What You Preach! Cheers! Viva La #sewingrevolution In true #sewingrevolution style, I hope these top tips help to not make sewing back breaking work but support you to sew for longer. Have fun and let me know how you get on. I’m already practicing what I preach as I have written this blog standing up and have finished a cup of tea while proof reading! Check me out! Viva La #Sewingrevolution !
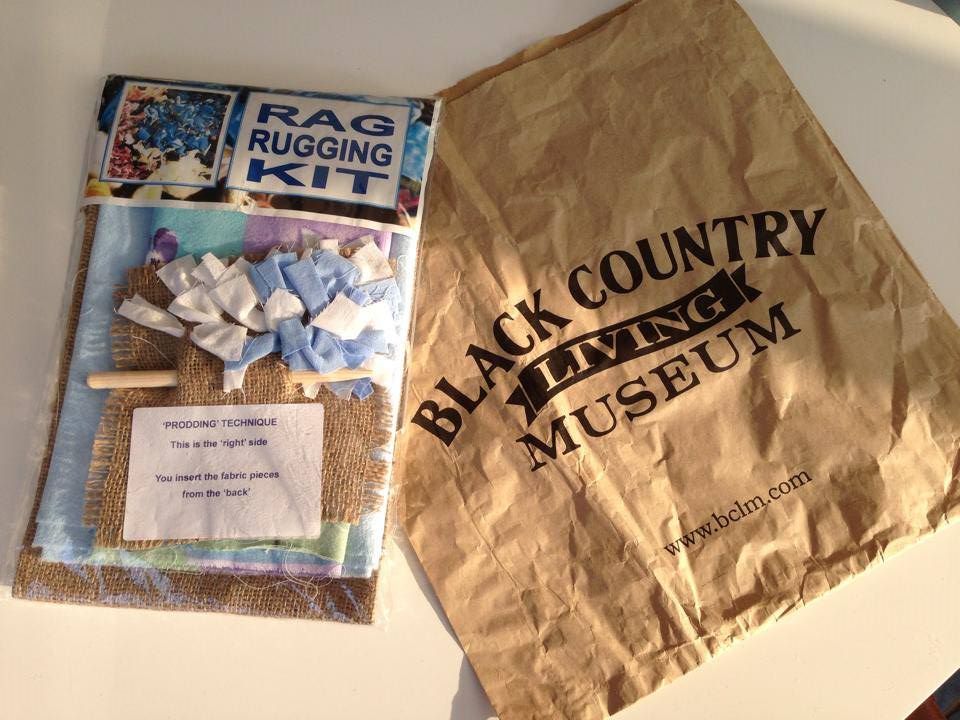
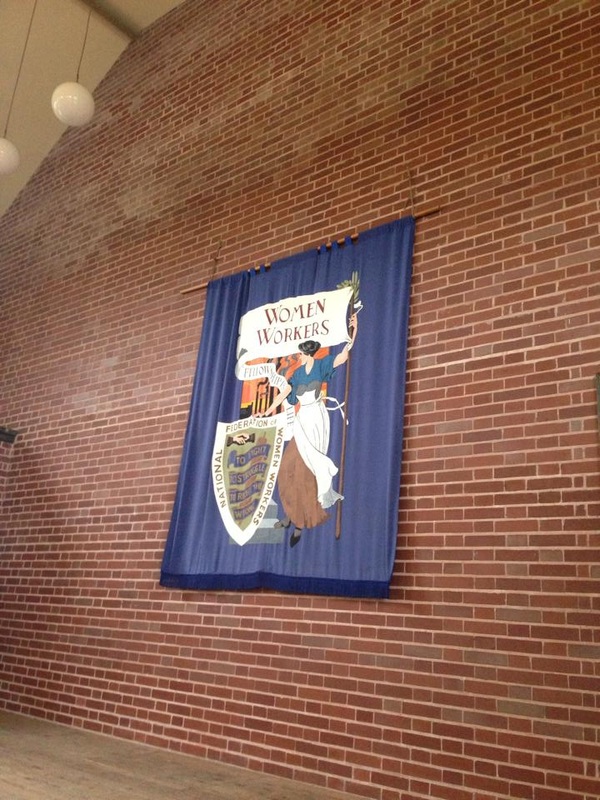
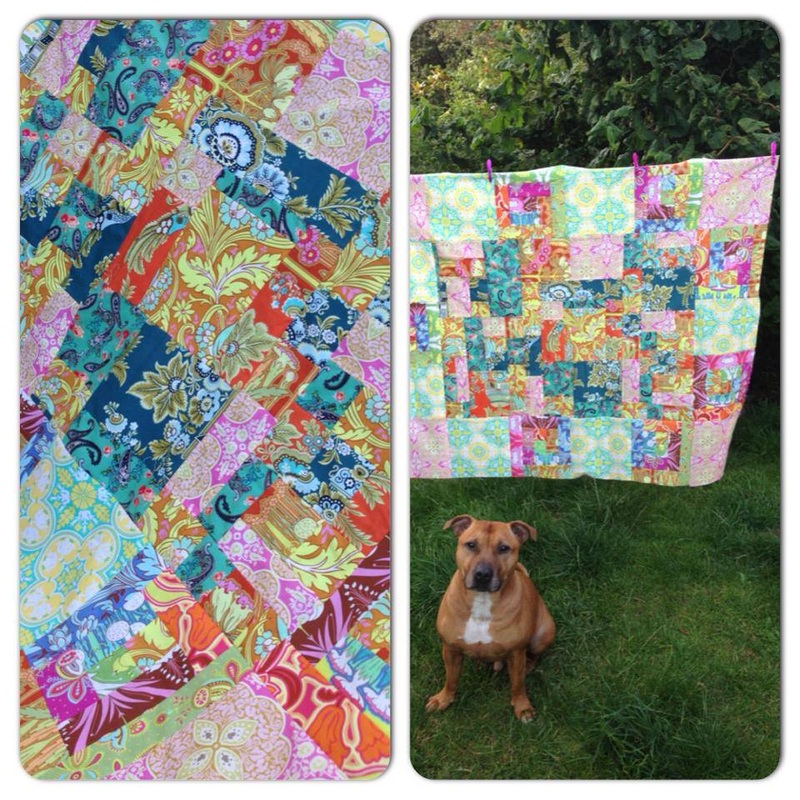
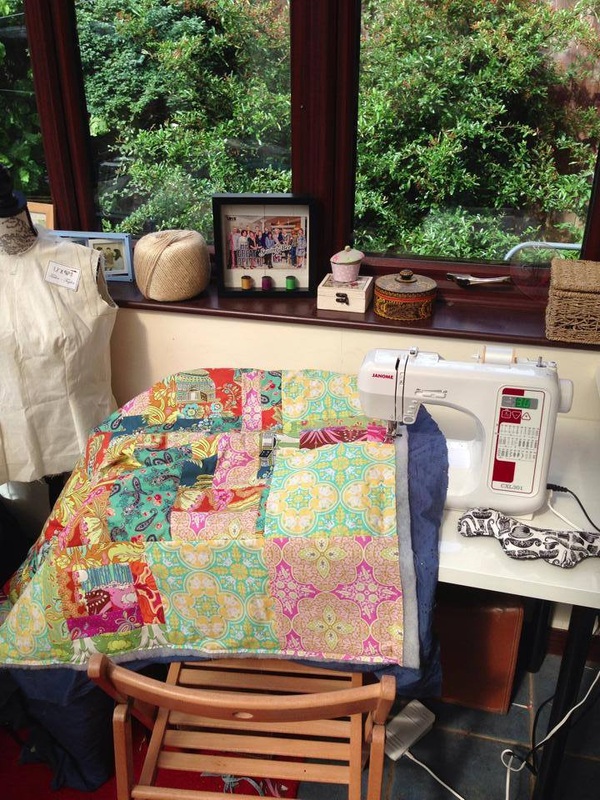
Sources : http://www.bbc.co.uk/news/magazine-24532996 https://open.bufferapp.com/healthiest-way-to-work-standing-sitting/ http://www.forbes.com/pictures/efkk45efdje/best-exercises-to-do-at-your-desk-2/ http://www.webmd.com/diet/features/6-reasons-to-drink-water http://www.easystand.com/health-benefits-new/ http://etf.bgetem.de/htdocs/r30/vc_shop/bilder/firma53/t_013e_a04-2013.pdf I've had an educational sewing journey this month. Learning new skills by attending a weekend pattern drafting workshop, visiting a living museum and being inspired by the Issue 63 of Sew Magazine. Not that I'm an 'old dog' but you really never stop learning, experimenting and perfecting your sewing skills. Pattern Drafting with Jules from Sew Me Something- Stratford.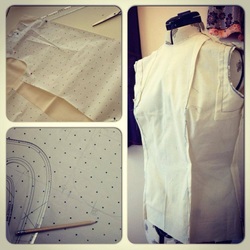 Pattern Drafting is something that I have always wanted to learn. I love nothing more than to create my own clothes without using a pattern but I wanted to know how you take a persons individual measurements and transpose these onto paper to the create a block or sloper first. A block is a basic fitted pattern that can then be transformed into different patterns with different styles. Within the class we all finally got to get measured properly from head to toe, literally. It was great as you really need two people (yourself and someone to measure you) to get the correct measurements at the right points. To have these measurements not only create my block but they are also really helpful for when trying to pick/ buy the right size pattern. Then we got into the science of it. Drawing out my shoulders, bust, waist and hips on paper in a series of lines and curves was just amazing. Seeing my form as a flat drawing ready to be copied and transferred to Calico fabric to make my toile that fitted perfectly, was something that I always wanted to do. I've always wanted to really get into the mechanics and science of dress making, but don't let this put you off going to a pattern drafting course. It is not as high tech as you think once you get into the swing of it. With my toile perfected I was ready to start altering and designing the style of my garment. I cant wait to show the final garment so watch this space. If you are interested in doing a pattern drafting course, I would recommend Sew Me Something as Jules is an amazing teacher and also bakes wonderful cakes! A Step Back Into The Past - Black Country Living Museum.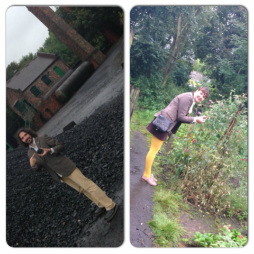 On a rare day off, Kirk and I decided that we wanted to spend the day together, so we went to a local attraction called the Black Country Museum. It was a very wet day but this didn't dampen the day at all. We had a trip down the mine, ate traditional fish and chips cooked in beef dripping and wrapped in brown paper. Visited the local pub for a pint and a warm by the open coal fire. This is not like a normal museum, they have people 'living' in the street and working in the shops, so it's as if you have just travelled back in time and popped round for a cup of tea. The people that lived or worked in the buildings were so lovely and very knowledgeable about the period and they were occupying. Explained the history of the house, their routine if they actually lived there, the equipment they would use and would also do demo's to show us how the blacksmiths would make chain links, cut glass. It was lovely to see that most of the houses had a sewing machine in them. This was obviously not uncommon for people to have a sewing machine have pride of place in the house or at least a sewing kit and it was great to see the people showing little children what it was and how to use it. It was when we visited a lady who was sat next a roaring fire in the living room making a rag rug when I really became inspired. I asked if she could show me how to do it and what they would of used back then. She told me that they would of been made out of old potato sacks and use old clothes to make the rugs. The perfect upcycle project, I was so pleased that they had the rag kit in the gift shop! Of course I had to buy it and make one for myself. It takes some time so not quite finished it yet but I cannot wait to share it with you when it's finished. I might even do a workshop on how to do it! Going Bold and Bright with Log Cabin Blocks.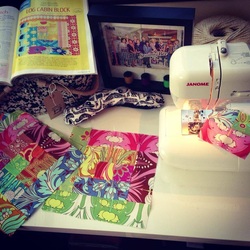 After getting the quilting bug last month after making a baby show gift for my friend, the 63rd issue of Sew Magazine couldn't have come at a better time. On page 71 they demonstrated how to make the 'block of the week' which was a log cabin block. This was perfect timing for the project I was already half way through. I had created a fairly big crazy patch piece but wanted to add to it but doing something different. Being a complete novice at this, the log cabin block was perfect to frame this piece and the instruction were easy to follow. Using a Jelly roll I had been given and wanted to use as the fabric designs just matched perfectly, I began to make my blocks. I was amazed at how quickly the shape came together and I quickly used up all of my jelly roll. As it was quite a busy quilt I thought I would couple my finished log cabin blocks with single squares of fabric for the boarder. When joining all the pieces together I was really pleased with the outcome. I appreciate it's probably not to everyone's taste as I think it has every colour possible in there, but It's my quilt and I'll sewing it how I like it! lol. That being said when I posted the finished pictures on my social media sites your feedback was so encouraging and just lovely. So BIG thanks everyone! Can't wait to for the weather to get colder so I can snuggle up with a good cup of tea and a great movie. Not that I want to wish the summer away as I'm very much a sun worshiper! I'd love to see what you have been up to this August! Are you sewing a quilt ready for the winter? Remember I do keep an eye out for your #sewingrevolutions so please keep posting!
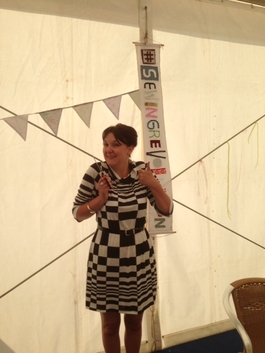
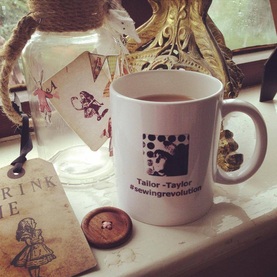 You cannot have #sewingrevolutions without TEA! You cannot have #sewingrevolutions without TEA! On the 18th of July in Walsall, I held a #sewingrevolution event at Helen's Haberdashery. With wine and nibbles and about twenty other people we chatted about the Sewing Bee, problems with projects, new ideas, current makes. I had taken my Sewing Bee makes so people could have a nose at them, we even had a pattern and fabric swap. Everything you could possibly want to talk about sewing we discussed. It was really nice when we went around the room and everyone got to introduce themselves, talk about their passion for sewing and explain how it all started for them. Hearing everyone's sewing journey's was a real treat. Very personal and all for very different reasons. Thanks for sharing Ladies and Gents! It was a little scary for me at the start as I had to deliver a kind of talk which then turned into a Question and Answer session by accident. They did grill me a little but it was all a bit of fun really, I was very nervous though but with a cup cake in hand and a glass of wine in the other it became a wonderfully relaxed evening. I cannot wait for the next one. So keep an eye on Tailor Taylor Events! 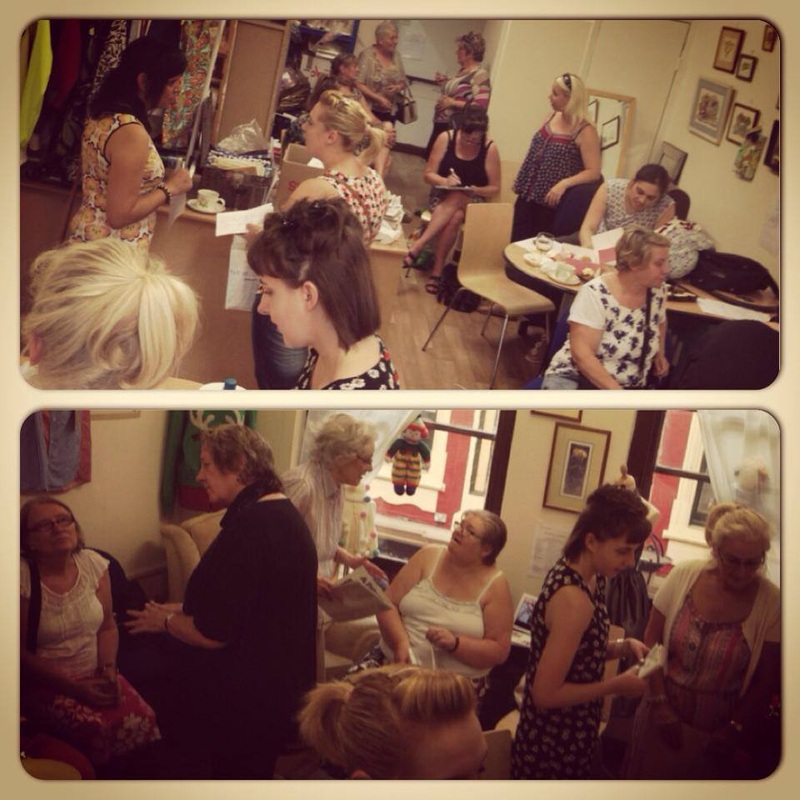
Sip N Stitch - Walsall @ Helen's Haberdashery.
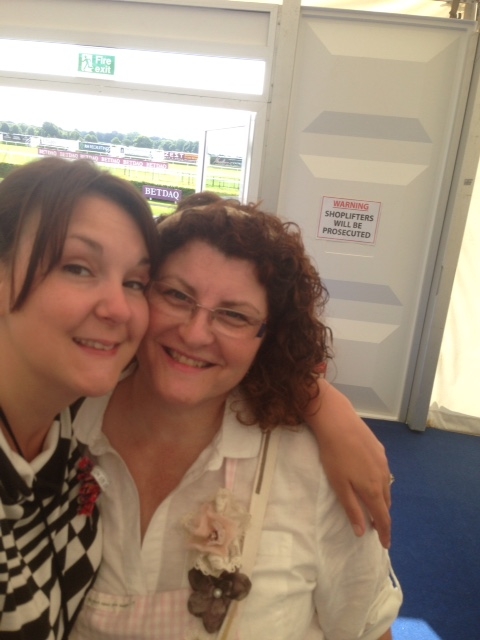
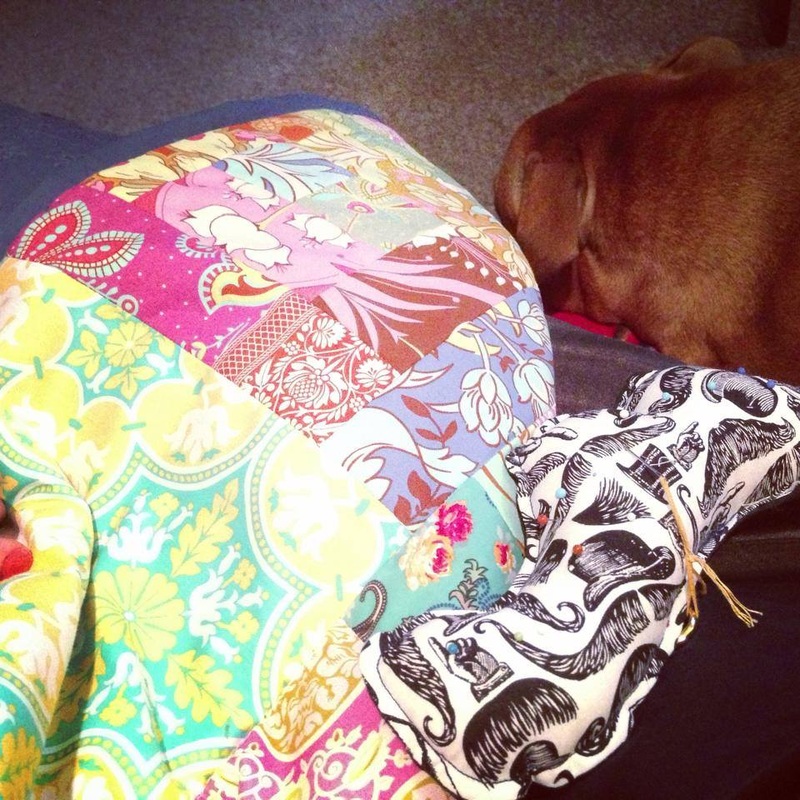
Catching up with the Bee's!!!I also had a trip down memory lane this month and caught up with the Bee's!! It was so lovely seeing them again in the flesh. It's not quite the same talking over the phone or catching up on twitter or facebook. Face to face and with hugs is so much better. Heading back to the Wapping came with mixed feelings. It was such an intense period for all of us when the Sewing Bee was being filmed it, I felt nervous going down on the train, but this quickly disappeared when we all talked about what we had been up to since the Bee, how busy we all are and our stories of people recognising us is in strange places. We completely overtook the corner of the pub and filled the room with excited voices and laughter. It was a shame it was only for the day, I'm used to seeing them for at least 2 days solid. So it was sad when we had to say goodbye, but we are going to organise another get together soon. All I'm going to say about our chat is that we all have some pretty exciting things going on at the moment. So keep an eye out you never know when you are going to see us next! Gifts for friends. Emma and I watching a dance performance. Emma and I watching a dance performance. Its also been a crazy one for bespoke items this month. My best friend from school, Emma is finally getting married to her partner Helen at the end of August. I had promised to make her wedding shirt for her and as August is fast approaching I was running out of time. Luckily I've managed to brake the back of it making it after work in the week as my weekends are becoming less available, so its been a little stressful. Going for something a little different Emma wanted ruffle's and she has them! Just have the button's to go now. I'm thinking blue, one she is a Baggies Fan (West Bromwich Albion) and two you have to have something blue on your wedding day. What do you think? 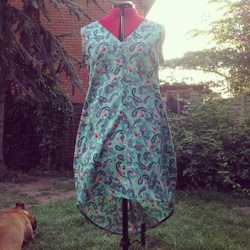 Charlotte's Paisley Tailor Taylor Dress. Charlotte's Paisley Tailor Taylor Dress. I've also made a dress for my wonderful friend Charlotte. She is the one that made my amazing cup cakes for the viewing of first episode on the Sewing Bee..Remember? Well she wanted a dress that she saw on Pinterest and couldn't find it anywhere. So we went fabric shopping together. She picked her fabric and I have drafted the pattern and made the dress for her Birthday. She is going away on holiday in August, so again it was all hands to the deck to get it finished in time. I do love paisley so I think the choice of fabric is ace and of course it has cheeky pockets!! 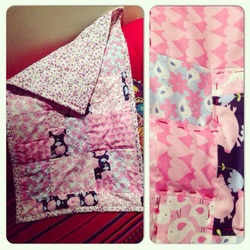 Tailor Taylors' First Quilting effort. Tailor Taylors' First Quilting effort. Last but by no means least, we have a new arrival on the way! A fellow friend who is also an amazing vocalist, Kelly and our slide guitarist, 'Dobro' are having a baby girl. They are going to call her Martha, after The Beatles track. They do not know I have made anything yet, but I hope they like it. I wanted to have a go at quilting as I was to be going to the Festival of Quilts in August. However, I'm not able to make it now but still feeling inspired I decided to make this lovely handmade gift from me. Big enough for a cot or a push chair, the quilt is made from off cuts of left over material. I even had a go at a little hand embroidery to give it a little detail. I would definitely recommend making one especially if you have any small left over off cuts! It's a #upcycling #sewingrevolution waiting to happen! 
Gone to Specsavers!
In my last blog I mentioned that I've been getting migraines. To rule a few things out I've had my eye's tested. Turns out that I need to wear glasses while using a computer. They don't think that is what is causing it but it isn't going to be helping.
Advise - Give your eyes regular breaks from the screen, otherwise you will look like this! The glasses are ace though and a BOGOF as well!! BARGAIN! So what have you been up to? Don't forget I'm keeping my eyes open for your #sewingrevolution makes so please don't forget to hashtag! I'm searching for you! |
#sewingrevolution newsWhatever I'm doing Categories
All
|


 RSS Feed
Sewing Revolution |
Tailor Taylor |
|